What Is a Coolant Leak?
Coolant is a vital liquid in your car’s system. It helps regulate engine temperatures. A coolant leak repair occurs when this liquid escapes from its designated pathways. Leaks can happen in hoses, the radiator, or around seals. This problem reduces the coolant level and affects engine cooling. Left unresolved, leaks may lead to serious engine damage.
Common Signs and Symptoms of a Coolant Leak
Recognizing a coolant leak early can prevent extensive damage. Here are common signs to look for:
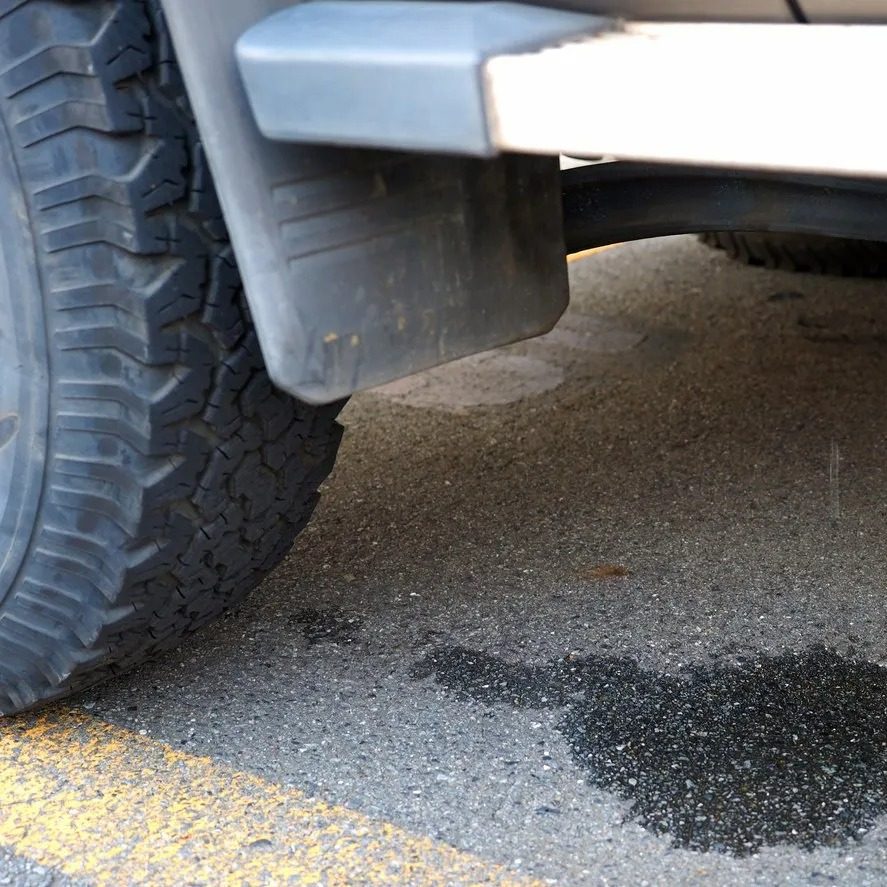
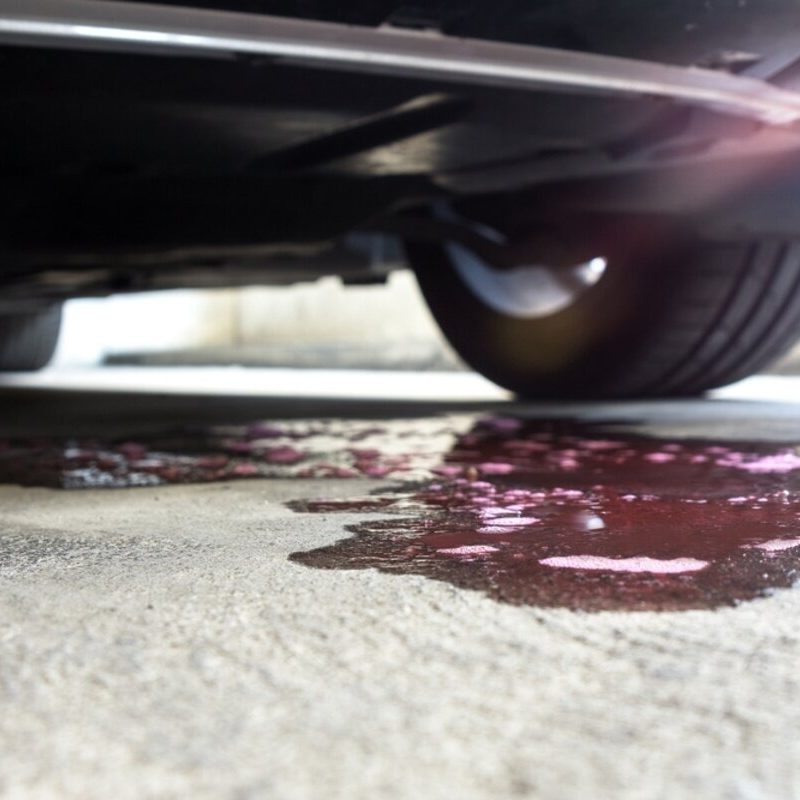
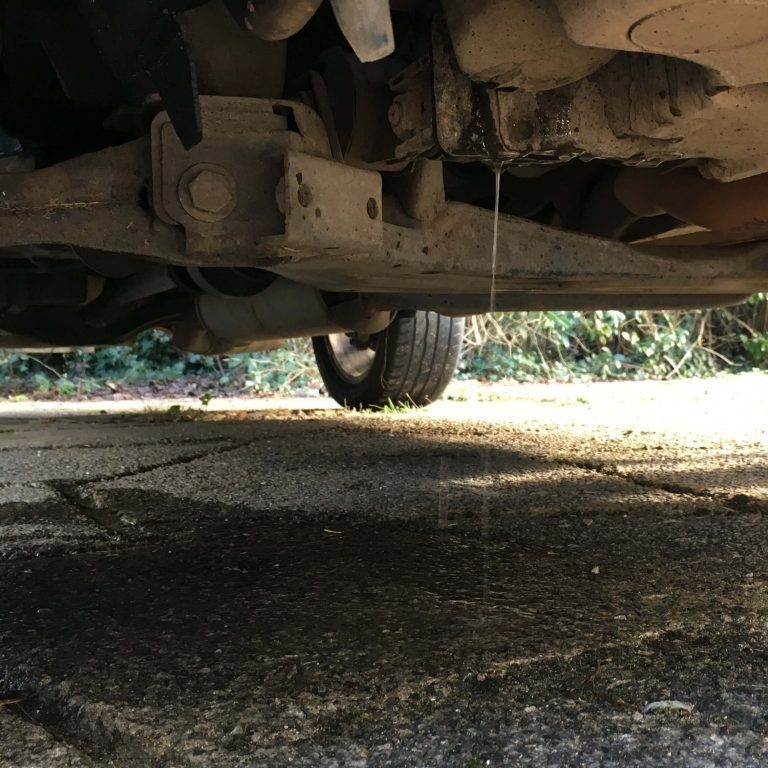
- Puddles Under the Vehicle: Bright green, orange, or pink puddles indicate a possible coolant leak.
- Engine Overheating: A leaking system struggles to maintain proper temperature.
- Dashboard Warning Light: Low coolant levels may trigger a warning light.
- Sweet Smell Inside or Around the Car: Coolant has a distinct, sweet odor.
- Steam from the Hood: Steam indicates excessive engine heat due to low coolant levels.
Why a Coolant Leak Is a Serious Problem
Coolant leak repair can lead to significant issues. The engine depends on coolant to avoid overheating. If the coolant level gets too low, overheating can cause engine wear or permanent damage. Overheating may lead to warped cylinders, a blown head gasket, or seizing of engine components. Addressing leaks promptly prevents expensive repairs and prolongs engine life.
Causes of Coolant Leaks
Understanding the causes of coolant leak repair is essential. These leaks may result from several issues with your vehicle.
Cracked Hoses and Connections
Hoses transport coolant throughout your car’s engine. Over time, heat and wear can cause cracks. Damaged hoses or loose connections may allow coolant to escape. Regular inspections help detect these problems early.
Faulty Radiator or Radiator Cap
The radiator cools the overheated coolant before recirculating it. A cracked radiator can lead to leaks. Similarly, a worn or damaged radiator cap can fail to maintain pressure. This can cause the coolant to overflow or leak.
Issues with the Water Pump
The water pump ensures the coolant circulates properly. A malfunctioning or leaking water pump disrupts this flow. This often results in overheating and visible leaks near the pump. Look for signs of moisture around the water pump housing.
Blown Head Gasket and Engine Problems
A blown head gasket is a serious cause of coolant leakage. It allows coolant and engine oil to mix. This leads to white exhaust smoke, overheating, and reduced engine performance. If left untreated, it can cause significant engine damage.
By understanding these common causes, you can address coolant leaks quickly and efficiently.
How to Identify the Source of a Coolant Leak
Finding the source of a coolant leak is essential for repair. Identifying it quickly can save your engine from damage. Below are effective methods to locate the problem.
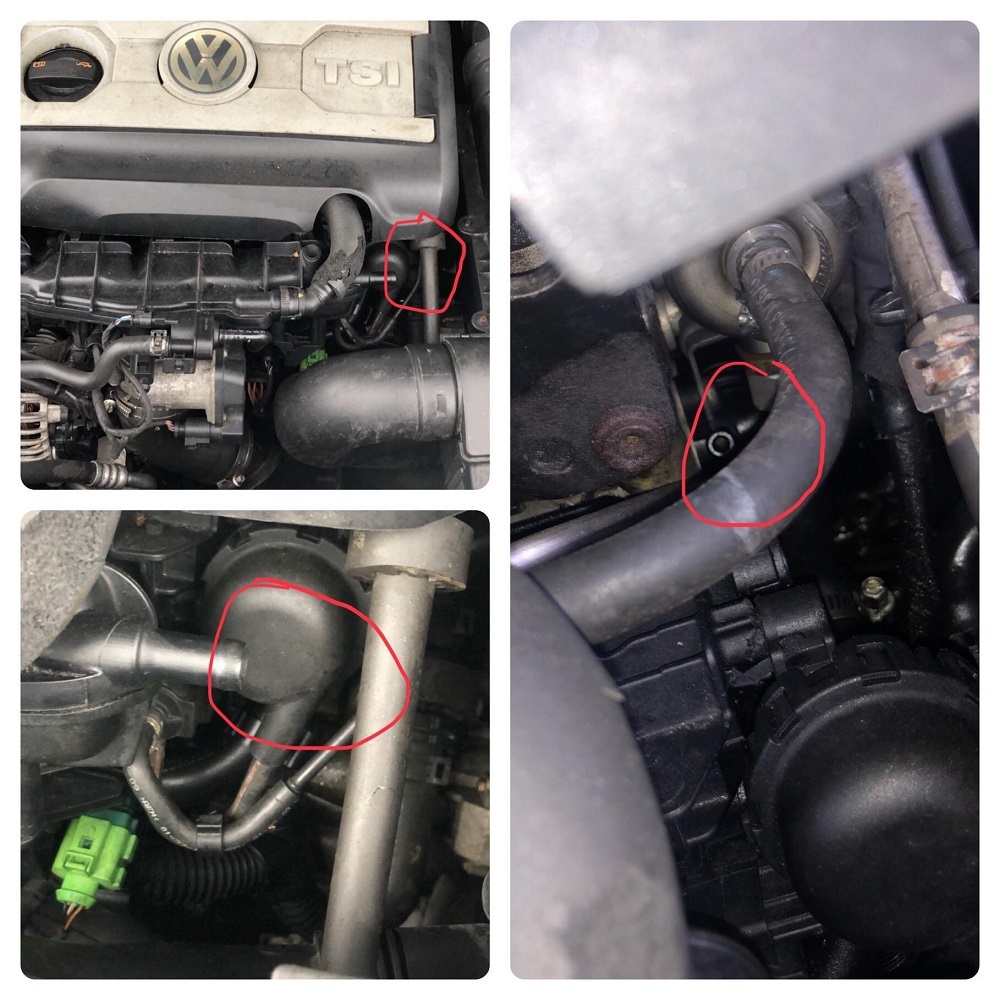
Visual Inspection Techniques
Start by visually inspecting the engine. Look for visible signs of leaks. Common places to check include:
- Under the Vehicle: Check for puddles of coolant below your car. Bright green, orange, or pink liquid signals a leak.
- Hoses and Connections: Inspect hoses for cracks or loose connections. Leaking coolant often appears as moisture on these parts.
- Radiator and Cap: Examine the radiator for cracks, and ensure the cap is properly sealed. Coolant may seep from damaged areas.
- Water Pump Area: Look around the pump housing for moisture or drips. This could indicate a pump problem.
A thorough visual inspection often helps pinpoint the leak source.
Using a Coolant Dye or Leak Detection Kit
If a visual inspection fails, use a coolant dye or leak detection kit.
- Dye Method: Add ultraviolet dye to your coolant system. Run the engine for a few minutes. Use a UV light to identify dye traces at the leak’s location.
- Pressure Tester: A leak detection kit often includes a pressure tester. Attach it to the radiator. Pump air into the system to pressurize it. Leaks become easier to spot with pressure buildup.
These tools offer precise ways to identify even small leaks.
Checking the Coolant Level and Pressure
Monitoring the coolant level can also help locate leaks. Here’s how:
- Check the coolant reservoir for rapid loss. Sudden drops point to a problem.
- Assess system pressure during operation. Low pressure indicates a weakness or leak.
Combining these steps with visual checks ensures careful identification of all potential leak sources.
By using these techniques, you can accurately identify the problem area and address it effectively. Early detection is key to preventing further engine issues.
DIY Coolant Leak Repairs
Repairing a coolant leak yourself can save money and time. With proper tools and knowledge, minor leaks can usually be addressed effectively. Below, you’ll find essential information to guide your DIY repair process.
Tools and Materials You Will Need
Before starting, gather all necessary tools and materials. Having these on hand eases the repair process:
- Safety Gloves and Glasses: Protect yourself during repairs.
- Coolant: Ensure you have the right type of coolant for your vehicle.
- Replacement Parts: New hoses, caps, or gaskets as required.
- Wrenches and Screwdrivers: Basic tools for removing and securing parts.
- Coolant Dye or Leak Detection Kit: Helps trace the location of leaks.
- Radiator Pressure Tester: Identifies leaks in the cooling system.
- Rags and Cleaning Supplies: Useful for cleanup and preparation.
- Sealing Tape or Epoxy: Temporary fixes for minor leaks.
Having these tools ensures your repair goes smoothly and minimizes interruptions.
Step-by-Step Instructions to Fix Common Leaks
Follow these steps to fix basic coolant leaks:
- Prepare the Area: Turn off the engine and let it cool completely.
- Locate the Leak: Inspect the engine visually or use dye to trace the leak.
- Drain the Coolant: If necessary, drain coolant into a container for reuse or disposal.
- Replace Damaged Parts: Install new hoses, caps, or gaskets as needed.
- Seal Temporary Leaks: For minor cracks, use sealing tape or epoxy to patch the area.
- Refill Coolant: Refill the system with fresh coolant to the correct levels.
- Test for Leaks: Start the engine and check for reoccurring leaks or dripping.
- Dispose of Waste Properly: Ensure used coolant and old parts are responsibly discarded.
Carefully follow instructions to avoid further damage to your vehicle.
When to Consider Temporary Fixes
Temporary fixes can be useful under specific conditions. Here’s when to use them:
- On the Road: Use sealing tape or epoxy for quick repairs if stranded.
- Small Cracks: Apply temporary solutions to slow a minor leak before a permanent fix.
- Buying Time: Temporary fixes can help maintain functionality until professional repairs.
However, avoid relying on temporary fixes long-term. They provide short-term relief but don’t solve underlying issues.
By carefully repairing small leaks yourself, you save money and ensure your car runs smoothly. For severe leaks, professional repair may be necessary to prevent further damage.
Professional Repair vs. DIY: What’s Best?
Deciding between professional repair and DIY fixes depends on the leak’s severity and your skills. This section explores how to assess the situation and make the right choice.
Assessing the Severity of the Leak
Understanding the severity of your coolant leak is crucial before taking action. Minor leaks, like small hose cracks or loose clamps, are manageable at home. Larger issues, such as a faulty radiator or a blown head gasket, demand professional attention. Evaluate the following:
- Volume of Coolant Lost: Rapid loss indicates a serious problem.
- Leak Location: Leaks near difficult-to-reach areas may require specialized equipment.
- Engine Symptoms: Overheating and white exhaust smoke point to internal engine issues.
If the issue seems beyond your skill level, consult a mechanic.
Cost Comparison: DIY vs. Professional Repair
Both methods impact your wallet differently. Consider these factors while weighing costs:
- DIY Repairs: Cost includes tools, replacement parts, and materials like coolant. This option is cheaper but labor-intensive.
- Professional Repair: Labor costs increase the expense. However, mechanics provide accuracy and permanent fixes.
- Severity Costs: Severe leaks, like head gasket issues, are costly regardless of the method but often require professional expertise.
If tools and knowledge are limited, professional repair may be more efficient in the long run.
Risks of Ignoring Coolant Leaks
Ignoring coolant leaks can result in severe engine damage and high repair bills. Key risks include:
- Engine Overheating: Insufficient coolant fails to regulate engine temperature. Overheating can warp or damage components.
- Blown Head Gasket: Prolonged exposure to heat stresses the engine, resulting in a costly head gasket issue.
- Complete Engine Failure: Neglected leaks may lead to irreversible engine damage.
Addressing leaks early, whether through DIY or professional help, protects your vehicle and prevents expenses from escalating.
By considering these aspects, you can decide the best course of action for repairing your coolant leak.
Preventing Future Coolant Leaks
Preventing coolant leak repair ensures your car maintains consistent engine performance and long-term reliability. Regular checks and proper care can minimize the risk of leaks.
Regular Maintenance Practices
Routine maintenance is key to preventing coolant leaks. Follow these practices:
- Inspect Coolant Levels: Check coolant levels frequently to avoid unnoticed depletion.
- Flush the Coolant System: Perform a system flush regularly to remove dirt or old coolant.
- Replace Coolant on Time: Change coolant as per your vehicle’s recommended schedule.
- Monitor Engine Temperature: Watch for overheating signs on the dashboard.
- Schedule Regular Tune-Ups: Professional inspections can identify potential issues early.
Maintaining a clean and properly functioning coolant system minimizes leakage risks.
Checking for Wear and Tear on Components
Worn components increase the likelihood of leaks. Regular checks help protect your cooling system:
- Examine Hoses and Clamps: Look for cracks, bulges, or loose clamps.
- Inspect Radiator Condition: Ensure there are no visible damages or rust on the radiator.
- Monitor the Water Pump: Check for moisture or unusual noises near the pump.
- Assess Seals and Gaskets: Make sure seals and gaskets are intact.
Replace damaged parts promptly to avoid future problems.
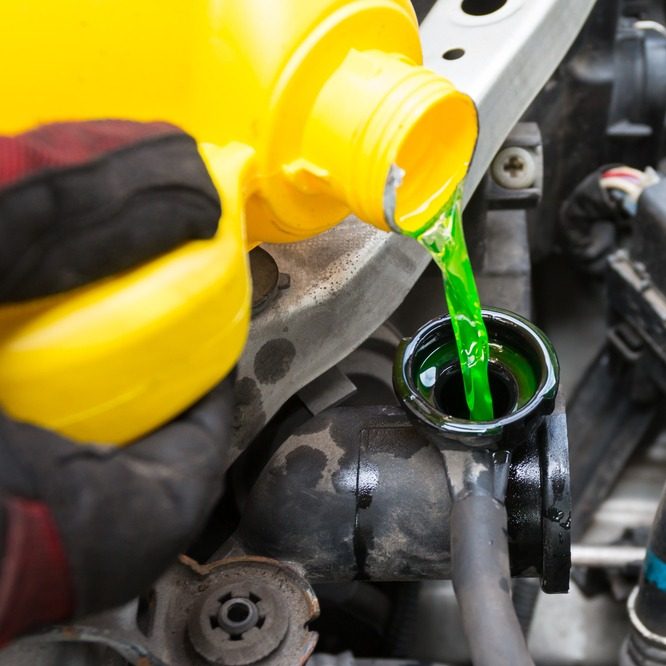
Using the Right Type of Coolant
Using incorrect coolant can harm your car’s cooling system. Follow these guidelines:
- Stick to Manufacturer Recommendations: Use the coolant type specified in your car manual.
- Avoid Mixing Coolant Types: Mixing different types can cause blockages.
- Check Coolant Quality: Avoid low-quality or expired coolants.
Proper coolant type ensures efficient engine cooling and prevents system corrosion.
By following these steps, you can prevent costly coolant leak repair and keep your engine in top condition.
Common Myths About Coolant Repairs
Coolant repairs are often misunderstood, leading to ineffective fixes and increased risks. Busting these myths ensures better car maintenance and repair decisions.
Misconceptions About Coolant Types
Many drivers believe coolant types are interchangeable, causing problems for their vehicles. Here are common misconceptions:
- “All Coolants Are the Same”: Different cars require specific coolant formulations to optimize performance and prevent damage.
- “Mixing Coolants Is Fine”: Mixing types can lead to chemical reactions, system blockage, and reduced cooling efficiency.
- “Water Can Replace Coolant”: Water lacks additives that prevent corrosion and freezing, making it a poor substitute.
Understanding the correct coolant for your car is essential. Consult your manual and always buy quality products suited to your vehicle.
Myths Regarding Quick Fixes
Quick fixes for coolant leak repair often promise unrealistic results. Here are common myths to watch out for:
- “Sealing Tape Fixes All Leaks”: Tape is only a temporary solution for minor cracks, not for severe leaks.
- “Radiator Stop-Leaks Are Permanent”: Additives may block tiny leaks but can clog your system and cause bigger issues.
- “Duct Tape Works on Leaking Hoses”: Using duct tape may hold temporarily but won’t withstand heat or pressure for long.
Quick fixes might appear cost-effective, but they should only be used temporarily. Always prioritize professional or permanent repairs to ensure safety.
By debunking these myths, drivers can avoid costly mistakes and maintain a reliable cooling system.
When to Seek Professional Help
Understanding when to seek professional help is key to resolving coolant leak repair effectively. Some situations demand expert attention due to complexity or severity.
Warning Signs That Require Expert Attention
Certain signs indicate that professional repair is necessary. Ignoring these could lead to severe damage:
- Heavy Coolant Loss: Significant coolant depletion within a short period signals a serious issue.
- Repeated Overheating: Frequent overheating indicates an unresolved leak or internal engine problem.
- White Exhaust Smoke: This might point to a blown head gasket, mixing coolant and engine oil.
- Difficulty Identifying the Leak: If DIY methods fail to locate the source, a mechanic is needed.
- Complex Repairs: Issues like radiator replacement or internal engine leaks require specialized tools and expertise.
Recognizing these warning signs early can save your engine and prevent expensive repairs.
Choosing the Right Auto Repair Shop
Selecting a reliable repair shop ensures quality work and prevents further issues. To find the right shop:
- Check Certifications: Look for ASE-certified technicians for expert handling of your vehicle.
- Read Reviews: Online reviews and ratings can provide insight into service quality.
- Compare Cost Estimates: Request quotes from different shops to ensure fair pricing.
- Visit the Shop: Inspect cleanliness, organization, and professionalism during your visit.
- Ask About Warranty: Reliable shops often offer warranties on both parts and services.
A good repair shop gives peace of mind and ensures your coolant leak repair is fixed correctly.
Knowing when to involve professionals protects your car and avoids costly complications.
Leave a Reply