What is Car Coolant and Why is it Important?
Car coolant is a vital fluid for your vehicle. It helps regulate engine temperature and ensures the engine does not overheat or freeze, depending on the climate. While the engine operates, it generates a lot of heat. The coolant absorbs this excess heat and dissipates it via the radiator. How to put coolant in car? Without coolant, engines can overheat, leading to severe damage and costly repairs. It also helps protect metal components by preventing rust and corrosion.
The Role of Coolant in Your Car
Coolant plays a key role in maintaining your car’s overall health. It flows through the engine, absorbing heat and carrying it to the radiator for cooling. Apart from maintaining a stable temperature, it also provides lubrication to the water pump and seals. Coolant ensures efficient engine performance and prevents hot spots. In colder climates, it also stops the engine from freezing, enabling smooth operation.
Signs Your Car Might be Low on Coolant
Knowing when your car is low on coolant is crucial. Look out for these signs:
- High engine temperature gauge: The temperature gauge may rise to dangerous levels.
- Engine overheating: Smoke or steam coming from the hood is a warning sign.
- Coolant warning light: Modern vehicles often have a dashboard warning light.
- Puddles under the car: Green, orange, or pink liquid under the vehicle indicates a potential leak.
- Unusual engine smells: A sweet or burnt odor can mean your coolant is leaking or overheating.
Recognizing these signs early can save your engine from costly damage. Always check your coolant level regularly and refer to your car’s manual for proper maintenance guidance.
Preparing to Add Coolant
Adding coolant to your car is an essential maintenance task. Proper preparation ensures safety and effectiveness. Before starting, gather everything necessary and follow safety precautions to protect yourself and your vehicle.
What Tools and Supplies You Will Need
To add coolant to your car, you will need specific tools and supplies. Here’s a checklist:
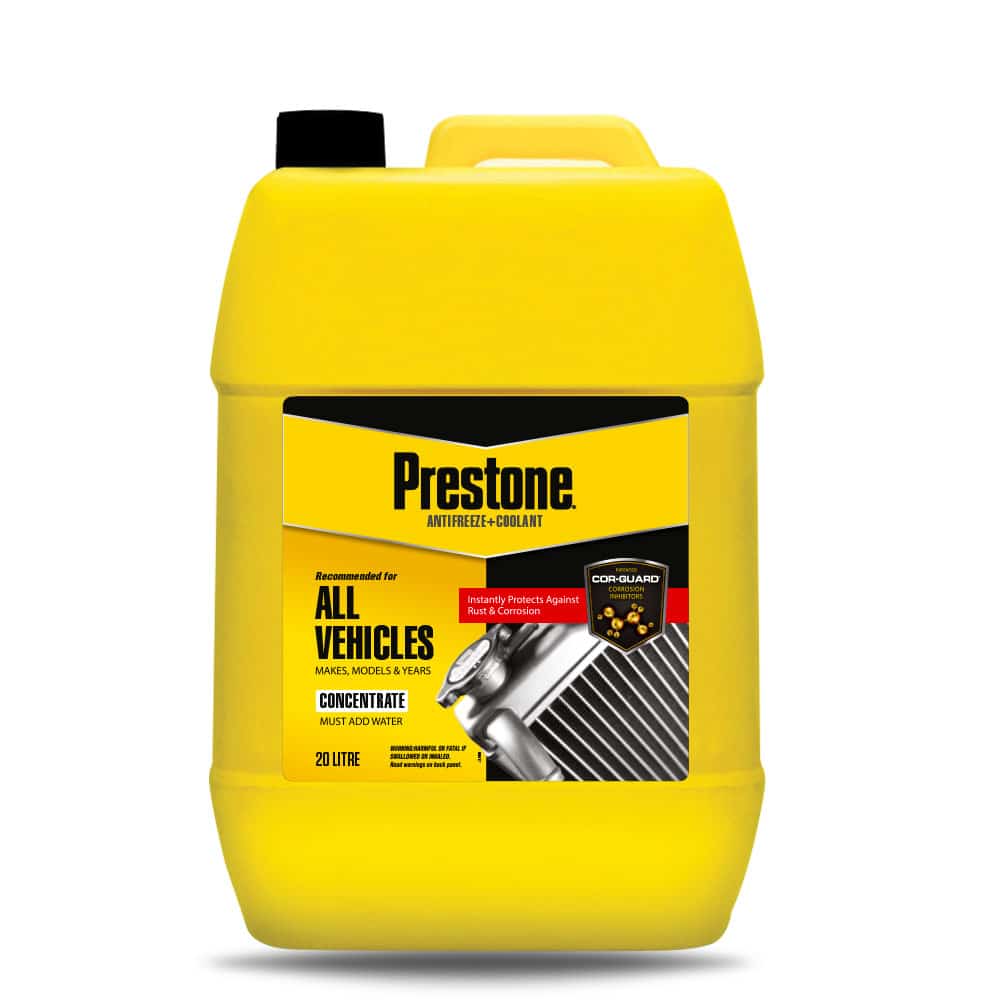
- Coolant: Ensure you have the correct type for your car (consult the manual for details).
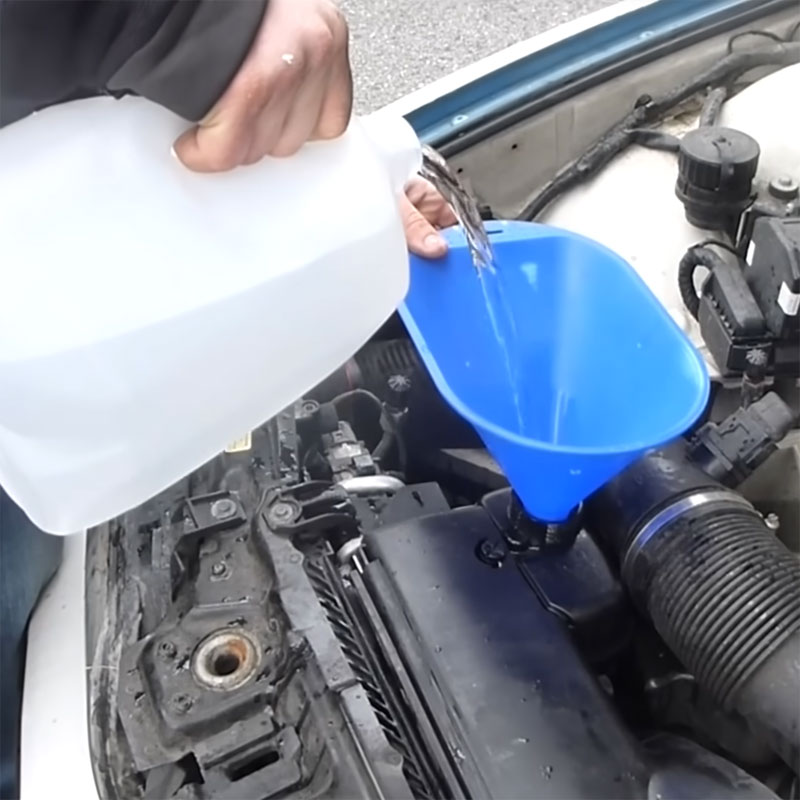
- Funnel: A funnel helps to pour coolant without spilling.
- Distilled Water: Needed for diluting concentrated coolant if required.
- Protective Gear: Wear gloves and safety glasses to safeguard your skin and eyes.
- Clean Rags or Paper Towels: Useful for wiping spills or cleaning the coolant reservoir.
- Owner’s Manual: For reference to locate the parts and ensure the correct procedures.
Double-check your tools and supplies before starting the process. Having all the right materials ensures a smoother experience.
Safety Precautions to Follow Before Adding Coolant
Safety is crucial when working with car coolant. Follow these precautions to avoid accidents:
- Allow the Engine to Cool: Never open the coolant reservoir or radiator cap when the engine is hot to prevent burns.
- Use Gloves and Safety Glasses: Protect your skin and eyes from harmful chemicals in the coolant.
- Work in a Well-Ventilated Area: The fumes from coolant can be harmful, so ensure proper ventilation.
- Avoid Overfilling: Overfilling the coolant reservoir can lead to spills or damage to the cooling system.
- Keep Out of Reach of Children and Pets: Coolant is toxic and harmful if ingested. Dispose of any waste responsibly.
- Check for Leaks: Inspect the engine bay for coolant leaks before adding more. Leaks indicate potential problems.
By having the right tools and observing safety practices, you can properly prepare to add coolant to your car.
How to Check Your Car’s Coolant Level
Regularly checking your car’s coolant level helps maintain engine performance and prevent damage. It is a simple yet vital step in car maintenance. Here is how you can do it safely and efficiently.
Locating the Coolant Reservoir or Radiator Cap
To check the coolant level, locating the correct components is crucial:
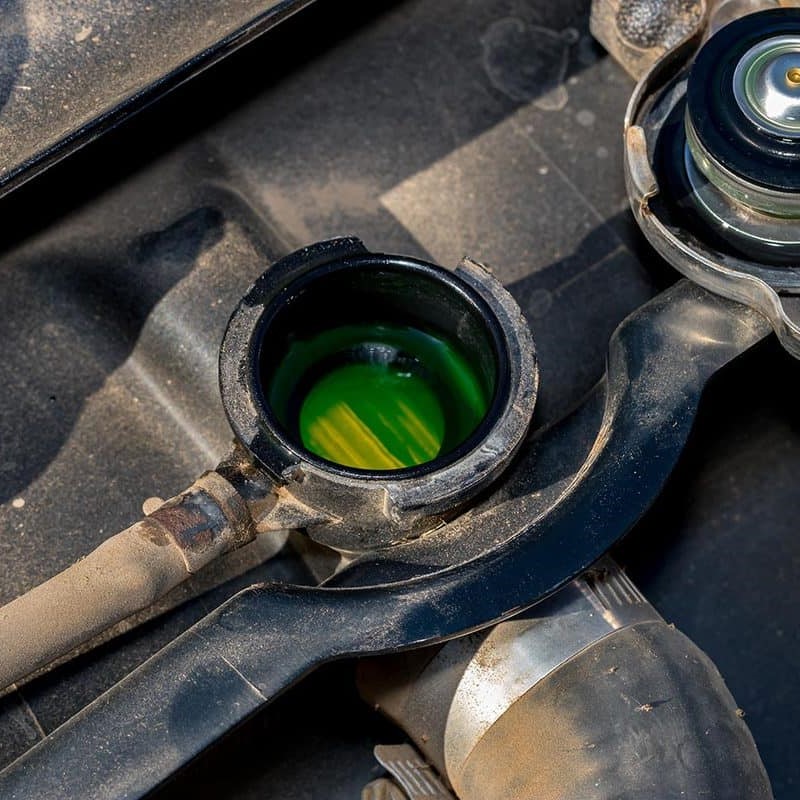
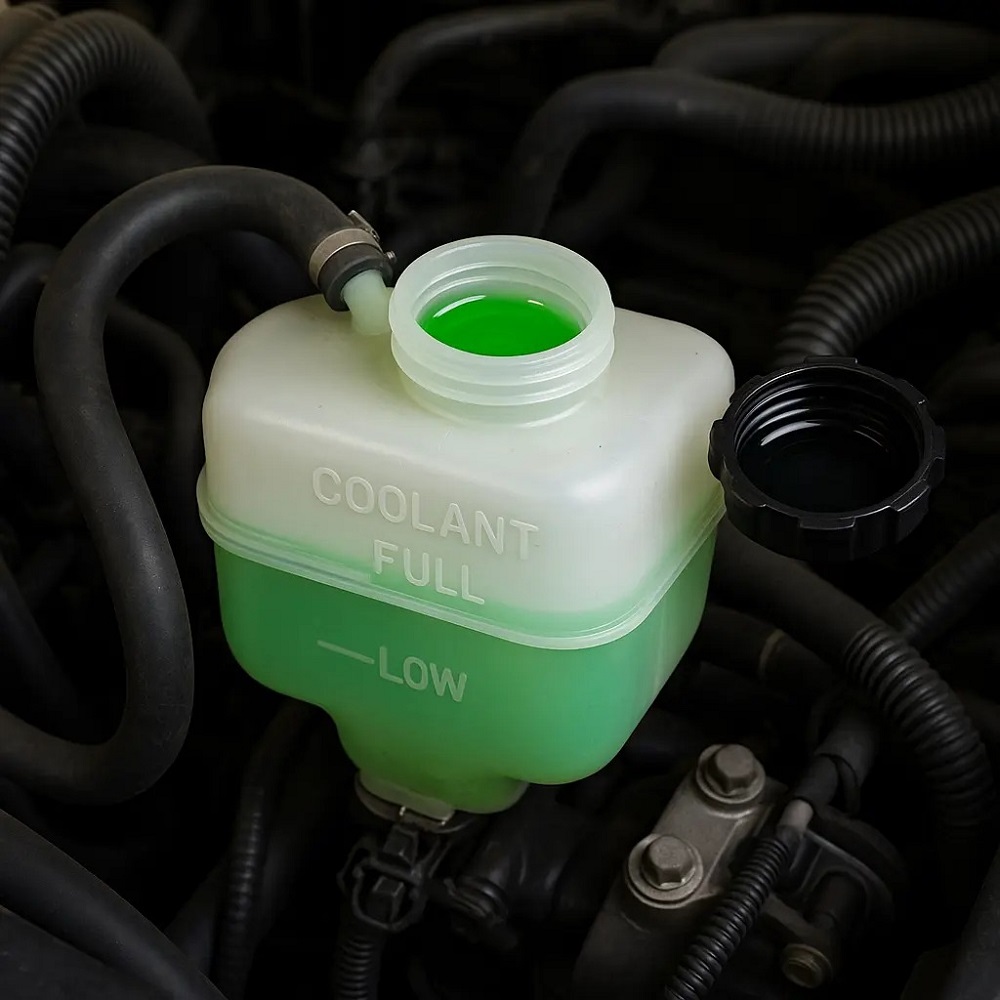
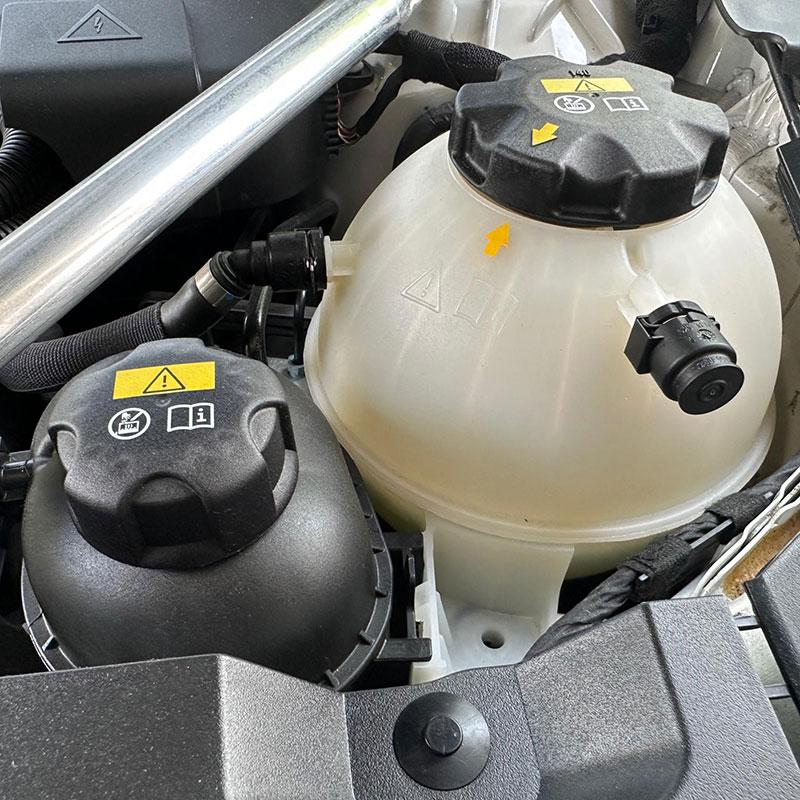
- Find the Coolant Reservoir: Open the car’s hood and locate the plastic container near the radiator. It is usually translucent and marked with “coolant” or “engine coolant.”
- Check for Coolant Labels: There are often “Min” and “Max” lines on the reservoir, indicating the acceptable coolant level range.
- Locate the Radiator Cap: If your vehicle lacks a transparent reservoir, check the radiator directly. Look for the metal cap on top of the radiator.
It is essential to consult your car’s owner manual for information specific to your vehicle model. The manual will guide you exactly where the coolant components are located.
Steps to Check the Coolant Level Safely
Following the correct procedure ensures safety and accuracy:
- Allow the Engine to Cool: Ensure the engine is completely cool before starting. Opening a hot coolant system can cause burns.
- Pop the Hood: After confirming the engine is cool, open the car hood to access the engine bay.
- Inspect the Coolant Reservoir Level: If the reservoir is transparent, compare the level of coolant with the “Min” and “Max” markings.
- Check Radiator (if needed): If the coolant cannot be seen in the reservoir, carefully remove the radiator cap. Use a clean cloth to handle the cap and open it slowly.
- Observe Coolant Appearance: Ensure the coolant is clean and free from debris or discoloration. Cloudy or rusty coolant may indicate a problem and needs replacing.
- Add Coolant, If Needed: Refer to the manufacturer’s recommendation to select the proper coolant type, and refill as necessary within the “Min” and “Max” lines.
By following these steps, you will ensure your vehicle has the right coolant amount for safe and efficient operation. Regular checks can help avoid costly repairs and keep your car running smoothly.
How to Choose the Right Coolant
Choosing the right coolant is crucial for your car’s performance and longevity. Not all coolants work for every vehicle, so understanding compatibility is essential.
Types of Coolant and Compatibility
There are several types of coolant, each designed for specific vehicle needs:
- Ethylene Glycol-Based Coolant: Commonly used in modern vehicles. It offers excellent heat transfer and protection against freezing and overheating.
- Propylene Glycol-Based Coolant: A less toxic alternative to ethylene glycol, suitable for eco-conscious users.
- Organic Acid Technology (OAT): Provides long-lasting protection and is often used in newer cars.
- Hybrid Organic Acid Technology (HOAT): Combines OAT benefits with added corrosion protection, suiting many European and Asian vehicles.
- Phosphate-Free Coolant: Ideal for aluminum engines in some Japanese vehicles. Prevents deposits and corrosion.
To ensure compatibility:
- Identify the coolant type presently used in your car.
- Mix only compatible types, as incorrect pairing can harm the cooling system.
- Avoid universal coolants unless your car manual approves them.
Checking the Manufacturer’s Recommendations
Your car’s manufacturer provides detailed guidance on coolant choice. Here’s how to check:
- Read the Owner’s Manual: It includes specific details on coolant type and change intervals.
- Check Under the Hood: Some vehicles have coolant type labels near the radiator or reservoir.
- Visit Trusted Sources: Manufacturer websites or authorized dealerships offer accurate coolant information.
- Ask a Professional: Consult a mechanic if the manual is unclear or unavailable.
Using the wrong coolant can lead to engine damage, corrosion, or reduced performance. Always follow the manufacturer’s recommendations for the safest choice.
How to Add Coolant to Your Car
Adding coolant to your car is a straightforward process. Follow these steps to ensure you do it properly and safely. Preparing beforehand and avoiding mistakes can make the task efficient.
Proper Steps to Refill Coolant
- Park on a Flat Surface: Ensure your car is parked on level ground and the engine is turned off.
- Allow Engine to Cool: Wait until the engine cools completely to prevent burns from hot coolant.
- Locate the Coolant Reservoir or Radiator Cap: Open the hood and locate the reservoir or radiator cap.
- Clean the Area: Wipe the area around the reservoir or cap to prevent contamination.
- Check Coolant Levels: Examine the coolant level in the reservoir. Check the markings for guidance.
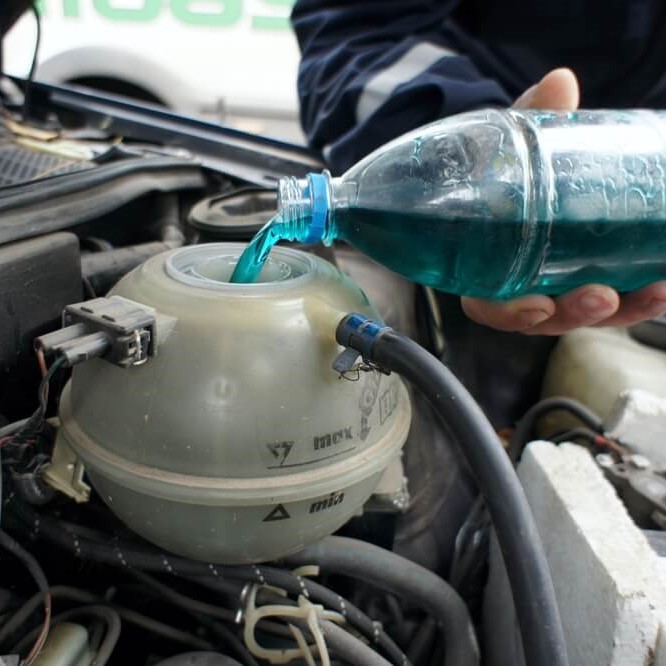
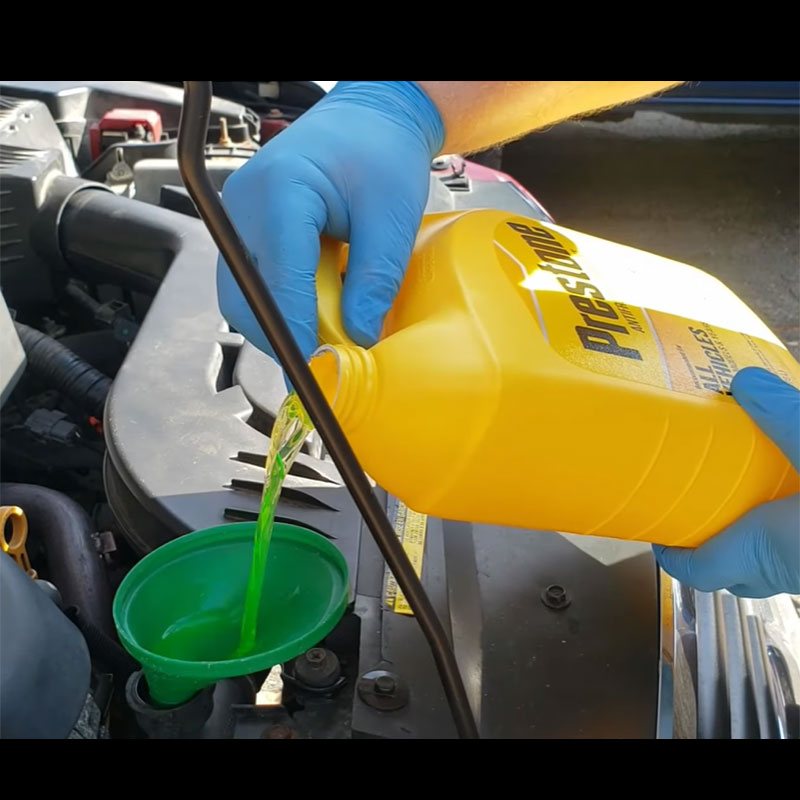
- Prepare Coolant Mixture (if needed): If using concentrated coolant, dilute it with distilled water as per the instructions.
- Add Coolant: Slowly pour coolant into the reservoir using a funnel. Do not overfill.
- Seal the Cap Tightly: Secure the reservoir or radiator cap properly to avoid leaks and maintain pressure.
Following these steps ensures your engine stays at the right temperature.
Avoiding Common Mistakes While Adding Coolant
- Adding Coolant When Engine Is Hot: Never open the radiator cap if the engine is hot.
- Using the Wrong Coolant Type: Double-check your car’s manual for the compatible coolant type.
- Mixing Coolants Incorrectly: Avoid combining incompatible coolants to prevent chemical reactions.
- Overfilling the Reservoir: Filling above the “Max” line can damage the cooling system.
- Skipping Leak Checks: Inspect for leaks before and after adding coolant.
- Forgetting to Close the Cap Securely: A loose cap can lead to overheating and fluid loss.
Avoiding these mistakes can prevent potential engine damage and ensure efficient vehicle operation.
What to Do After Adding Coolant
After adding coolant to your car, it’s important to ensure everything is in working order. Taking a few extra steps can prevent future problems and maintain your engine’s performance.
Checking for Leaks and Ensuring a Proper Seal
Checking for leaks and ensuring the reservoir is sealed is crucial for proper vehicle functioning.
- Inspect the Engine Bay: Check around the radiator and reservoir for any visible leaks or puddles.
- Verify the Seal: Ensure the reservoir or radiator cap is securely tightened.
- Examine Hose Connections: Look for loose or damaged hoses that may cause coolant leaks.
- Clean Spilled Coolant: Wipe away spilled coolant to prevent issues and keep the area clean.
- Monitor for Drips: After driving, inspect the area under your car for coolant drips or stains.
These steps protect your cooling system and avoid potential engine damage.
Running the Engine and Monitoring Coolant Levels
After ensuring no leaks, test the cooling system to confirm it’s working properly.
- Start the Engine: Run the car and let it idle for a few minutes with the hood open.
- Observe Temperature: Watch the temperature gauge on the dashboard as the engine warms up.
- Check Coolant Movement: Observe the coolant in the reservoir. It should circulate without bubbling or spilling.
- Verify Consistent Levels: Ensure the coolant stays within the “Min” and “Max” lines during operation.
- Listen for Noise: Pay attention to unusual sounds from the engine or water pump.
- Monitor the System: After turning off the engine, recheck coolant levels and look for new leaks.
These steps ensure proper coolant functionality and prevent overheating or freezing.
By following these checks, your car will stay in great condition with optimal cooling efficiency.
When to Seek Professional Help
Sometimes, car coolant issues may require expert assistance. Recognizing when to involve a mechanic is important.
Indicators of Coolant System Issues
Certain signs can suggest serious coolant system problems. Here’s what to watch for:
- Frequent Overheating: If your engine overheats regularly despite adding coolant, seek professional help.
- Persistent Coolant Leaks: Ongoing puddles under the car indicate a leak that needs expert repair.
- Discolored Coolant: Rusty or sludgy coolant may signal contamination or internal corrosion.
- Unusual Noises: Strange sounds, like a rattling or squealing water pump, indicate mechanical issues.
- Burning Smell: Persistent smells of burning or sweet scents could mean severe overheating or leakage.
- Steam from the Hood: Excessive steam suggests major overheating or a system failure.
If you spot these issues, stop driving and consult a mechanic.
Situations That Require a Mechanic
Some scenarios are beyond DIY fixes. Look for these situations where a mechanic is essential:
- Damaged Cooling System Parts: Cracks or damage in the radiator, hoses, or water pump need professional replacement.
- Frequent Coolant Refills: If coolant levels drop quickly, there may be an undetected or internal leak.
- Faulty Thermostat: An unresponsive or stuck thermostat disrupts the engine’s cooling.
- Overheating Despite Coolant Levels: Ventilation issues, blockages, or faulty fans need mechanic intervention.
- Failed Radiator Cap: If the cap doesn’t seal, it causes coolant loss and needs immediate fixing.
- White Exhaust Smoke: This indicates a possible head gasket leak or engine damage.
Prompt professional repair prevents further damage and ensures your car runs smoothly. Ignoring coolant system issues can lead to expensive repairs or engine failure.
Tips for Maintaining Your Car’s Cooling System
Proper maintenance of your car’s cooling system is essential for avoiding engine damage and ensuring optimal performance. Regular care extends your vehicle’s life and saves money on repairs.
Regular Inspection and Maintenance
Conduct routine checks on your cooling system to keep it in good shape.
- Inspect Coolant Levels: Check the levels in the reservoir weekly or before long drives.
- Look for Leaks: Check for puddles or stains under your car frequently.
- Observe Hoses and Connections: Inspect hoses for cracks or looseness to avoid leaks.
- Test the Radiator Cap: Ensure the cap seals tight to prevent pressure loss.
- Clean the System: Remove dirt, rust, or debris from the radiator and coolant reservoir.
- Monitor Temperature Gauge: Watch for unusual temperature changes during regular drives.
Regular inspections detect issues early. This prevents overheating and prolongs your engine’s lifespan.
How Often to Flush and Replace Coolant
Flushing and replacing coolant keeps the system clean and functioning efficiently.
- Follow Manufacturer’s Guidelines: Refer to your car’s manual to learn recommended flush intervals.
- Common Intervals: Most cars require coolant flushes every 30,000 to 50,000 miles.
- Check Coolant Condition: Discolored or dirty coolant signals the need for a replacement soon.
- Schedule Seasonal Maintenance: For extreme weather conditions, check and replace coolant every six months.
- Professional Assistance: Have a mechanic flush the system if you notice rust or debris in the coolant.
By flushing regularly, you remove buildup and prevent corrosion, promoting a healthy cooling system.
How to put coolant in car? Maintaining your car’s cooling system ensures reliable engine performance and saves you from costly repairs. Always keep it clean, inspect components, and replace coolant when necessary.
Leave a Reply