Introduction to Motorcycle Tire Changing
The Importance of Tire Maintenance
Tires are crucial components of a motorcycle. They are the only part of the bike that makes contact with the road, and their condition directly affects safety and performance. Regular tire maintenance ensures that your motorcycle operates smoothly and safely. Over time, tires wear out and may become unsafe. Knowing how to change motorcycle tire tools efficiently is a necessary skill for any motorcyclist.
Understanding Tire Types
Motorcycle tires come in various types, each designed for different riding styles and conditions. There are sport tires, touring tires, and off-road tires, among others. Each type has specific tread patterns and rubber compounds that affect performance and longevity. Understanding the differences helps you make informed decisions when it comes time to replace your tires.

Purpose of This Guide
This guide aims to equip motorcyclists with essential knowledge about tire changing tools, tips, and techniques. Whether you are a seasoned mechanic or a beginner, mastering tire-changing skills will save you time and money. By the end, you will have a clearer understanding of the tools and processes involved in changing motorcycle tire tools efficiently.
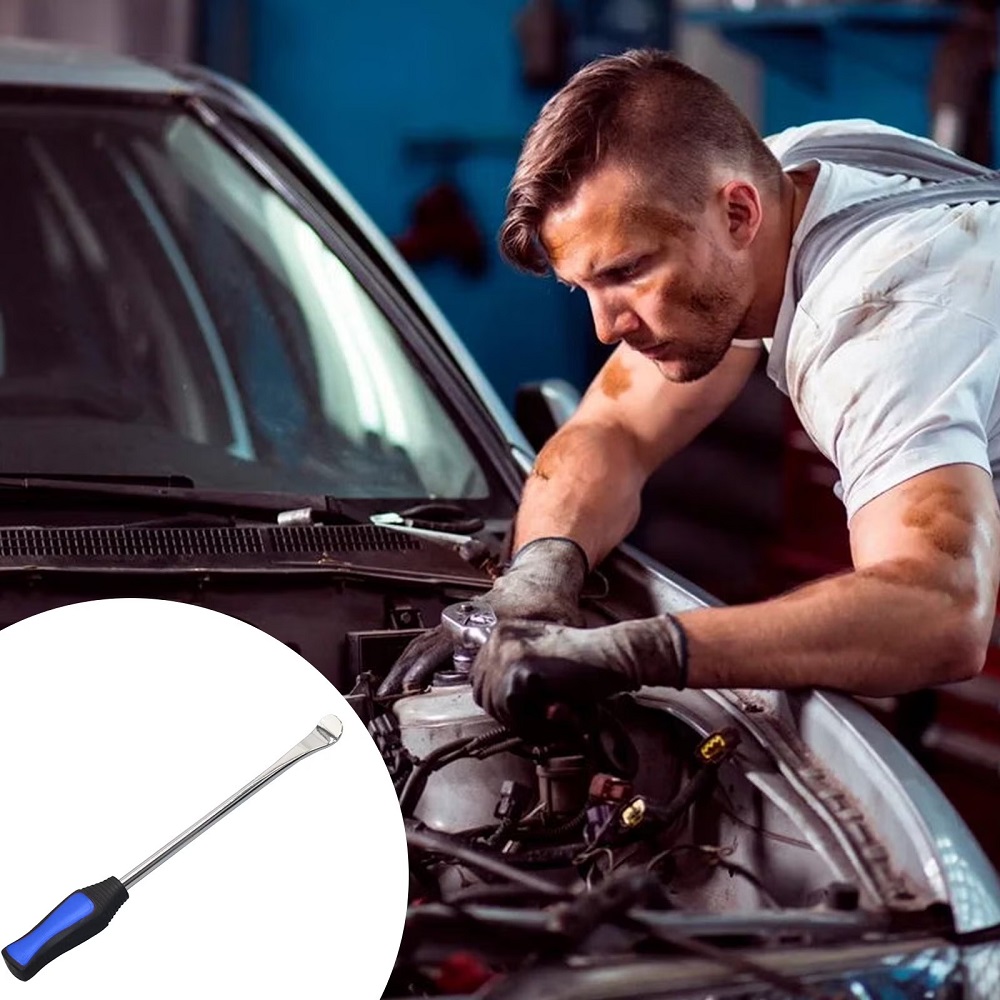
Essential Motorcycle Tire Tools
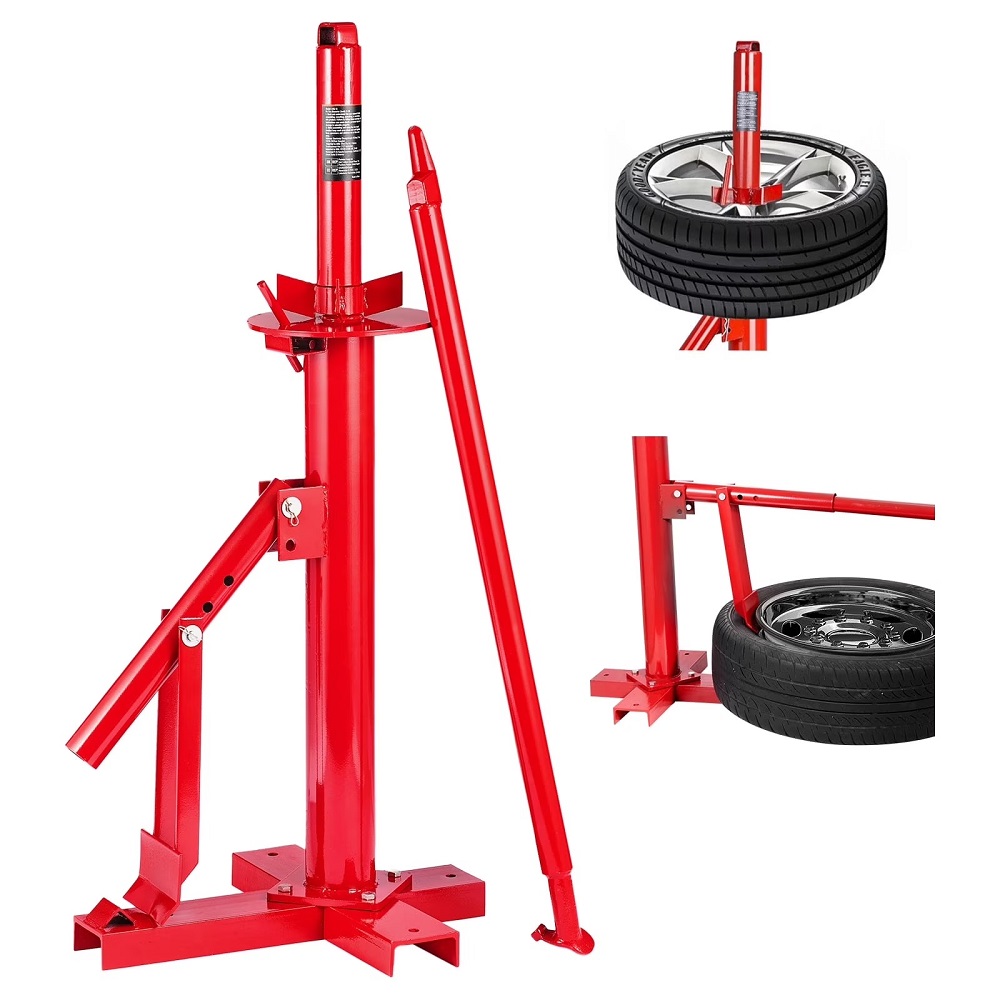
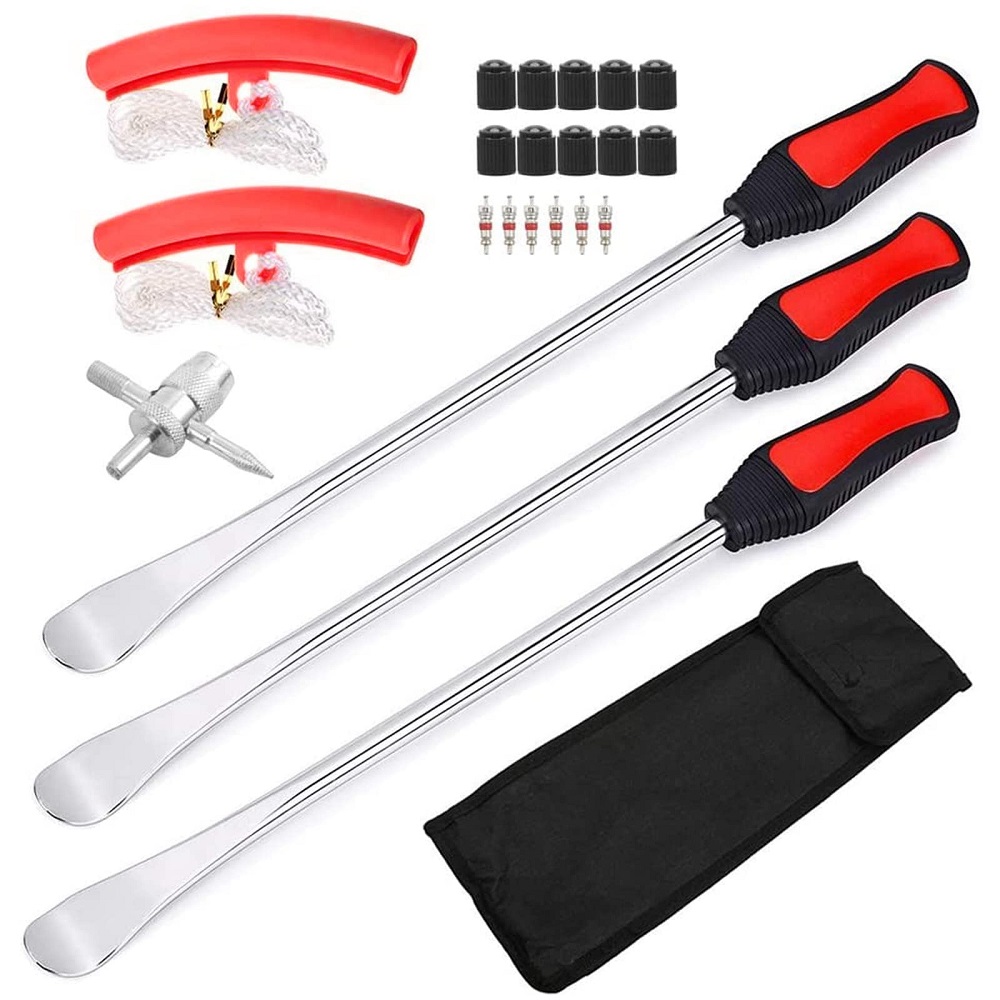
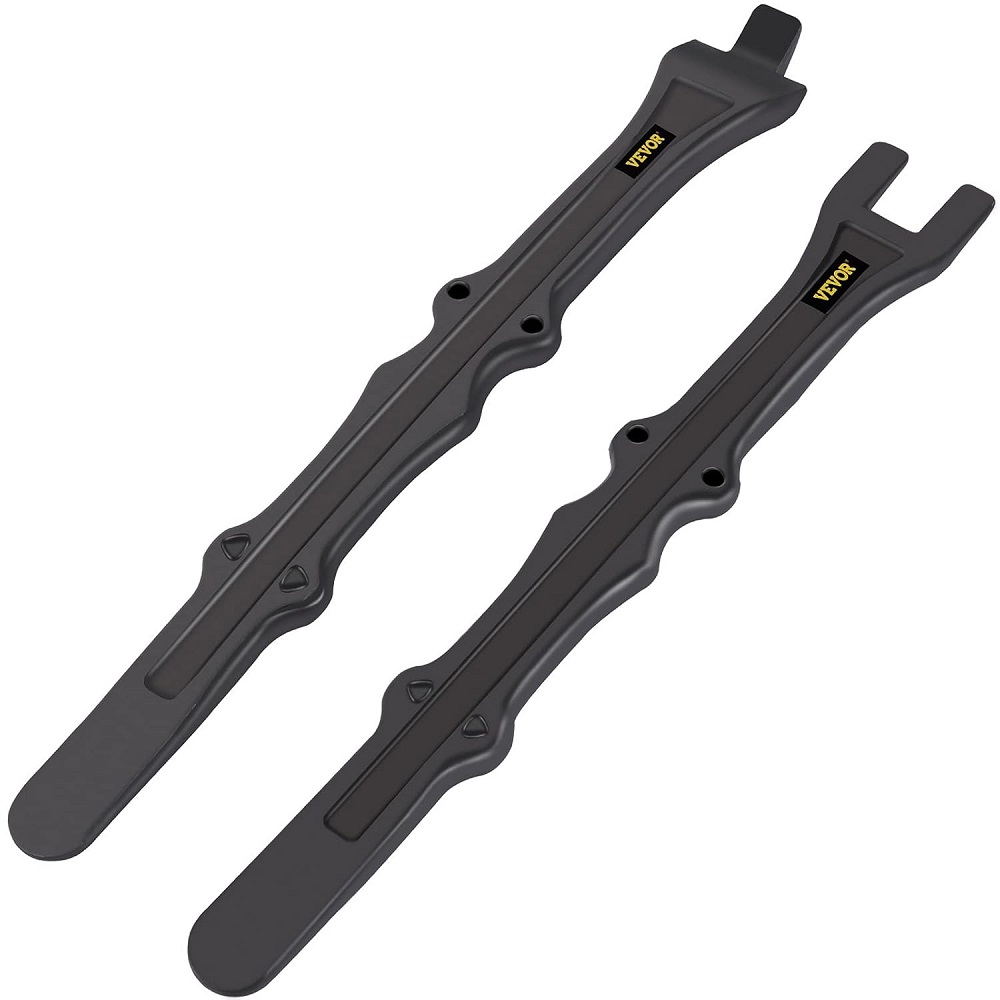
Tire Lever
A tire lever is a crucial tool for changing motorcycle tires. This tool helps in prying the tire away from the rim without damaging either component. Most tire changing kits include at least two levers. They are usually made of metal or strong plastic and come in various shapes and sizes. Having a good-quality tire lever set will make the tire changing process smoother.
Tire Pressure Gauge
A tire pressure gauge is essential for checking the inflation level of your tires. Proper tire pressure is vital for safety, handling, and tire longevity. Different motorcycle types require specific pressure ranges, so always refer to the manufacturer’s guidelines. A digital or analog gauge can provide accurate readings. Regularly checking tire pressure can prevent unexpected tire failures on the road.
Rim Protectors
Rim protectors are helpful for preventing damage to the motorcycle’s rims during tire change. When leveraging the tire off the rim, using rim protectors ensures that the delicate finish of your wheels is safeguarded. These protectors typically fit into the rim and provide a cushion between the lever and the wheel, making the job easier and cleaner.
Preparing for a Tire Change
Gather Your Tools
Before beginning the tire change, it’s essential to gather all necessary tools. Besides tire levers and rim protectors, you will need a torque wrench, socket wrench, and a clean workspace. Make sure your motorcycle is on a stable stand or lift for easy access. Having everything prepared in advance saves time and reduces frustration.
Inspect the Tire Condition
Inspect the tire visually before attempting to change it. Look for any signs of damage, such as cracks, bulges, or excessive wear. If the tire is simply worn down but still in good shape, it may only require replacement. However, if there are noticeable damages, it’s crucial to address those before attempting to attach a new tire.
Safety First
Tire changing can be a labor-intensive process, so prioritize safety. Always work in a well-ventilated area, preferably with a clean surface. Wear protective gloves and eyewear to avoid injury from sharp tools or debris. If using a jack or a stand, ensure that the motorcycle is stable and secure throughout the process.
The Tire Removal Process
Loosen the Wheel Bolts
The first step in removing the tire is to loosen the wheel bolts. Using a socket wrench, turn the bolts counterclockwise. It is often easier to do this while the motorcycle is still on the ground. Use your body weight to apply pressure and ensure the bolts are loose enough for easy removal. Make sure to remove the bolts completely before attempting to detach the tire.
Detach the Brake Caliper
If you’re removing the rear tire, it may be necessary to detach the brake caliper. This step prevents any damage to the caliper while changing the tire. Most motorcycles have a simple setup where the caliper is secured with bolts. Remove these bolts carefully and set the caliper aside on a clean surface. Avoid pulling on the brake lines to prevent any damage.
Remove the Wheel Assembly
Once the brake caliper is out of the way, carefully pull the wheel assembly off the axle. Ensure you have a good grip, as the assembly may be heavy. Roll the wheel out from under the motorcycle and set it on a clean surface. You’re now ready to proceed with removing the tire from the wheel.
Detaching the Tire from the Rim
Deflate the Tire
Before attempting to detach the tire, it must be fully deflated. Locate the valve stem and remove the valve core with a valve core tool. Allow all air to escape, which will make the tire easier to remove from the rim. This step is essential, as trying to pry off a fully inflated tire may result in injury or damage.
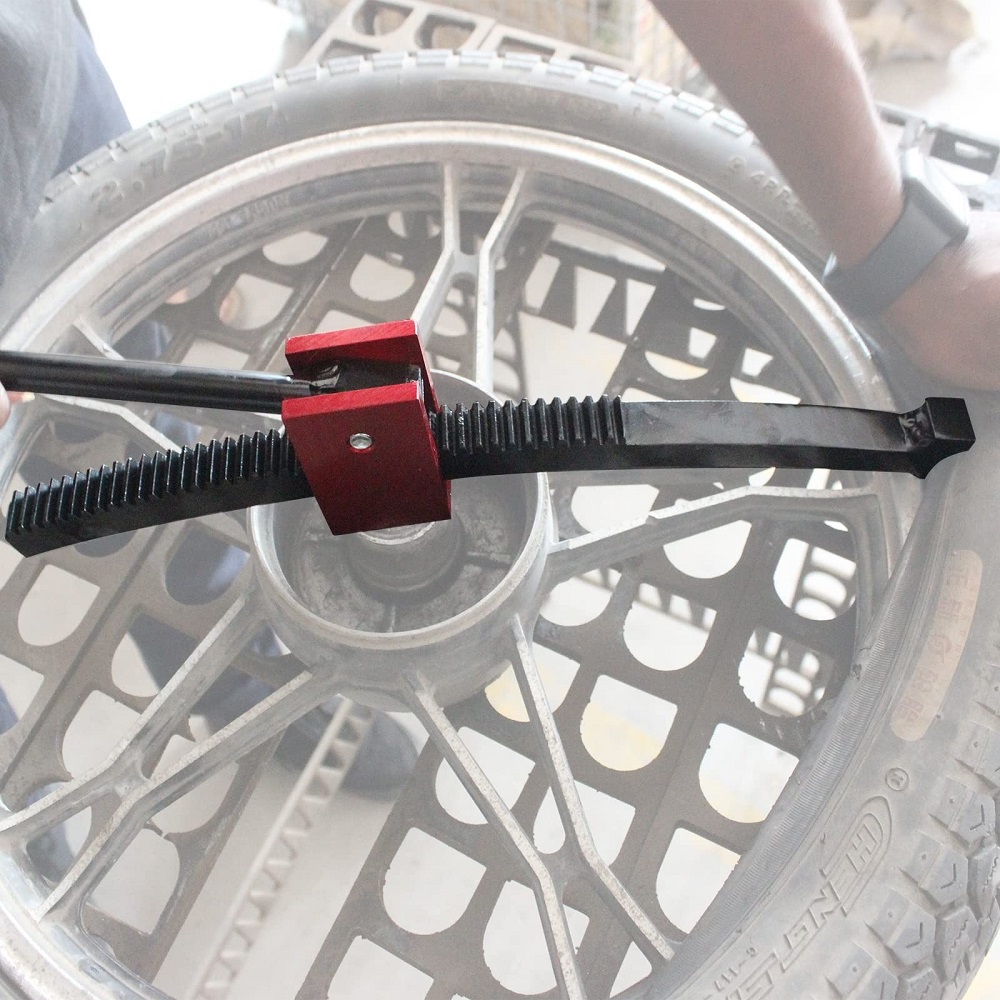
Insert Tire Levers
Begin by inserting the tire levers between the tire bead and the rim. Position them about six inches apart, applying pressure to pry the tire away from the rim. Start from one side and gradually work your way around. Take your time to avoid damaging the tire or rim. Always use rim protectors during this process to minimize potential damage.
Complete the Detachment
Once one side of the tire is off the rim, repeat the process for the other side. Insert the tire lever and use it to pry the tire completely off. It may help to rotate the wheel as you work to keep an easier grip. With both sides detached, you can now remove the tire from the rim entirely.
Installing the New Tire
Inspect the New Tire
Before installing a new tire, inspect it for any damages or defects. Check the manufacturing date and ensure it matches the specifications for your bike. If you’re unsure about which tire to purchase, consult your motorcycle’s manual or a tire professional.
Lubricate the Tire Bead
To facilitate easier installation, apply tire lubricant to the bead of the new tire. This lubricant can be specially designed or made of soapy water. Applying lubricant reduces friction and makes it simpler to slide the tire onto the rim.
Align and Install the Tire
Begin by aligning one side of the tire bead with the rim. Push it onto the rim until it seats properly. Gradually work your way around, ensuring that the tire bead remains in position. Once the first side is in place, repeat the process for the second side. Use your body weight and tire levers as needed to assist.
Finishing the Installation
Inflate the Tire
Once the tire is properly seated on the rim, it’s time to inflate it. Reinsert the valve core, and use a tire pump to inflate the tire. Refer to the manufacturer’s specifications for the correct pressure. Avoid overinflating, as this can lead to tire failure. After reaching the recommended pressure, check the bead to ensure it has sealed correctly.
Reattach the Wheel Assembly
Carefully roll the wheel back to the motorcycle. Align the axle with the mounting hole and slide the wheel into place. Ensure it fits snugly, as a poor fit can lead to dangerous riding conditions. Reattach any components you removed, including the brake caliper, and ensure they are secure before moving on.
Tighten Wheel Bolts
Using your torque wrench, tighten the wheel bolts according to the manufacturer’s specifications. This step ensures that the wheel is securely fastened to the motorcycle. Use a crisscross pattern to tighten each bolt evenly. This practice helps prevent warping or misalignment of the wheel.
Final Considerations
Test Ride
After changing the tire, it’s crucial to perform a test ride. This ride allows you to assess the handling and performance of the new tire. Pay attention to any unusual vibrations or noises. If anything feels off, double-check your work to ensure everything is properly installed.
Regular Tire Checks
Regular tire maintenance ensures optimal performance and safety. Frequent checks for tire pressure, tread depth, and wear will help you stay informed. Look for any signs of damage or irregularities while washing or inspecting your motorcycle. Proactive maintenance can prevent costly repairs and enhance your riding experience.
Staying Informed
As a motorcycle owner, it’s vital to stay informed about the most recent tools, techniques, and best practices related to tire changing. Online resources, forums, and riding communities offer valuable information and support. Consider engaging with fellow riders to enhance your knowledge and skills further.

FAQ:
- How do I safely remove a motorcycle tire?
- To safely remove a motorcycle tire, first lift the bike using a stand, loosen the axle nut with a wrench, and remove any necessary components such as the brake caliper. Use tire levers to pry the tire off the rim carefully, ensuring not to damage the rim.
- What techniques can I use to install a new motorcycle tire?
- When installing a new motorcycle tire, ensure the tire and rim are clean. Lubricate the bead and rim with tire lubricant, position the tire onto the rim using tire levers, and make sure it’s seated correctly before inflating. Follow the manufacturer’s instructions for proper installation.
- How do I check the tire pressure on my motorcycle?
- To check tire pressure, use a reliable tire pressure gauge. Remove the valve stem cap, press the gauge onto the valve, and read the pressure. Ensure the pressure is within the recommended range specified in your motorcycle’s owner manual.
- How often should I change my motorcycle tires?
- The frequency of tire changes depends on riding conditions, mileage, and tire condition. As a general guideline, replace tires every 5,000 to 10,000 miles or when they show signs of wear, such as tread depth under 1/16 inch, cracking, or bulging.
- Can I change my motorcycle tires myself, or should I hire a professional?
- You can change motorcycle tires yourself if you have the right tools and some mechanical knowledge. However, if you’re unsure or uncomfortable with the process, hiring a professional is recommended to ensure safety and proper installation.
Conclusion: Mastering Tire Changes
Embrace the Learning Process
Changing motorcycle tire tools may seem daunting, especially for beginners. However, with the right tools and techniques, it becomes a manageable task. Embrace the learning process, and don’t hesitate to practice. The more you practice, the more comfortable you will become with the process.
Enjoy the Ride
Knowing how to change motorcycle tire tools empowers you as a rider. This essential skill comes in handy during road trips or emergencies. Enjoy the freedom of being able to maintain and repair your motorcycle, enhancing your riding experience. With the knowledge gained from this guide, you are now better equipped to tackle tire changes efficiently.
Join the Motorcycle Community
Finally, consider connecting with the motorcycle community. Sharing experiences and tips, such as the best tools for changing motorcycle tire tools, with other riders will broaden your understanding and skills. Engaging with like-minded individuals enriches your journey as a motorcycle enthusiast. There’s always something new to learn, so keep exploring!
Leave a Reply