
Choosing the right fuel pump for your motorcycle is crucial for maintaining optimal performance. The fuel pump is responsible for delivering fuel from the tank to the engine, which makes it a vital component of the motorcycle’s fuel system. If the fuel pump fails or shows signs of wear, it can lead to poor performance and even engine failure. This article provides a comprehensive guide to selecting the right replacement fuel pump for your motorcycle. From understanding its function to installation tips, this guide covers all aspects of motorcycle fuel pump selection.
Understanding the Function of a Fuel Pump
Purpose of the Fuel Pump
The primary purpose of the fuel pump is to transport fuel from the tank to the engine. It creates pressure within the fuel system, allowing the engine to receive a consistent supply of fuel for combustion. Without a functioning fuel pump, the engine cannot draw fuel, and the motorcycle will not start or run effectively. Understanding this crucial role is the first step in recognizing the importance of replacing a failing fuel pump.
Types of Fuel Pumps
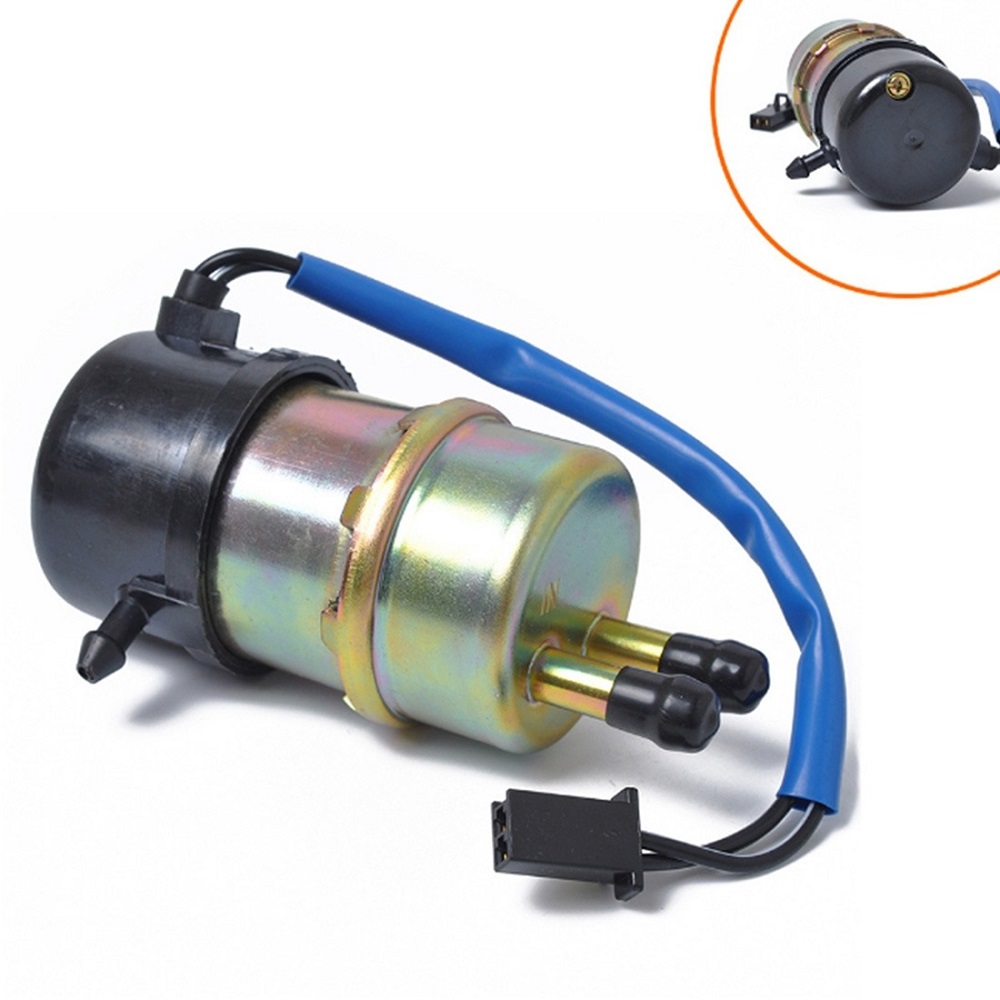
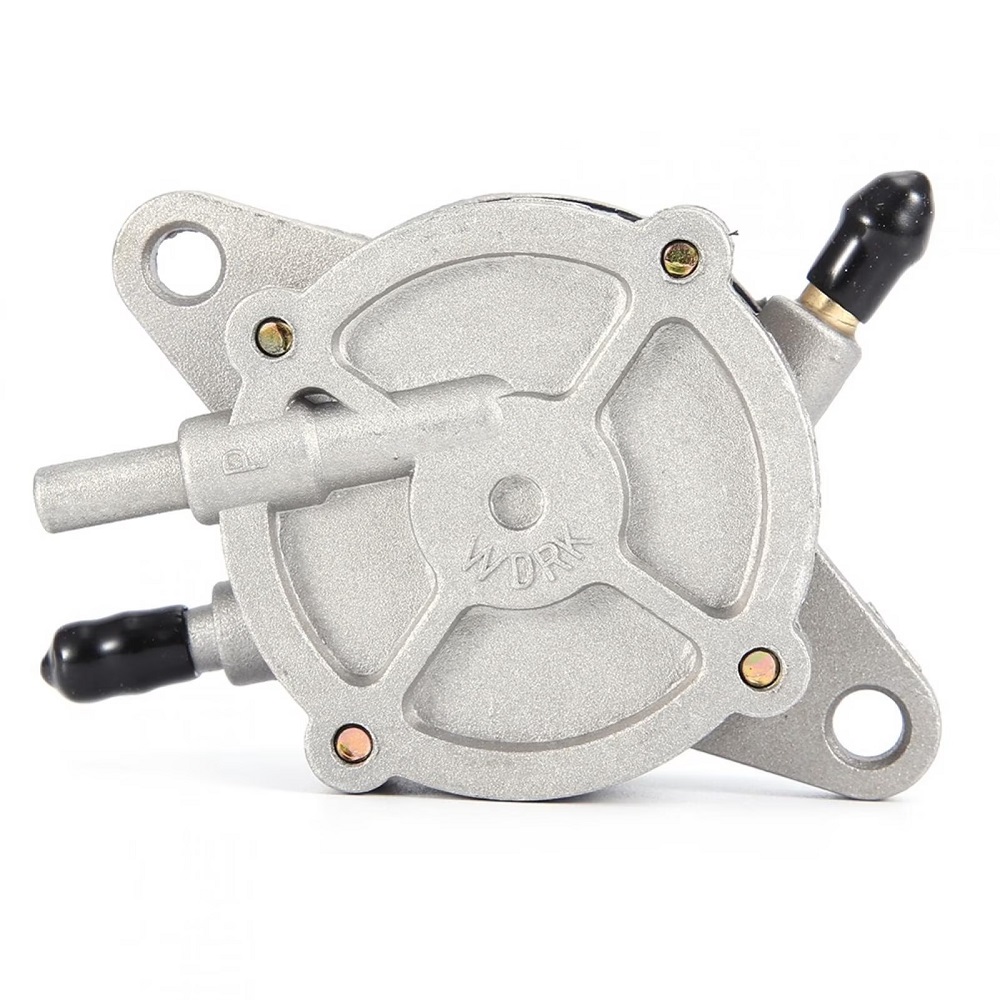
Motorcycles typically use two types of fuel pumps: mechanical and electric. Mechanical fuel pumps operate using the engine’s motion to draw fuel from the tank, while electric fuel pumps are powered by a battery and provide better fuel delivery. Electric pumps are more common in modern motorcycles because they offer better performance and reliability. Knowing which type of fuel pump your motorcycle uses is essential for a successful replacement.
Signs of a Failing Fuel Pump
Recognizing the signs of a failing fuel pump can save you from more significant issues down the line. Common symptoms include engine sputtering, difficulty starting, or stalling during rides. If you notice any of these symptoms, it’s crucial to investigate further. Ignoring these red flags can lead to more extensive engine damage and costly repairs. Taking action at the first signs of trouble is essential for keeping your motorcycle in top shape.
Selecting the Right Replacement
Compatibility with Your Motorcycle
The first step in selecting a fuel pump replacement is ensuring compatibility with your specific motorcycle model. Each motorcycle may have unique specifications and requirements for fuel pump design and function. Check your owner’s manual or consult your dealer to get the correct part number for your model. Using the wrong fuel pump can lead to performance issues and may even damage your engine.
Quality Matters
When selecting a replacement fuel pump, opting for high-quality parts is essential. While cheaper alternatives may seem attractive, they can lead to more significant problems in the long run. A quality fuel pump is engineered to deliver the right amount of fuel under pressure consistently. Research reputable brands and read reviews to ensure you choose a reliable fuel pump that meets industry standards.
OEM vs. Aftermarket Parts
You will likely encounter two main options when purchasing a fuel pump: Original Equipment Manufacturer (OEM) parts and aftermarket parts. OEM parts are made by the motorcycle’s manufacturer and are typically more expensive. However, they ensure a perfect fit and reliable performance. Aftermarket parts, on the other hand, are produced by third-party companies and can vary in quality. Weighing the pros and cons of each option is vital in making an informed decision.
Gathering Necessary Tools and Materials
Essential Tools for Installation
Before starting the replacement process, it’s crucial to gather the necessary tools. Typically, you’ll need basic hand tools, such as wrenches, screwdrivers, and pliers. Depending on your motorcycle’s design, you may also require socket sets and a torque wrench. Having the right tools on hand will make the installation smoother and reduce the risk of damaging components.
Additional Supplies
In addition to tools, you may need some additional supplies for the installation. Fuel line clamps, gaskets, and hose fittings should be on your list. Ensure that you have high-temperature-resistant materials, as fuel can generate heat during operation. Having these items ready will help ensure that the fuel pump replacement is successful.
Safety Gear
Safety should always come first when working on any motorcycle component. Wear gloves and safety goggles to protect yourself from fuel spills and debris. If possible, work in a well-ventilated area to avoid inhaling fumes. Taking proper safety precautions will enhance your comfort and protect you from potential hazards during the installation.
Preparing for the Fuel Pump Replacement
Reviewing the Motorcycle Manual
Before beginning the replacement, review your motorcycle’s service manual. This manual contains lighting diagrams, specific instructions for your model, and tips for safely removing the fuel pump. Understanding the layout and processes outlined in the manual will give you a clearer idea of what to expect during the installation. Familiarizing yourself with the process beforehand can save you time and frustration.
Emptying the Fuel Tank
Before removing the old fuel pump, empty the fuel tank as much as possible. This step is crucial for avoiding spills during the installation. If necessary, use a siphon to safely drain fuel from the tank. Ensure that you dispose of the drained fuel properly, following local regulations. Working with a nearly empty tank will make the replacement process more manageable and prevent accidents.
Disconnecting the Battery
For safety reasons, always disconnect the battery before working on the fuel pump. This action prevents electrical shocks, accidental shorts, and other hazards while you work. Remove the negative terminal first, followed by the positive terminal. This simple step adds an extra layer of safety to your installation process.
Removing the Old Fuel Pump
Accessing the Fuel Pump
Once preparations are complete, it’s time to access the old fuel pump. Depending on your motorcycle model, this may involve removing the seat or side panels. Take your time during this step to avoid damaging any components. Carefully inspecting the area can also help you identify any other potential issues worth addressing while you’re working on the motorcycle.
Detaching Fuel Lines and Connectors
After gaining access to the fuel pump, carefully detach the fuel lines and electrical connectors. Be cautious, as there may be residual fuel in the lines. Have a clean rag handy to catch any spills. Additionally, gently wiggle the fuel lines to remove them without puncturing or damaging other components. Proper detachment will ensure a smooth and stress-free removal process.
Unbolting the Pump
Once the fuel lines are detached, proceed to unbolt the fuel pump from its housing. Use the appropriate socket or wrench to carefully remove the bolts securing the pump. Keep the bolts in a safe place, as you will need them for the new installation. After removing the old pump, inspect the surrounding area for debris or damage, which may need addressing before installing the new pump.
Installing the New Fuel Pump
Positioning the New Pump
With the old pump removed, carefully position the new fuel pump into the housing. Ensure it fits snugly and aligns with the mounting holes. A proper fit is essential for a successful installation. If you encounter any resistance, double-check that all obstructions have been cleared away. Taking your time during this step can prevent future issues related to proper fuel delivery.
Securing the Pump
Next, secure the new fuel pump using the bolts you removed earlier. Hand-tighten the bolts initially to ensure the pump is aligned before applying torque. Once the pump is in place, use a torque wrench to tighten the bolts according to the manufacturer’s specifications. This step is crucial for maintaining the integrity of the installation and ensuring a long-lasting connection.
Reattaching Fuel Lines and Connectors
Once the fuel pump is secured, it’s time to reattach the fuel lines and electrical connectors. Ensure that the fuel lines fit snugly and securely. It’s advisable to check for any wear or damage before reattaching parts to prevent future leaks. Confirm that the electrical connections are properly seated, which facilitates a direct and dependable power supply for the pump.
Final Steps Before Starting
Reconnecting the Battery
Before starting the motorcycle, reconnect the battery terminals. Be sure to connect the positive terminal first, followed by the negative terminal. Ensure that the connections are tight and secure. Reconnecting the battery is a straightforward process, but double-checking the connections can help avoid electrical issues when starting the bike.
Testing for Leaks
After verifying all connections, it’s time to test for leaks. Turn on the ignition without starting the engine and listen for any unusual sounds. Check all fuel line connections and the pump area for signs of leakage. If you notice any leaks, immediately turn off the ignition and address the problem before attempting to start the engine.
Starting the Motorcycle
Once everything is securely connected and inspected for leaks, it’s time to start the motorcycle. Allow the engine to run for a few minutes and listen for any irregular sounds. Pay attention to the performance and responsiveness of the engine. If everything operates smoothly, you’ve successfully replaced the fuel pump and can now enjoy the improved performance.
Maintenance and Care
Regular Inspections
Once your new fuel pump is installed, regular inspections are important for maintaining its performance. Check all fuel lines, connections, and the pump housing for signs of wear, corrosion, or leaks. Keeping an eye on these components can help you catch any issues early, avoiding unexpected breakdowns on the road.
Fuel Quality Matters
Using high-quality fuel can significantly impact the lifespan and efficiency of the fuel pump. Low-quality fuel can lead to unwanted deposits and clogs, stressing the pump and other components. Always purchase fuel from reputable sources and consider using a fuel additive to keep your system clean. Prioritizing fuel quality can help keep your new pump running smoothly for the long term.
Keeping the Tank Clean
Dirt and debris in the fuel tank can cause significant harm to the fuel pump. Regularly inspect and clean the fuel tank to prevent contaminants from entering the system. This care can prolong the life of your pump and optimize your motorcycle’s performance. Keeping the tank clean also contributes to a smoother riding experience.
FAQ:
- How do I know if my motorcycle fuel pump needs replacement?
- Signs that your fuel pump may need replacement include difficulty starting the bike, sputtering or stalling while riding, a decrease in power during acceleration, and fuel leaks. If you hear unusual noises from the pump, it could also indicate a problem.
- What factors should I consider when selecting a replacement fuel pump?
- When choosing a replacement fuel pump, consider compatibility with your motorcycle model, the flow rate and pressure specifications, and whether the pump is an OEM (original equipment manufacturer) or aftermarket part. Quality and warranty information are also important.
- Can I install a motorcycle fuel pump myself?
- Yes, many riders can replace a fuel pump with basic mechanical skills and tools. However, the installation process may vary by model, so it’s advisable to refer to the motorcycle’s service manual for specific instructions and safety precautions.
- Are aftermarket fuel pumps reliable?
- Aftermarket fuel pumps can be reliable, but it’s important to choose reputable brands with good reviews. Ensure that the aftermarket pump meets or exceeds the specifications of the original pump to ensure performance and compatibility.
- How often should I replace my motorcycle fuel pump?
- The lifespan of a motorcycle fuel pump varies depending on usage, maintenance, and fuel quality. Typically, pumps can last anywhere from 30,000 to 100,000 miles. Regular maintenance and using clean fuel can extend their lifespan, so it’s essential to keep an eye on performance.
Conclusion
Summary of Key Points
Selecting the right replacement fuel pump for your motorcycle is a crucial aspect of motorcycle maintenance. Understanding the function of the fuel pump, selecting the correct part, and properly installing it ensures improved performance and reliability. Following the steps outlined in this guide makes the process manageable and helps you avoid common pitfalls.
The Importance of Regular Maintenance
After installing your new motorcycle fuel pump, ongoing maintenance is essential to ensure long-lasting performance. Regular inspections, using high-quality fuel, and keeping the fuel system clean will help you get the most out of your motorcycle. These simple practices can significantly enhance the riding experience and prolong the life of your components.
Enjoy the Ride
In conclusion, investing in the best replacement fuel pumps for motorcycles and taking the time to perform a proper installation will lead to an enhanced riding experience. A reliable fuel system is essential for keeping your motorcycle running smoothly and efficiently. With a new motorcycle fuel pump in place, you can confidently hit the road and enjoy the freedom and excitement of riding without worrying about fuel delivery issues. Ride safe and happy!
Leave a Reply