DUnderstanding the Role of Your Windshield Seal
A car’s windshield is more than just a window. Consequently, it acts as a critical structural component. However, the windshield seal often goes unnoticed until problems arise. This rubber component plays a vital role in vehicle safety. It secures the glass to the frame. Furthermore, it prevents water, wind, and dust from entering the cabin. Many drivers ignore this small part until it fails. Recognizing windshield seal leak symptoms early can save you money. You might need windshield seal repair if you notice moisture inside.
This article explores how to maintain this essential part. We will discuss how to fix windshield seal leak issues effectively. Additionally, we will analyze the windshield seal replacement cost for those needing professional help. Sometimes, a simple DIY fix works wonders. Other times, you need the best windshield sealant for leaks. Understanding the difference is key. Therefore, reading this guide helps you make informed decisions. You will learn to spot damage before it worsens. Ultimately, a well-sealed windshield ensures a quiet and dry ride.
Common Causes of Windshield Seal Deterioration
Several factors contribute to the breakdown of windshield seal. First, age is the primary enemy of rubber. Over time, the material loses its elasticity. It becomes hard and brittle. Consequently, cracks form on the surface. These cracks allow water to seep through. Second, extreme weather conditions accelerate wear. Intense sunlight causes the rubber to dry out. UV rays break down the chemical bonds in the seal. Therefore, parking in the shade helps. Conversely, freezing temperatures make the rubber shrink. The seal pulls away from the glass. This creates a gap for air and water. Third, poor installation is a common issue. If the seal was not fitted correctly, it fails prematurely. Perhaps the technician used too little adhesive.
Maybe the surface was not cleaned properly. Fourth, car accidents can damage the seal. Even a minor fender bender can shift the glass. This movement compromises the seal’s integrity. You might not see the damage immediately. However, the leak will appear later. Finally, harsh chemicals degrade the rubber. Some car wash soaps are too strong. They strip the protective oils from the seal. Therefore, always use mild, automotive-specific cleaners. Regular inspection helps you catch these issues early.
Identifying the Symptoms of a Failing Seal
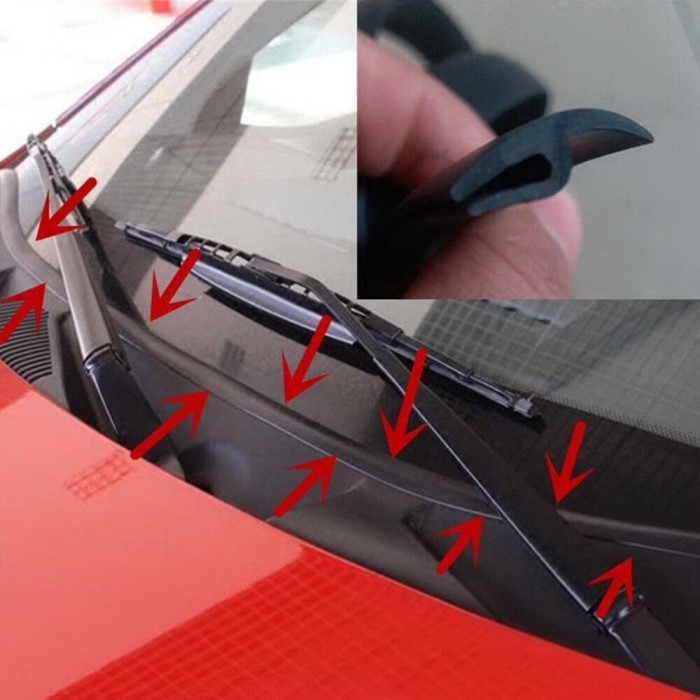
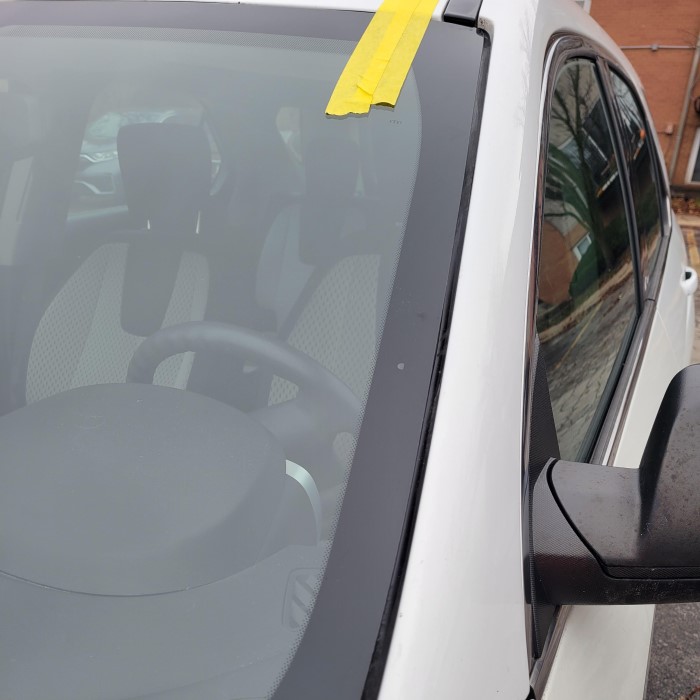
Spotting a leak early prevents major damage. You need to know the warning signs. The most obvious symptom is water inside the car. You might see wet spots on the dashboard. Alternatively, the carpets might feel damp. Usually, this occurs after heavy rain or a car wash. Do not ignore these signs. Water leads to mold and rust. Furthermore, unusual noises often indicate a problem. A failing seal lets wind whistle into the cabin. You might hear a hissing sound at high speeds. This noise is annoying. However, it also suggests a gap exists. Another symptom is visible damage. Inspect the rubber around the glass. Look for cracks, gaps, or peeling sections. Sometimes, the rubber pulls away completely.
You can see the metal frame underneath. Additionally, check for fogging inside the windshield. A breach in the seal allows moisture to enter. This causes condensation to form between the glass layers. It obstructs your view. It also indicates a serious seal failure. If you notice any of these signs, act quickly. Delaying the repair leads to costlier fixes. You can perform a simple water test. Have someone spray water on the windshield while you sit inside. Look for water droplets entering the cabin. This confirms the location of the leak.
Essential Tools for a Quick Repair
Fixing a leak requires the right equipment. You cannot use just any glue. You need automotive-grade materials. First, purchase a high-quality sealant. Urethane adhesive is the industry standard. It creates a strong, waterproof bond. However, silicone sealant works for minor leaks. It is flexible and easy to apply. Choose the product that fits your needs. Second, get a caulking gun. This tool helps you apply the sealant evenly. A steady hand is crucial for a clean application. Third, you need cleaning supplies. Rubbing alcohol is excellent for removing dirt and grease. Use lint-free cloths to wipe the surface. The area must be spotless before you apply sealant. Dirt prevents the adhesive from sticking.
Fourth, a trim removal tool is helpful. It allows you to lift the rubber seal gently. You can access the gap underneath without damaging the paint. Do not use a screwdriver. It can scratch the glass or the frame. Fifth, have masking tape ready. Tape off the area around the leak. This protects the paint from excess sealant. It also makes the job look professional. Finally, keep a utility knife nearby. You might need to trim old, cracked rubber. A clean surface ensures a better repair. Gather all these tools before you start. Being prepared makes the process smoother.
Step-by-Step Guide to Sealing a Leak
You can fix minor leaks yourself. Follow this procedure for the best results. First, identify the source of the leak. It is not always where you see the water. Water travels along the frame. Therefore, inspect the entire seal. Look for the highest point of damage. Once you find the spot, clean the area. Use the rubbing alcohol and cloth. Remove all debris and old adhesive. The surface must be dry and clean. Next, use the trim tool to lift the rubber. Create a small gap between the seal and the glass. Be gentle to avoid tearing the rubber. Now, load the sealant into the caulking gun. Cut the tip of the nozzle at an angle. This shape allows for precise application. Apply a thin bead of sealant into the gap.
Do not use too much product. Excess sealant looks messy. It can also squeeze out onto the glass. After applying the adhesive, press the seal back into place. Hold it firmly for a few minutes. The sealant needs time to grab. Wipe away any excess product immediately. Use a damp cloth. Allow the sealant to cure. Check the product instructions for drying times. Usually, it takes a few hours. Do not drive the car until the adhesive sets. Finally, perform the water test again. Verify that the leak has stopped. If water still enters, you missed a spot.
When to Replace the Entire Seal
Sometimes, a simple repair is not enough. You might need a full replacement. If the rubber is severely cracked, patching it won’t work. Old, brittle rubber cannot hold a seal. It will continue to crumble. Therefore, replacement is the only safe option. Additionally, look for signs of structural damage. If the windshield has shifted, the seal is compromised. This is dangerous. The windshield provides roof support. A bad seal weakens the car’s structure. Furthermore, consider the extent of the damage. If there are multiple leaks, replacement is more effective. Repairing many small leaks takes too much time. It also looks patchy. A new seal looks cleaner and performs better.
Also, consider if you are selling the car. A new seal adds value. It shows the car was well-maintained. Buyers appreciate a dry, quiet cabin. Replacing the entire seal is a bigger job. It often requires removing the windshield. This process is risky. You can break the glass. Therefore, most drivers hire professionals for this task. A professional installation comes with a warranty. This guarantees the work. If it leaks again, they fix it for free. Evaluate the condition of your seal honestly. If in doubt, consult an expert. They can advise you on the best course of action.
Professional Repair vs. DIY Approaches
Deciding between DIY and professional help is tough. Consider your skill level first. Applying sealant is relatively easy. Most people can handle a minor repair. You just need patience and the right tools. DIY repairs save money. You only pay for the materials. However, they require your time and effort. Conversely, professional repairs guarantee quality. Technicians have years of experience. They spot problems you might miss. They also have specialized tools. For example, they use powerful suction cups to hold the glass. This ensures a perfect fit. Moreover, professionals handle the messy cleanup. They dispose of the old rubber properly. Safety is another factor. The windshield is a safety device.
If you make a mistake, the glass could pop out during an accident. This is a life-threatening situation. Therefore, if you are unsure, hire a pro. It is better to spend money now than risk your life later. Also, consider the warranty. DIY fixes have no guarantee. If the leak persists, you must do it again. Professional work is insured. Look for certified auto glass shops. Check online reviews. A reputable shop provides excellent service. They get the job done right the first time.
Preventative Maintenance for Longevity
Prevention is always better than repair. You can extend the life of your seal. Regular maintenance is simple but effective. First, clean the seals often. Use a damp cloth to wipe away dirt. Dirt acts like sandpaper. It wears down the rubber over time. Therefore, keep the area clean. Second, condition the rubber. Automotive rubber conditioners are available. They keep the seal soft and pliable. Apply the conditioner every few months. It prevents the rubber from drying out. Third, protect the car from the sun. Park in a garage whenever possible. If you must park outside, use a sunshade. This blocks harmful UV rays. It keeps the interior and seals cool. Fourth, avoid harsh chemicals.
o not use bleach or strong detergents near the glass. These chemicals eat away the rubber. Use gentle car wash soaps instead. Fifth, inspect the seal seasonally. Check it in the spring and fall. Look for cracks or separation. Early detection allows for quick fixes. Finally, treat ice and snow carefully. Do not use metal scrapers on the seal. Use a plastic ice scraper or a brush. Pulling on the rubber can tear it. Follow these tips to keep your seal in top shape. A little care goes a long way.
FAQ
Can you replace just the seal on a windshield?
Yes, you can replace just the rubber seal. This is possible if the glass itself is in good condition. However, it is a delicate job. It often requires removing the windshield to install the new gasket correctly. Many professionals recommend removing the glass to ensure a perfect seal.
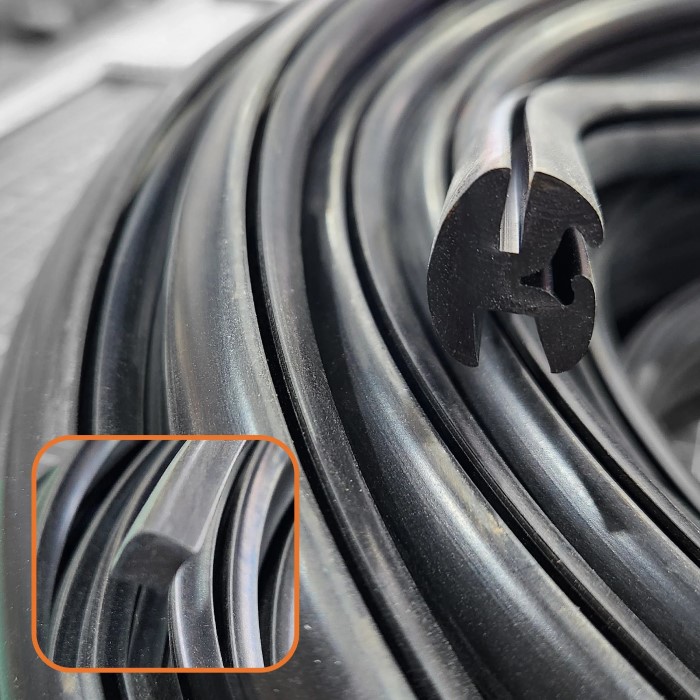
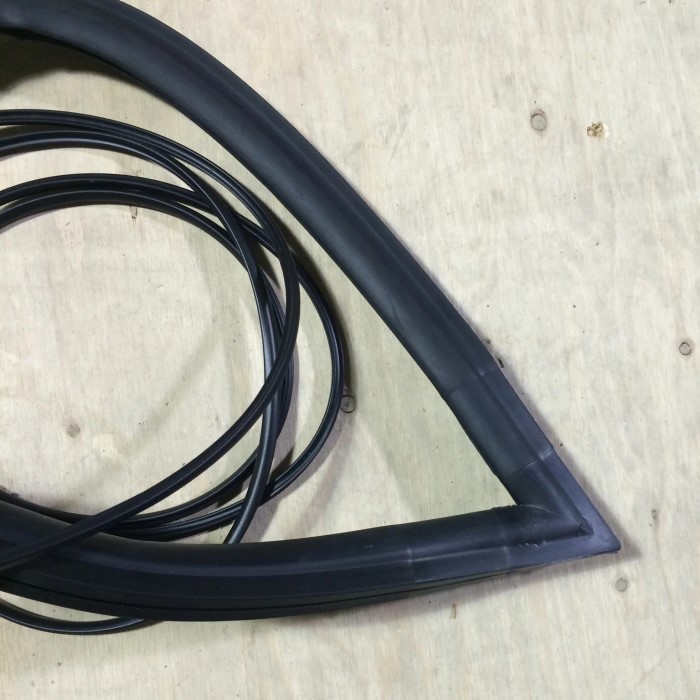
What is the seal around a windshield called?
The seal around a windshield is commonly called the weatherstripping or the rubber gasket. It acts as a barrier against the elements. It also cushions the glass against the metal frame of the car. This prevents vibrations and keeps water out.
Conclusion
Your car relies on a healthy windshield seal for protection. Ignoring leaks leads to bigger problems. This article covered the basics of windshield seal repair. We discussed how to fix windshield seal leak issues with simple tools. However, sometimes professional help is necessary. You must weigh the windshield seal replacement cost against the safety benefits. Always choose the best windshield sealant for leaks if you do it yourself. Stay alert for windshield seal leak symptoms like water drips or wind noise. Addressing these signs early keeps your cabin dry. It also maintains the structural integrity of your vehicle. Take care of your car, and it will take care of you.
Leave a Reply