
Understanding the Basics of a Dead Battery
A dead battery is a common problem for drivers. It leaves you stranded and frustrated. Understanding why batteries die helps you prevent it. Most car batteries last between three to five years. However, several factors can shorten this lifespan. Extreme cold or heat affects battery performance significantly. In winter, the chemical reactions inside the battery slow down. This reduces the power available to start the engine. Furthermore, leaving lights on is a primary cause. Headlights or interior lights drain the battery overnight. Even a small dome light can cause issues. Parasitic drains also create problems. These occur when components continue to draw power after the car is off. For instance, a faulty relay might keep a circuit active. Consequently, the battery loses its charge completely. Identifying the cause is the first step. You must know the problem to fix it.
How to set up jumper cables? Corrosion is another major culprit. Battery terminals often accumulate a white or blish powder. This substance is caused by chemical reactions. It creates resistance between the terminal and the cable. As a result, the electrical current cannot flow freely. The starter motor does not get enough power. You might hear a clicking sound when you turn the key. This sound indicates a weak connection or a dead battery. Therefore, checking your battery regularly is wise. How to set up jumper cables? Look for signs of wear and corrosion. Cleaning the terminals can often solve starting issues. You can use a mixture of baking soda and water. This neutralizes the acid and cleans the metal. A wire brush helps remove stubborn deposits. Maintaining a clean battery ensures a reliable connection. It extends the life of the electrical system.
Essential Safety Precautions Before You Start
Safety must be your primary concern. Dealing with electricity and batteries involves risks. Car batteries contain sulfuric acid. This chemical is highly corrosive. It can burn skin and damage clothing. Furthermore, batteries emit hydrogen gas. This gas is explosive. A single spark can ignite the gas. This can cause the battery to explode. Therefore, you must take precautions. Never smoke near a battery. Keep open flames and sparks away. Wear safety glasses if possible. They protect your eyes from acid splashes. Gloves are also a good idea. They protect your hands from acid and grease. Before you touch any cables, inspect the battery. Look for cracks or leaks. Do not attempt to jump a damaged battery. It is too dangerous. If you see fluid leaking, call a professional.
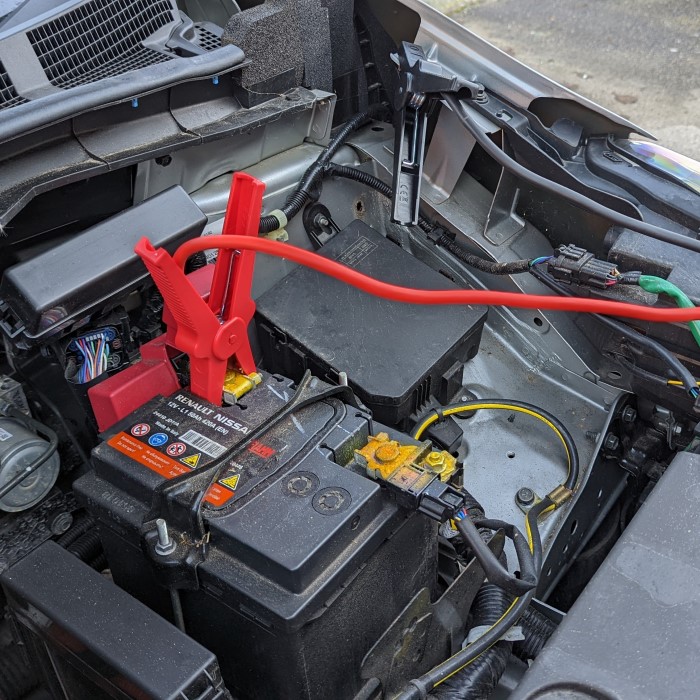
Park the vehicles in a safe location. Both cars must be in “Park” or “Neutral.” Set the parking brakes firmly. This prevents the cars from rolling. Ensure the vehicles are not touching each other. Metal-to-metal contact can cause a short circuit. Turn off the ignition in both cars. Also, turn off all electrical accessories. This includes lights, radio, and air conditioning. These devices draw power. They can cause a spike in voltage during the connection. Remove the keys from the ignition. This ensures the system is completely off. Open the hoods of both cars. Locate the batteries. Identify the positive and negative terminals. They are usually marked with a (+) or (-) sign. The positive terminal is often red. The negative terminal is often black. If the terminals are dirty, clean them briefly. A better connection ensures a safer jump start.
Identifying Battery Terminals and Cable Quality
How to set up jumper cables? Correct identification of terminals is critical. You must know positive from negative. Reversing the polarity causes severe damage. It can destroy the electrical system. The positive terminal is usually larger. It has a (+) symbol near it. The cable connected to it is often red. The negative terminal is smaller. It has a (-) symbol. The cable connected to it is usually black. However, colors can fade over time. Sometimes, cables are replaced with different colors. Always rely on the symbols (+) and (-). If the symbols are unreadable, look for other clues. The positive cable runs to the starter or a fuse box. The negative cable runs to the car’s frame or engine block. If you are unsure, consult the owner’s manual. It will have a diagram. Do not guess. Guessing can lead to a blown fuse or worse.
The quality of your jumper cables matters. Not all cables are created equal. Wire gauge determines the current capacity. A lower gauge number means a thicker wire. For example, 4-gauge wire is thicker than 10-gauge. Thicker wires are better for jump-starting. They allow more current to flow. This is important for large engines or very dead batteries. Thin wires might heat up. They might not deliver enough power. Invest in a good set of cables. Look for copper or aluminum-copper construction. Check the clamp strength. Strong springs ensure a tight grip. The clamps should have teeth that bite into the metal. Good contact is essential for transferring power. Some clamps have copper teeth. These conduct electricity better. Store your cables in a dry place. Keep them untangled and ready for use.
Step-by-Step Guide to Connecting the Cables
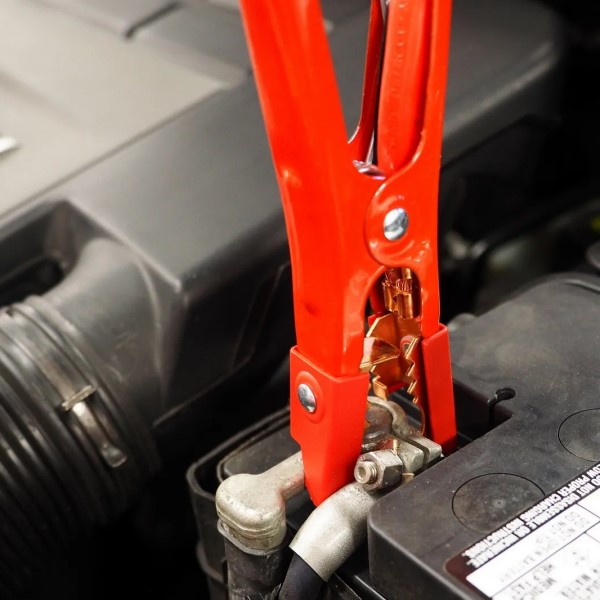
How to set up jumper cables? Now you are ready to connect. This process requires focus. Follow the steps precisely. First, take one end of the jumper cables. Separate the red and black clamps. Ensure they do not touch each other. Pick up the red clamp. Connect it to the positive terminal of the dead battery. Make sure it has a solid connection. Wiggle it slightly to ensure good metal-to-metal contact. Next, go to the good battery. Connect the other red clamp to its positive terminal. The circuit is not complete yet. Now, pick up the black clamp on the same end. Connect it to the negative terminal of the good battery. This provides the power source for the jump. The dead car is still an open circuit.
Finally, take the remaining black clamp. Do not connect it to the negative terminal of the dead battery. This is a common mistake. Instead, find a clean metal ground on the dead car. This can be a bolt on the engine block. It can be a metal strut. Ensure the area is free of paint and grease. Connect the black clamp here. When you make this connection, you might see a small spark. This is normal. It means the circuit is complete. The dead battery is now receiving power. Wait a few minutes. Let the dead battery charge slightly. Three to five minutes is usually enough. This step is helpful if the battery is very dead. It allows the bad battery to build up some charge.
Common Mistakes to Avoid During the Process
How to set up jumper cables? Many people make mistakes during a jump start. These errors can be costly. One major mistake is mixing up the terminals. Connecting positive to negative causes a short circuit. This creates a massive electrical surge. It can melt the battery posts. It can blow the car’s computer. Always double-check the (+) and (-) signs. Never assume cable color is correct. Always verify the markings. Another error is connecting the last black clamp to the dead battery’s negative terminal. This can ignite hydrogen gas. The spark happens right next to the battery. Always use a remote ground point. It is a safer practice. Do not let the clamps touch each other. If they touch while connected to a battery, they will spark. This can damage the clamps.
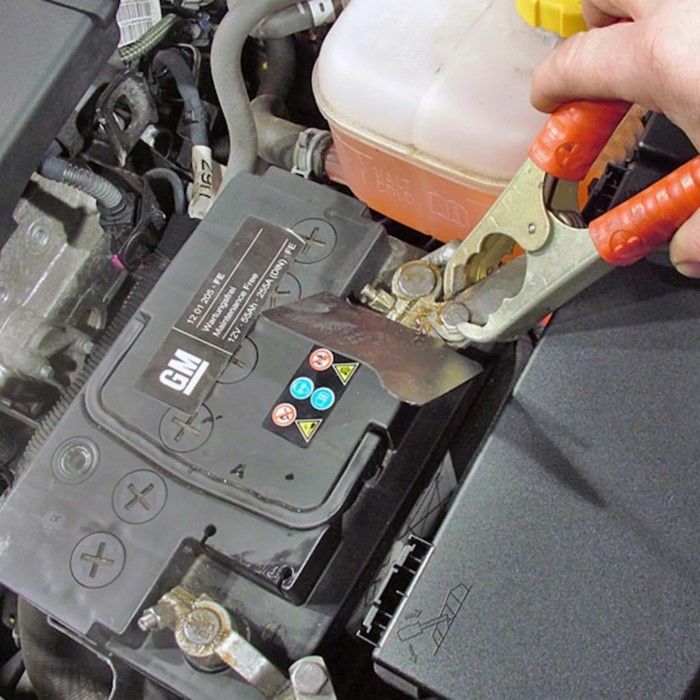
Another mistake is ignoring corrosion. Dirty terminals prevent the flow of electricity. You might think the battery is dead. Actually, the connection is just bad. Always check for build-up. Scrape it off if necessary. A poor connection will prevent the car from starting. The good car might charge the bad battery. But the starter won’t get enough amps. Additionally, people often leave the cars running while connecting. This is risky. It can damage the electronics. The voltage regulator might spike. Always turn off both cars. Connect the cables. Then, start the good car. Wait. Then start the dead car. This sequence protects the alternators. It prevents voltage spikes from damaging sensitive components.
Proper Removal and Post-Jump Start Care
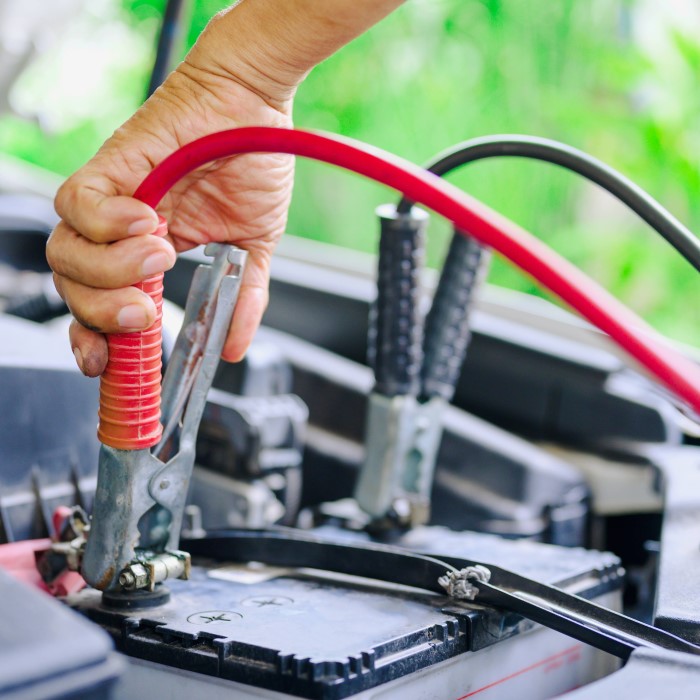
How to set up jumper cables? Removing the cables requires care. You must do it in the reverse order of connection. This prevents short circuits and sparks. First, turn off the engine of the car that was jumped. It is safer to remove cables with the engines off. However, many people leave them running. If you leave them running, be careful. Do not let the clamps touch any metal. Start with the black clamp on the dead car. Remove it from the ground point. Tuck it away from the battery. Next, remove the black clamp from the good car’s negative terminal. Then, remove the red clamp from the good car’s positive terminal. Finally, remove the red clamp from the dead car’s positive terminal. This breaks the circuit safely. Keep the clamps separated until they are stored.
Once the cables are removed, drive the car. You need to recharge the battery fully. Let the car run for at least 20 minutes. Driving on the highway is best. High RPMs help the alternator charge faster. If you just let it idle, it might not charge fully. The alternator needs to work. If you turn the car off too soon, it might not start again. The battery needs to build a reserve. If the car dies again shortly after, you have a bigger problem. The alternator might be faulty. Or the battery might have a dead cell. In this case, you need a mechanic. A jump start is a temporary fix for a dead battery. It does not fix a broken alternator.
Troubleshooting Why the Jump Start Failed
How to set up jumper cables? Sometimes, the jump start does not work. The engine does not turn over. This can be frustrating. Do not keep trying endlessly. You might cause damage. There are several reasons for failure. First, check the connections. A loose clamp is the most common cause. Ensure the clamps are tight. Wiggle them to see if the dash lights come on. If the lights are dim, the connection is weak. Clean the terminals again. Try a different ground point. Sometimes the chosen metal is painted or dirty. Move the black clamp to a cleaner spot. Second, check the jumper cables themselves. Are they thick enough? Very thin cables might not carry enough current for a truck or SUV. Try using a heavier set of cables.
The battery might be too damaged. If it has a dead cell, it will not hold a charge. A jump start provides power to start the engine. But a shorted cell drains that power instantly. You can test this. Jump the car and disconnect the negative cable while it runs. If the car dies immediately, the battery is likely shorted. This is a sure sign you need a new battery. However, be careful doing this test. It can damage the alternator. A better test is using a multimeter. Check the voltage while the car is off. If it is below 9 volts, the battery is severely damaged. It might be beyond saving. In this case, no amount of jumping will help. You need a replacement.
FAQ Section
What is the correct order to attach jumper cables?
The correct order is crucial for safety. First, connect the red clamp to the positive terminal of the dead battery. Second, connect the other red clamp to the positive terminal of the good battery. Third, connect the black clamp to the negative terminal of the good battery. Finally, connect the last black clamp to an unpainted metal surface on the dead car’s engine block. This specific order prevents sparks near the dead battery.
Do I connect red or black first?
You should always connect the red cables first. This connects the positive terminals. The positive circuit is not grounded until the black cable is attached. Connecting the positive side first prevents accidental short circuits. If you connect the black cable first, the car’s frame becomes “live.” Touching a red clamp to any metal part would cause a dangerous spark. Always go red first, then black.
What is the correct order for connecting battery cables?
The connection order for a jump start is Red -> Red -> Black -> Black (Ground). Start with the dead battery’s positive (red). Then go to the good battery’s positive (red). Next, connect the good battery’s negative (black). Finally, ground the last black clamp on the dead car. For disconnecting, reverse this order. Remove the black clamps first, then the red clamps.
Does the order you put on jumper cables matter?
Yes, the order matters greatly. Following the correct order protects you and your car. It prevents sparks from occurring near the battery. Batteries produce flammable hydrogen gas. A spark near the battery could cause an explosion. The correct order ensures the circuit is grounded away from the battery. It also protects the vehicle’s electrical system from surges. Always follow the standard sequence for safety.
Conclusion
Knowing how to set up jumper cables is a vital life skill. It saves you from long waits and towing fees. We have discussed the correct procedures in detail. You now understand the risks and rewards. The process is straightforward if you stay calm. Remember, preparation is key. Safety glasses and gloves are recommended. We outlined the necessary jumper cables setup instructions for a successful start. Following these steps prevents damage to your vehicle. It keeps you safe from acid and sparks. We also emphasized the difference between how to connect jumper cables properly versus dangerous shortcuts. Always prioritize the correct terminal sequence. This protects the sensitive electronics in modern cars.
We covered how to use jumper cables for a car battery with a donor vehicle. This is the most common method. However, always ensure the donor car is compatible. We also provided safety tips for using jumper cables throughout the guide. These tips minimize the risk of explosion or electric shock. Finally, you learned how to charge a dead car battery with jumper cables and what to do after the engine starts. Driving the car allows the alternator to recharge the battery. If the car fails to start, troubleshoot the connections and battery health. You might need a new battery or a mechanic. Do not ignore warning signs. Keep this guide handy. Share it with new drivers. Being prepared makes all the difference in an emergency. With the right knowledge, a dead battery is just a minor inconvenience.
Leave a Reply