Introduction to Valve Cover Gaskets
Maintaining a vehicle is a responsibility that every car owner takes seriously. The engine is the heart of the car. It consists of many parts working together. Among these parts, the valve cover plays a crucial role. It sits at the top of the engine. It protects the valve train from dirt and debris. However, a seal is needed between the cover and the engine block. This seal is the gasket valve cover. Over time, this gasket wears out. As a result, oil begins to leak. You might notice oil spots on your driveway.
Perhaps you smell burning oil while driving. These are common signs of a failing seal. This article will guide you through the repair process. You will learn about gasket valve cover replacement. We will discuss the gasket valve cover leak symptoms in detail. Furthermore, we will provide clear gasket valve cover installation instructions. Choosing the right parts is also important. We will explore the best gasket valve cover materials. Finally, we will explain the critical gasket valve cover torque specifications. By the end of this guide, you will feel confident to tackle this job yourself. It is a manageable task for most DIY enthusiasts.
Understanding the Function of a Valve Cover
The valve cover is a metal housing. It bolts to the top of the engine cylinder head. Its primary job is protection. It shields the valve train components. These components include rocker arms, valves, and springs. They operate in a bath of engine oil. Without the cover, oil would spray everywhere. Consequently, the engine would lose lubrication rapidly. Dirt would also enter the system. This would cause severe engine damage.
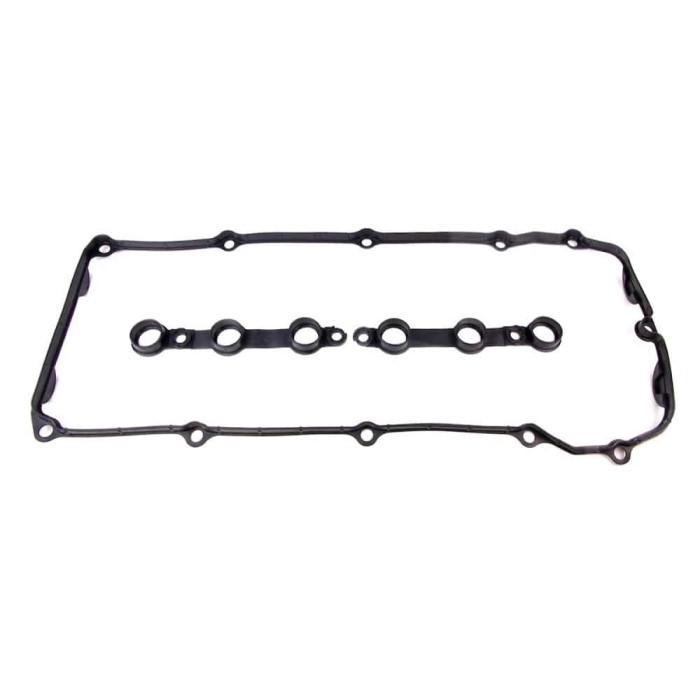
Therefore, the valve cover is essential. However, it cannot seal itself. It needs a soft material to create a tight bond. This is where the gasket comes in. The gasket fills the gap between the metal cover and the metal engine head. Engine parts are not perfectly flat. They have microscopic imperfections. The gasket conforms to these imperfections. Thus, it prevents oil from escaping.
In addition, the valve cover often holds the spark plug tube seals. These are small rubber rings. They prevent oil from leaking into the spark plug wells. If oil enters the spark plug tubes, the engine may misfire. This is a serious issue. The valve cover also has a breather system. This allows pressure to escape from the crankcase. If the gasket fails, pressure can build up. This pressure can cause further leaks. Understanding this function helps you appreciate the repair. It is not just about stopping a leak. It is about preserving the engine’s health.
Identifying Gasket Valve Cover Leak Symptoms
Spotting a leak early can save you money. There are several clear signs. First, check for visual evidence. Look at the engine. Do you see fresh oil on the sides? Oil should stay inside the engine. If it is on the outside, the gasket might be bad. The leak usually starts small. It begins as a seep. You might see a wet spot near the edge of the valve cover.
Second, pay attention to smells. Burning oil has a distinct odor. It is acrid and thick. If the valve cover leaks, oil often drips onto the hot exhaust manifold. The manifold gets extremely hot. Consequently, the oil burns off instantly. This creates smoke and a strong smell. You might smell it inside the car cabin. This is a safety concern.
Third, watch your oil levels. A bad leak causes rapid oil loss. You might find yourself topping off the oil frequently. Check the dipstick regularly. If the level drops quickly, suspect a leak. However, not all oil loss is due to the valve cover. The oil pan gasket is another common culprit. You must locate the source.
Fourth, look for smoke from under the hood. If the leak is severe, oil pools on the exhaust. This can produce visible smoke. It is alarming to see smoke while driving. Pull over immediately if this happens. It poses a fire risk. Therefore, addressing these symptoms quickly is vital. Do not ignore them. They indicate that the engine is losing its seal.
Essential Tools and Safety Gear
Preparation is the key to a successful repair. You cannot work without the right tools. First, gather your basic hand tools. You will need a socket set. Metric sockets are common on most engines. You will also need a ratchet and extension bars. A torque wrench is absolutely necessary. We will discuss why later. Screwdrivers are also useful. Some covers use bolts, while others use screws.
Next, you need cleaning supplies. The old gasket material must be removed completely. A plastic scraper is best. It removes the residue without scratching the metal. Metal scrapers can damage the sealing surface. You will also need a degreaser. Brake cleaner or engine degreaser works well. This cleans the oil and grime from the surface. Additionally, grab some clean rags or paper towels. You will need them to wipe up excess oil.
Safety gear is equally important. Wear safety glasses. Oil and debris can splash into your eyes easily. Mechanics gloves are also recommended. They protect your hands from sharp edges. The engine bay has many hot and sharp parts. Furthermore, gloves keep your hands clean. Engine oil contains chemicals that are bad for your skin. It is best to avoid prolonged contact.
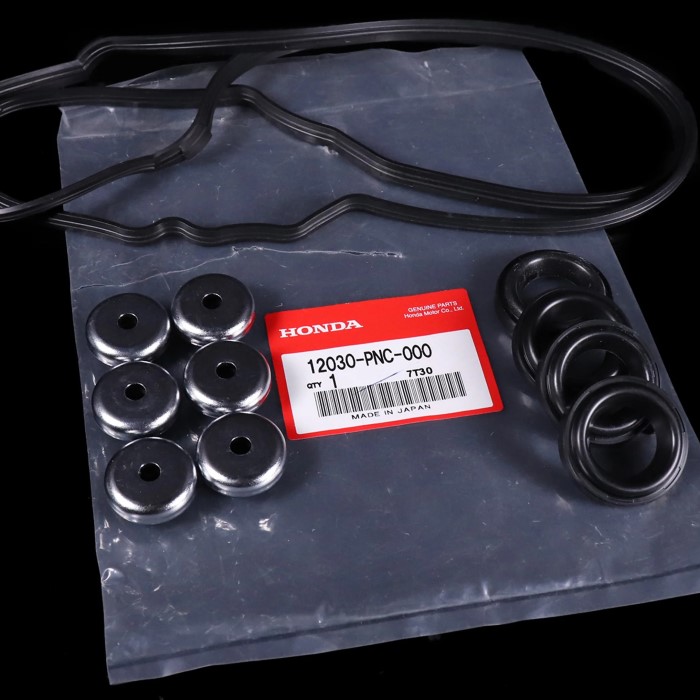
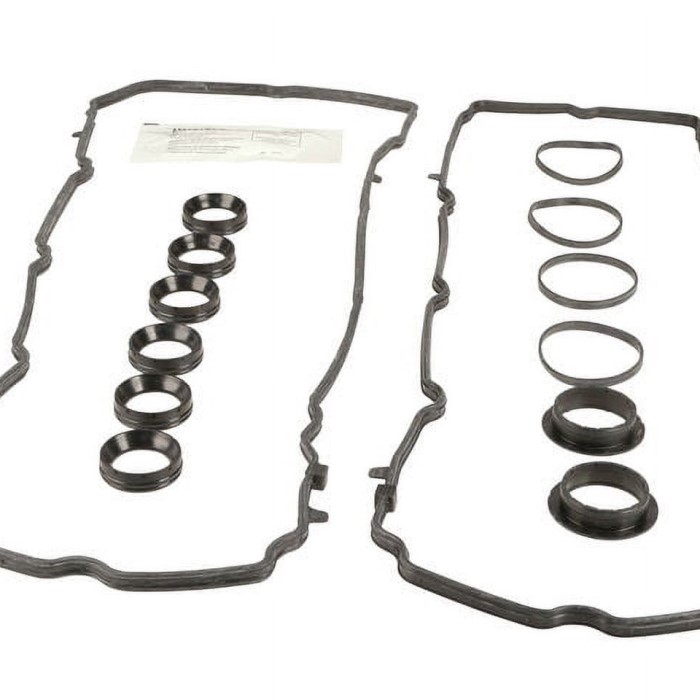
Finally, ensure you have the correct replacement parts. Do not start the job until you have the new gasket. Check that it matches your engine. Some gaskets come with spark plug tube seals. Others do not. Decide if you need to replace the tube seals. Buying a complete kit is usually the best option. This ensures you have everything you need before you begin.

Selecting the Best Gasket Valve Cover Materials
Not all gaskets are created equal. Manufacturers use different materials. Choosing the right one affects longevity. The most common material is rubber or silicone. These are often called molded rubber gaskets. They are flexible and durable. They create an excellent seal. Most modern cars use this type. They are easy to install. Furthermore, they resist oil degradation well.
Another type is the cork gasket. Cork was very common in older vehicles. It is inexpensive. However, it is brittle. It can crumble if over-tightened. Moreover, cork is susceptible to oil soaking. Over time, it becomes soft and weak. It is rarely used in modern high-performance engines. Some mechanics use cork-rubber blends. These offer better durability than pure cork. They are a middle-ground option.
Then there are synthetic rubber compounds. Viton is a high-performance material. It withstands high temperatures. It is excellent for turbocharged engines. Engines that run hotter need better gaskets. Therefore, check your owner’s manual. It specifies the recommended material.
Consider the brand as well. OEM (Original Equipment Manufacturer) parts are always a safe bet. They fit perfectly. Aftermarket brands vary in quality. Read reviews before buying. A cheap gasket might fail in a year. A high-quality one can last a decade. Investing in quality now saves time later. It prevents you from doing the job twice. Therefore, prioritize quality over price. Your engine deserves the best protection.
Step-by-Step Removal Process
Now, you are ready to begin the work. First, ensure the engine is cool. Never work on a hot engine. You could suffer severe burns. Open the hood and secure it. Disconnect the negative battery terminal. This prevents electrical shorts. It is a vital safety step.
Next, locate the valve cover. It is on top of the engine. You might need to remove other parts to access it. These could include the air intake tube or ignition coils. Unbolt the ignition coils carefully. Label the spark plug wires if necessary. This ensures you connect them back in the correct order. Modern engines often have coil packs directly on the plugs. Remove the bolts holding them.
Then, remove the valve cover bolts. Loosen them gradually. Start from the outside and work your way in. This prevents warping the cover. Place the bolts in a safe container. You do not want to lose them. Gently lift the valve cover off. It might stick due to old oil. Tap it lightly with a rubber mallet. Do not pry it with a screwdriver. Prying can damage the sealing surface.
Once the cover is off, inspect it. Look for sludge inside. This indicates poor oil change habits. Also, check the mating surface on the engine. It must be perfectly clean. You are now halfway through the job. Take your time with each step. Rushing leads to mistakes. The removal process sets the stage for a good seal.
Installation and Torque Specifications
Cleanliness is the most important part of installation. Use your plastic scraper. Remove all traces of the old gasket. The surface must be bare metal. Wipe it down with degreaser. Use a lint-free rag. Even a small piece of old gasket can cause a leak.
Now, place the new gasket onto the valve cover. Some gaskets press into a groove. Others need sealant. Check the instructions. If sealant is required, apply a thin bead. Do not use too much. Excess sealant can end up in the engine. It can clog oil passages. This causes catastrophic engine failure. Therefore, be precise and sparing.
Carefully lower the valve cover onto the engine. Align the bolt holes. Hand-tighten the bolts first. Do not use the ratchet yet. This ensures the cover sits flat. Now, use your torque wrench. This step is critical. Gasket valve cover torque specifications exist for a reason. Over-tightening crushes the gasket. This causes leaks. Under-tightening means the cover is loose. This also causes leaks. Consult the manual for the torque value. It is usually measured in foot-pounds or inch-pounds. Tighten the bolts in a crisscross pattern. Start from the center and move outward. This distributes the pressure evenly.
Finally, reinstall the other components. Put the ignition coils back. Reconnect the air intake. Double-check all connections. Reconnect the battery. You are now ready to test the repair.
Testing and Final Checks
The job is complete. However, you must verify your work. Start the engine. Let it idle for a few minutes. Do not rev the engine yet. Allow the oil pressure to build up. Watch the valve cover area closely. Use a flashlight. Look for any signs of seepage. A proper seal should be completely dry.
Next, take the car for a short test drive. Drive gently at first. Then, drive normally to warm up the engine. The engine needs to reach operating temperature. Metal expands when hot. This tests the seal under real conditions. Drive for about fifteen minutes.
After the drive, park the car on a clean surface. Let it sit for a while. Check for drops of oil on the ground. Inspect the engine again. If you see no leaks, the job is a success. If you see a leak, you may need to tighten the bolts slightly. Sometimes, the bolts settle after installation. Re-torquing them can solve the issue. However, do not overdo it.
Also, check the oil level again. Top it off if necessary. The repair process might have lost some oil. Keep an eye on the oil level over the next few days. It should remain stable. If it drops, investigate further. But in most cases, a proper repair solves the problem permanently. You have successfully maintained your vehicle.
Frequently Asked Questions
Is a valve cover gasket leak serious?
Yes, it can be serious. While the engine will not explode immediately, the leak gets worse. Low oil levels damage the engine. Leaking oil can start fires if it hits the exhaust. It also damages rubber components like hoses. Therefore, you should fix it promptly.
How much does it cost to replace a valve gasket cover?
The cost varies by vehicle. A mechanic may charge between 200 500. The part is cheap, usually under $50. The labor makes up most of the cost. If you do it yourself, you save significantly. You only pay for the parts and tools.
What is a gasket valve cover?
It is a seal. It sits between the valve cover and the engine cylinder head.
Is it bad to drive a car with a bad valve cover gasket?
It is not recommended. You risk engine damage due to low oil. You also risk fire hazards from burning oil. Furthermore, a leaking gasket can foul spark plugs. This causes the engine to run poorly. It is best to replace it as soon as possible.
Conclusion
Performing maintenance on your own vehicle is rewarding. It saves you money and builds your skills. Replacing a gasket valve cover is a perfect project for beginners. It is straightforward and requires basic tools. You have learned to identify the problem. We have covered the entire process of gasket valve cover replacement. Recognizing gasket valve cover leak symptoms early prevents damage. Following the gasket valve cover installation instructions ensures a proper seal. Selecting the best gasket valve cover materials guarantees longevity. Finally, adhering to gasket valve cover torque specifications prevents future issues. Now, you can open the hood with confidence. Keep your engine clean and your oil inside where it belongs. Enjoy the satisfaction of a job well done.
Leave a Reply