Every car owner eventually faces exhaust system repairs. The catalytic converter is a critical component for your vehicle. It reduces harmful emissions before they exit the tailpipe. However, this part can fail over time due to age or damage. When it fails, you need a solution quickly. Many drivers worry about the high prices at repair shops. Therefore, a DIY approach is a popular alternative. This guide focuses on the replacement catalytic converter. We will explore every aspect of this repair job.
You need to understand the replacement catalytic converter cost before you start. We will highlight the best replacement catalytic converter for cars available today. Furthermore, we will discuss the specific needs for a replacement catalytic converter for trucks. Our replacement catalytic converter installation guide will walk you through the process. Most importantly, we will ensure you find a replacement catalytic converter for emission compliance. Let’s dive into the world of exhaust repair and save you money.
Recognizing the Symptoms of a Failing Converter
Identifying a problem early saves time and money. Your vehicle often tells you when something is wrong. You must pay attention to these signals. One of the most obvious signs is a Check Engine Light. The onboard computer monitors the exhaust system closely. It detects inefficiency in the catalyst. Consequently, it triggers the warning light on your dashboard. You should use an OBD-II scanner to read the code. Codes like P0420 often point directly to the catalyst. However, this code can also indicate other issues. Therefore, further diagnosis is always necessary.
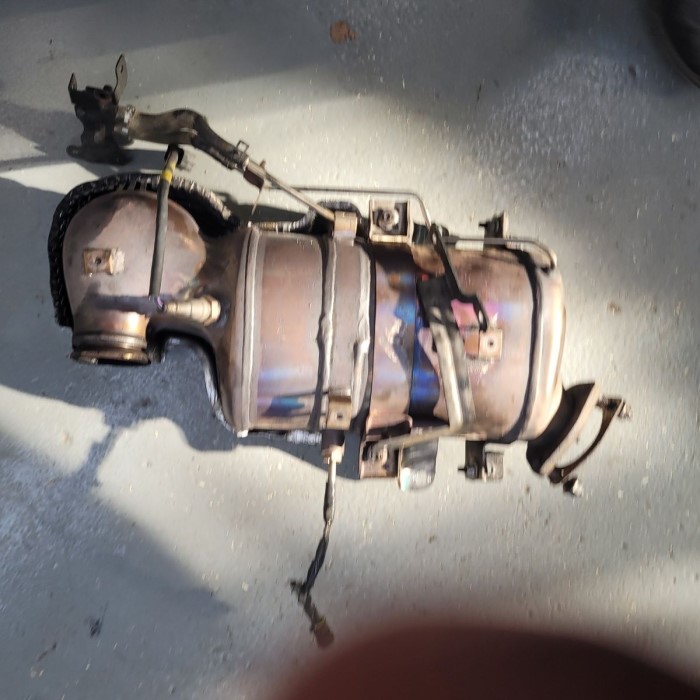
Physical symptoms are also very common. You might hear a rattling noise coming from under the car. This sound usually happens when the internal structure breaks apart. The ceramic honeycomb inside the converter can fracture. Then, the pieces rattle against the metal shell. This noise is distinct and loud. Furthermore, you may notice a drop in performance. The engine might struggle to accelerate. It could feel sluggish or stall unexpectedly. A clogged converter restricts the exhaust flow. This backpressure prevents the engine from breathing properly. As a result, power decreases significantly.
Smell is another powerful indicator. A failing converter often produces a sulfur odor. This smell resembles rotten eggs. It occurs when the converter cannot process hydrogen sulfide correctly. Additionally, you might see dark smoke from the tailpipe. This smoke indicates unburnt fuel. It means the engine runs too rich. A rich mixture can overheat and destroy the converter. If you notice any of these signs, act immediately. Driving with a bad converter damages other engine parts. It can ruin your oxygen sensors. It can even cause a fire hazard in extreme cases. Prompt diagnosis protects your investment.
Understanding the Costs and Budgeting
Price is a major concern for most drivers. Professional repairs can be incredibly expensive. Shops charge high labor rates for exhaust work. Furthermore, they often markup the parts significantly. Therefore, a DIY repair offers substantial savings. You only pay for the part and your time. However, the part itself is not always cheap. Precious metals like platinum and palladium coat the internal structure. These metals drive the market price up. Consequently, even a direct-fit part costs money. We must analyze the replacement catalytic converter cost realistically.
Several factors influence the final price. The type of vehicle matters most. Luxury cars often require more expensive units. Trucks need larger converters to handle higher emissions. Furthermore, the brand of the part changes the price. OEM parts are usually the priciest option. They come directly from the vehicle manufacturer. Aftermarket parts are often more affordable. You can find the best replacement catalytic converter for cars among aftermarket brands. Brands like MagnaFlow and Walker offer great value. They meet OEM specifications without the heavy price tag. Therefore, research is key to finding a deal.
You should also consider long-term value. A cheap, low-quality part might fail quickly. It could save you money now but cost more later. Therefore, investing in a high-quality unit is wise. Look for parts with a longer warranty. Some manufacturers offer 5-year or even lifetime warranties. This protects your purchase. Additionally, check for rebates or tax incentives in your area. Some states offer help for emission repairs. Budgeting involves more than the sticker price. Factor in tools if you do not own them. You might need a saw or a wrench set. Plan your budget carefully to avoid surprises.
Choosing the Right Part for Your Vehicle
Selection is critical for a successful repair. You cannot just buy any universal part. The converter must match your specific vehicle. First, check your vehicle’s emissions legal status. Some states follow California CARB standards. Others follow Federal EPA standards. You must buy a compliant part. Installing a non-compliant part is illegal. It will fail a state inspection instantly. Therefore, look for a replacement catalytic converter for emission compliance. Check the product description carefully. It should list the approved vehicle models.
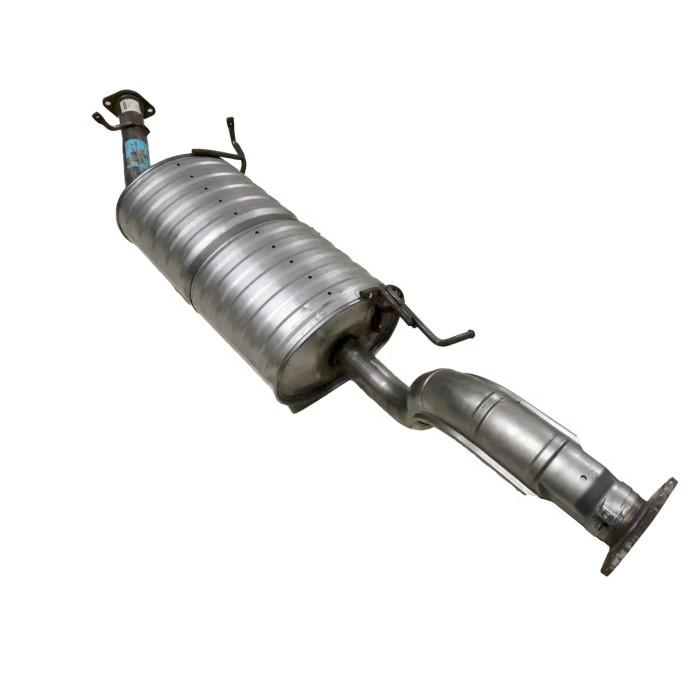
Next, decide between direct-fit and universal types. A direct-fit converter matches your car’s dimensions exactly. It has the correct flanges and pipe lengths. Consequently, installation is much easier. You simply bolt it into place. This is the best choice for beginners. However, direct-fit units cost a bit more. Universal converters are cheaper. They are just the shell of the converter. You must cut your old pipes and weld the new one in. This requires advanced skills and tools. Most DIYers prefer the direct-fit option. It reduces the labor time significantly.
Consider your vehicle type carefully. A sedan has different needs than a heavy-duty pickup. You need a specific replacement catalytic converter for trucks. Trucks produce more exhaust volume. Their converters are built to handle higher heat and flow. Installing a car converter on a truck will fail. It will clog quickly or overheat. Always verify the part number with the manufacturer. Use your VIN to ensure compatibility. This step prevents costly returns. Finding the best replacement catalytic converter for cars or trucks takes research. Read reviews from other customers. Look for comments on fitment and longevity. A well-chosen part performs perfectly for years.
Essential Tools and Safety Gear
Preparation makes the job smoother. You cannot install a converter with just your hands. You need specific tools to handle metal pipes. First, gather your safety equipment. Working under a car is dangerous. You need a sturdy floor jack and jack stands. Never rely on just the jack. The stands support the vehicle if the jack slips. Furthermore, wear safety glasses. Metal shards can fly when you cut pipes. Gloves protect your hands from sharp edges and heat. Safety is the first priority.
You will need a socket set. The bolts on the exhaust flange are often rusty. They require significant force to remove. A breaker bar helps with stuck bolts. Penetrating oil is also essential. Spray the bolts hours before you start. This liquid loosens the rust. It makes removal much easier. Sometimes, the bolts are too rusted to turn. You might need to cut them off. A reciprocating saw is perfect for this task. It cuts through metal bolts and pipes quickly. Have extra blades ready. Metal dulls blades fast.
If you choose a universal weld-on part, you need a welder. A MIG welder is the standard choice. You also need welding wire and gas. Welding requires skill and practice. If you are new to welding, practice on scrap metal first. For direct-fit installations, a saw might still be necessary. Sometimes, the old pipes are damaged. You might need to cut a section out. A hacksaw works for small cuts. However, a power saw saves time. Finally, have a torque wrench ready. You must tighten the bolts to the correct spec. Over-tightening snaps bolts. Under-tightening causes leaks. Gather these tools before you begin.
Preparing Your Vehicle for Installation
Start by positioning the car safely. Park it on a flat, concrete surface. A driveway is usually fine. However, ensure the ground is level. Engage the parking brake firmly. Block the rear wheels for extra security. Then, lift the front of the car. Use the floor jack under the designated lift points. Refer to your owner’s manual for these spots. Lift it high enough to slide under comfortably. Place the jack stands under the frame rails. Lower the jack until the car rests on the stands. Shake the car gently to test stability. It must not move.
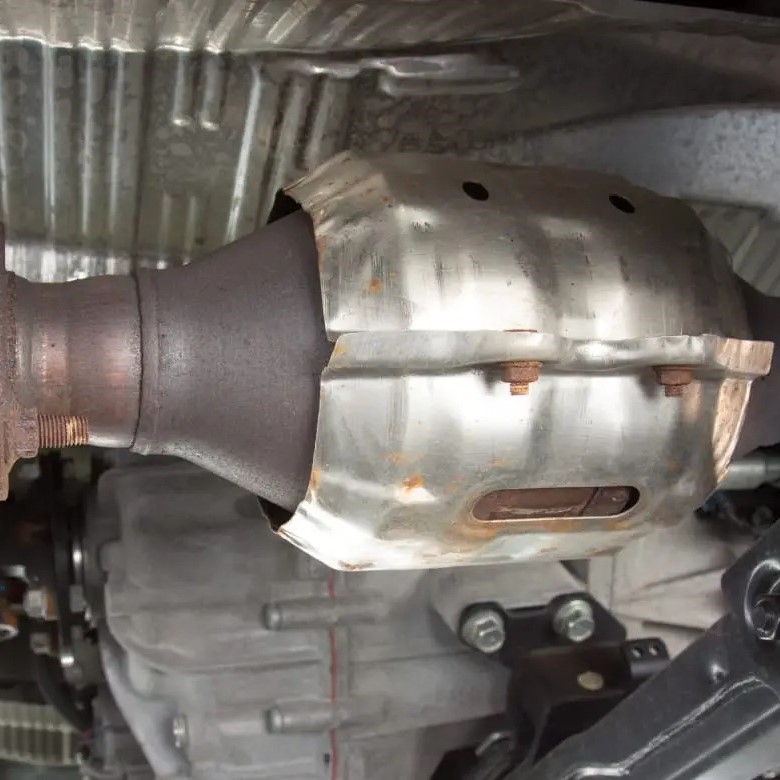
Locate the old catalytic converter. It sits underneath the car in the exhaust system. Trace the pipes from the engine to find it. Spray penetrating oil on all the connection bolts. Let the oil soak for at least 15 minutes. This breaks down the rust bond. If you plan to cut the pipes, mark the cut lines now. Use a marker to draw straight lines. Ensure you leave enough room for the new part to fit.
Disconnect the oxygen sensors. Most modern converters have sensors screwed into them. You must unplug the electrical connectors first. Trace the wires back to the harness. Unclip them gently. Do not pull on the wires. Then, use a socket to unscrew the sensors. Be careful not to damage the threads. If the sensors are old, consider replacing them too. A bad sensor can ruin a new converter. Put the sensors aside in a safe place. Now, the physical removal process begins. The car is ready for the operation.
Step-by-Step Removal of the Old Unit
The removal process can be tough. Rust makes exhaust parts stick together. Start by loosening the flange bolts. These bolts connect the converter to the exhaust pipes. Use your breaker bar and socket. Apply steady pressure. If the bolt does not move, do not force it. It might snap. Instead, heat the bolt with a torch. Heat expands the metal and breaks the rust. Then, try turning it again. If it still fails, cut the bolt head off with the saw.
Once the bolts are loose, remove them completely. Separate the flange connections. The pipes might still stick together due to corrosion. Tap the pipe gently with a hammer. This vibration helps loosen the seal. Do not hit the converter itself. The ceramic inside is fragile. If the flange does not separate, pry it with a screwdriver. Work patiently until the pipes come apart. Support the muffler and tailpipe. Do not let them hang freely. They can bend or break.
If your old converter is welded in, you must cut it. Use the reciprocating saw. Cut the inlet and outlet pipes. Cut straight and clean lines. Remove the old unit from the car. It might be heavy. Lift it out carefully. Check the remaining pipes for damage. The ends might be rusty or deformed. You might need to trim them back. Ensure the new converter will fit perfectly into the gap. Clean the flange surfaces with a wire brush. Remove all old gasket material and rust. A clean surface ensures a leak-free seal.
Installing the New Replacement Catalytic Converter
Now, you can install the new part. Take your replacement catalytic converter out of the box. Inspect it for shipping damage. Ensure the arrow on the shell points towards the rear. This arrow indicates the flow direction. Installing it backwards will fail. It cannot process the exhaust correctly. If you have a direct-fit unit, slide it into place. Line up the flanges with the existing pipes. This step is usually straightforward. The fit should be snug but not forced.
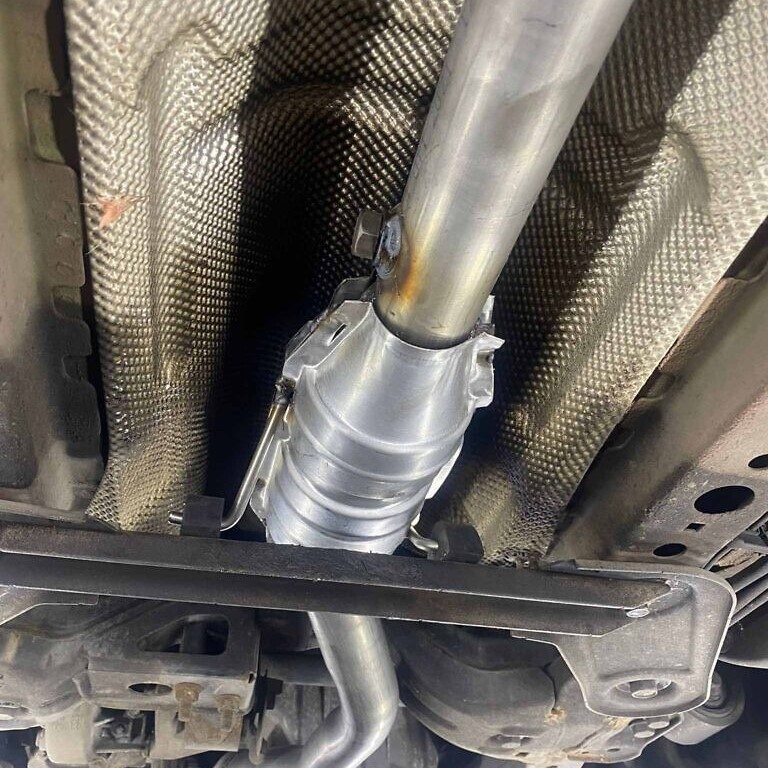
Insert the new bolts into the flanges. Always use new bolts and nuts. Old rusty bolts are weak. They should not be reused. Tighten the bolts by hand first. This aligns the parts. Then, use your wrench to tighten them further. Follow a cross-pattern for tightening. This distributes the pressure evenly. It prevents the flange from warping. Use your torque wrench for the final tightening. Check the specs for your vehicle. Usually, exhaust bolts need about 30-40 foot-pounds. Do not over-tighten them.
If you are welding, position the new unit carefully. Ensure the gaps are equal on both sides. Tack weld the converter in four spots. These small welds hold it in place. Check the alignment one last time. Then, weld the entire circumference of the pipe. Create a strong, continuous bead. This seals the pipe permanently. No exhaust gas should leak. After welding or bolting, reinstall the oxygen sensors. Screw them in tightly. Plug the electrical connectors back in. Ensure the wires route away from hot pipes. The installation is now complete.
Post-Installation Checks and Legal Compliance
Lower the vehicle back to the ground. Start the engine immediately. Listen for any unusual noises. A hissing sound indicates an exhaust leak. If you hear a leak, turn the car off. Lift it again and check the connections. Tighten the bolts or fix the weld. The system must be completely sealed. Let the engine run for a few minutes. Watch the dashboard for warning lights. The Check Engine Light might stay on initially. The computer needs time to reset.
Drive the car for a test run. Accelerate gently and check the performance. The engine should feel responsive. There should be no rattling sounds. Stop the car and inspect the work again. Check for smoke or smells. The new converter should smell neutral. It should not produce smoke. Your DIY repair is successful if everything works. You have saved money and learned a skill. This is a great achievement for any owner.
Remember the legal aspects. You installed a replacement catalytic converter for emission compliance. Keep the paperwork for the part. Some states require proof of purchase for inspection. The part number must match the vehicle registration. You may need to fill out a warranty card. This protects your rights if the part fails. Emission laws are strict. Federal law prohibits the removal or tampering with converters. You must install a certified EPA or CARB part. DIY repair is legal if done correctly. Avoid “test pipes” or dummy converters. Those are illegal on public roads. Your repair is safe and legal.
Frequently Asked Questions
Is it worth replacing my catalytic converter?
Yes, it is worth the investment. A bad converter hurts fuel economy and power. It also prevents you from passing state inspection. Furthermore, driving with a failed unit can damage the engine. The cost of the part is high, but the value is higher. You protect your vehicle and the environment. A DIY installation makes it much more affordable.
Can I still drive with a bad catalytic converter?
You can drive for a short time. However, it is not recommended. The car will lose power and use more gas. In severe cases, the converter can clog completely. This stops the engine from running. It can also overheat and cause a fire. You should fix the issue as soon as possible to avoid risks.
How to cheaply fix a catalytic converter without replacing it?
There is no true cheap fix. You cannot repair the internal ceramic. Some “cleaners” claim to wash the catalyst. They rarely work on seriously damaged units. Sometimes, the issue is just a bad sensor. Replacing the oxygen sensor might fix the Check Engine Light. This is much cheaper. However, if the ceramic is broken, you must replace it.
Conclusion
Exhaust repair is a manageable task for the average driver. You do not always need a professional mechanic. This guide provided all the necessary information. We discussed the vital role of the replacement catalytic converter. You now understand the factors affecting replacement catalytic converter cost. We identified the best replacement catalytic converter for cars and trucks. You followed our detailed replacement catalytic converter installation guide step by step. We also stressed the need for a replacement catalytic converter for emission compliance. By doing this yourself, you saved significant labor costs. You also maintained your vehicle’s health and performance. Take pride in your work. Your car is cleaner, safer, and ready for the road. Always drive with a properly functioning exhaust system.
Leave a Reply