A Simple Introduction to Bleeder Valves
When you work on your vehicle’s braking system, the brake bleeder valve plays a small but vital role. This tiny component allows air and old fluid to escape when you bleed the brakes. Many drivers overlook it, but choosing the right one can save time and prevent leaks. First, consider brake bleeder valve replacement if your current valve is rusted or stripped. You also need to know how to use a brake bleeder valve correctly. Different vehicles require different brake bleeder valve sizes and types.
For example, some cars use metric threads, while others use standard ones. You should also invest in proper brake bleeder valve tools and kits. A good kit makes the job easier and cleaner. Overall, a brake bleeder valve for automotive maintenance is a small investment that improves safety. Without it, you cannot remove trapped air from the brake lines. Air in the lines leads to a spongy pedal and poor braking performance. Therefore, understanding this part is the first step toward proper brake care.
Why This Small Part Matters
The brake bleeder valve sits on top of each brake caliper or wheel cylinder. Its only job is to release air and old brake fluid during a bleed process. However, if the valve fails, you cannot get a firm pedal. Air bubbles are compressible, so they reduce hydraulic pressure. Consequently, your brakes feel soft and unresponsive. Moreover, a corroded or damaged valve can leak fluid. That means you lose brake fluid over time, which increases the risk of brake failure. For these reasons, you must choose a valve that matches your vehicle’s specifications.
Additionally, many DIYers make the mistake of reusing an old valve. They assume it will work fine. But rust, debris, or thread damage can cause problems later. So, do not skip this part. Instead, inspect the valve carefully during every brake job. If you see any signs of wear, replace it immediately. Also, note that the valve design varies. Some have a rubber cap to keep out dirt. Others have a special thread pattern for specific brands. Therefore, always check your repair manual before buying a new one. In short, this small part deserves your attention because it directly affects your safety on the road.
Key Selection Criteria
When you shop for a brake bleeder valve, several factors matter. First, consider the thread size and pitch. Most vehicles use either M10x1.0 or M10x1.5 threads. However, some European cars use different sizes. To avoid mistakes, measure the old valve or check your service manual. Second, look at the material. Brass valves resist corrosion better than steel. They also last longer in humid environments. Steel valves are stronger but can rust. Third, check the valve type. Standard bleeder valves have a simple screw design.
Others have a built-in check ball to prevent air from re-entering. That feature is helpful for one-person bleeding. Fourth, think about the valve length. A longer valve may interfere with the wrench, while a short one may be hard to reach. Fifth, consider the hex size. Common sizes are 8mm, 10mm, and 11mm. You need a wrench that fits snugly. Sixth, verify the pressure rating. Most valves handle up to 2,000 psi, which is enough for normal braking. However, high-performance brake systems may need a stronger valve. Finally, check if the valve comes with a dust cap. A cap keeps out grime and prevents the threads from seizing. By evaluating these criteria, you can pick a valve that works reliably for years.
Exploring Different Sizes and Types
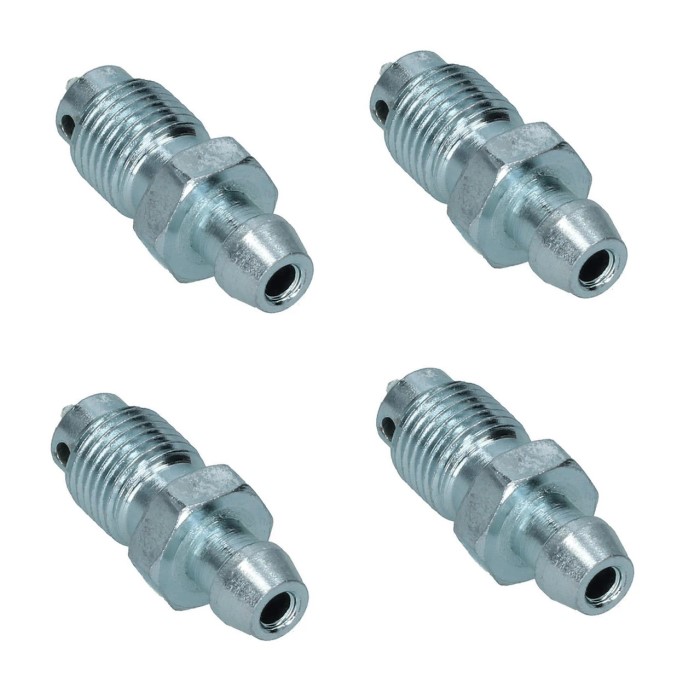
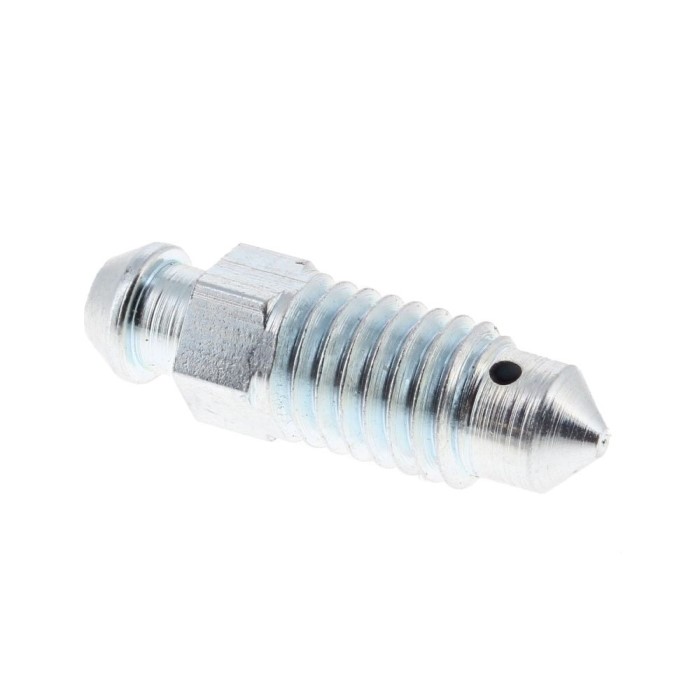
Brake bleeder valves come in many sizes and designs. The most common thread sizes are M10x1.0 and M10x1.5. However, you may also find M8, M12, or even 1/8 NPT threads. Some older American cars use 3/8-24 threads. Meanwhile, Japanese and European vehicles often use metric threads. To identify your size, use a thread gauge or compare with a known sample. Another type is the speed bleeder valve. It contains a one-way check valve inside. That allows you to bleed brakes without pumping the pedal and then opening the valve. You simply open the valve, pump the pedal, and close it. This type is popular for DIY mechanics working alone. There are also bleeder valves with a built-in rubber seal.
These reduce the chance of leakage. Some high-end valves have a protective coating to prevent rust. Additionally, some manufacturers offer valves with a longer stem to provide extra clearance. The hex head size also varies. Common sizes are 8mm, 10mm, and 11mm. You need a matching wrench or socket. If you use the wrong hex size, you may strip the valve. Moreover, some valves have a hole for a wire lock. This prevents accidental loosening during vibration. Overall, understanding the range of sizes and types helps you make an informed choice.
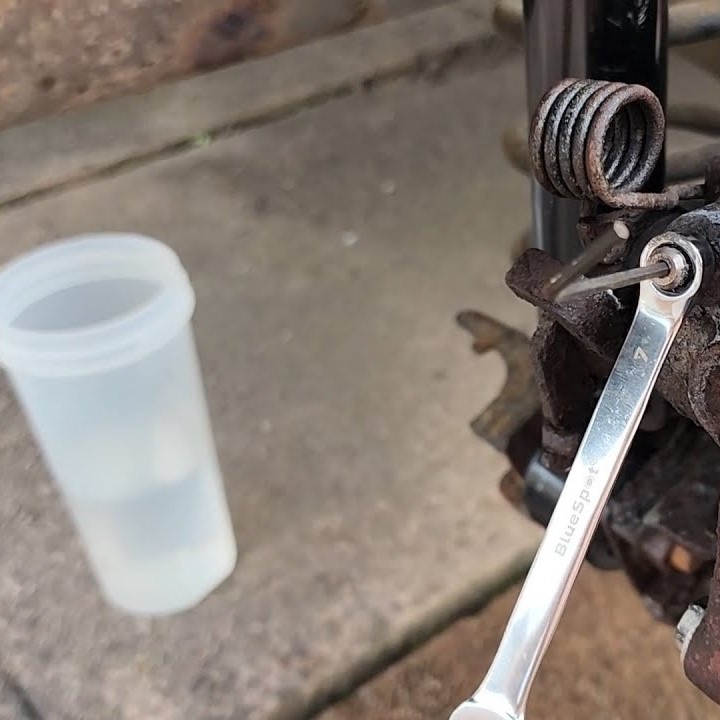
Necessary Tools and Kits
To use a brake bleeder valve effectively, you need the right tools. A basic set includes a box-end wrench or a specialized bleeder wrench. These wrenches are designed to grip the valve without rounding it. They also have a slot to allow the fluid to flow out. Another essential tool is a clear hose. You attach it to the valve nipple to direct fluid into a container. This prevents spills and helps you see air bubbles. A catch bottle is also useful. Many kits include a one-way valve or a vacuum pump. The vacuum pump creates suction at the bleeder valve, making the job faster. Another popular kit is the pressure bleeder. It pressurizes the master cylinder reservoir. Then you simply open each valve, and fluid flows out automatically.
This method is efficient and requires only one person. Additionally, you may need a flare nut wrench for stubborn valves. Sometimes the valve is seized, so a penetrating oil like WD-40 can help. Always keep a torque wrench handy to avoid overtightening. Overtightening can crack the valve body. Also, consider a thread chaser to clean the threads before installation. For professional results, invest in a complete brake bleeder kit. Many kits include multiple valve sizes, adapters, and hoses. With the right tools, bleeding brakes becomes a straightforward task.
Step-by-Step Bleeding Guide
Now let’s discuss how to use a brake bleeder valve correctly. First, gather your tools: a wrench, clear hose, catch bottle, and fresh brake fluid. Then, locate the bleeder valve on the caliper or wheel cylinder. It usually has a rubber dust cap. Remove the cap and clean the area around the valve. Dirt can enter the system and cause damage. Next, attach the clear hose to the valve nipple. Place the other end into the catch bottle with a small amount of brake fluid. The fluid prevents air from being sucked back. Then, have an assistant pump the brake pedal several times and hold it down. Open the bleeder valve with the wrench. Watch the fluid and bubbles flow through the hose. Close the valve before the assistant releases the pedal.
Repeat this process until no more bubbles appear. If you work alone, use a one-person bleeder kit. Alternatively, use a pressure bleeder to speed up the process. After finishing each wheel, check the master cylinder fluid level. Add fresh fluid as needed to prevent the reservoir from running dry. Finally, tighten the valve to the manufacturer’s torque specification. Replace the dust cap. Test the brake pedal feel. It should be firm and responsive. If it still feels spongy, repeat the process on all wheels. Remember to bleed the wheel farthest from the master cylinder first. This sequence ensures all air is removed.
Knowing When to Replace
You should consider brake bleeder valve replacement in several situations. First, if the valve is rusted or corroded, it may leak or break. A broken valve can be very difficult to remove. Second, if the hex head is rounded off, you cannot tighten or loosen it properly. Third, if the threads are damaged, the valve will not seal correctly. This leads to fluid leaks and air entry. Fourth, replace the valve if it has a damaged rubber cap. The cap protects the valve from dirt. Without it, debris can clog the valve.
Fifth, when you upgrade your brake system, you may need different valve sizes. For example, big brake kits often come with new calipers that have different bleeder valves. Sixth, if you notice brake fluid seeping from the valve area, replace it immediately. Even a small leak can cause a pressure loss. Seventh, after many years of use, the valve may become brittle. It is cheap to replace, so do not take risks. Always use a valve that matches your vehicle’s specifications. Also, use anti-seize compound on the threads during installation. This prevents future seizing. By replacing worn valves promptly, you maintain a safe braking system.
Common Errors and Solutions
Many DIYers make mistakes when dealing with a brake bleeder valve. One common error is overtightening the valve. This can strip the threads or crack the caliper. Always use a torque wrench. Another mistake is using the wrong size wrench. This rounds off the hex head, making removal impossible. Use a tight-fitting box-end wrench or a specialty bleeder wrench. A third error is forgetting to open the master cylinder cap during bleeding. The cap creates a vacuum that hinders fluid flow. Loosen the cap but leave it in place to prevent spills. Fourth, some people reuse old brake fluid. Old fluid absorbs moisture and lowers the boiling point. Always use fresh fluid from a sealed container. Fifth, bleeding in the wrong order.
The correct order is usually right rear, left rear, right front, left front, but check your vehicle’s manual. Sixth, failing to clean the valve area before opening it. Dirt can enter and damage the internal seals. Seventh, using too much force when removing a seized valve. Apply penetrating oil and let it sit for 15 minutes. Then use a slight back-and-forth motion. If the valve still won’t budge, heat it with a torch carefully. Finally, do not forget to test the brakes after the job. Pump the pedal several times with the engine off. Then start the engine and check for leaks. By avoiding these errors, you ensure a successful brake bleeding session.
Frequently Asked Questions
What is a brake bleeder valve?
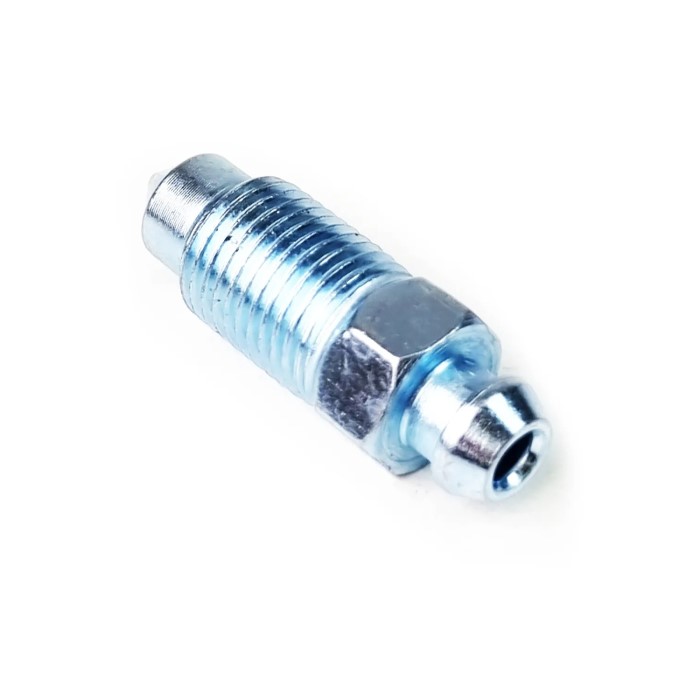
A brake bleeder valve is a small screw-like component located on each brake caliper or wheel cylinder. Its purpose is to release trapped air and old brake fluid from the hydraulic system. When you open the valve, air and fluid exit through a small port. This allows fresh fluid to take their place. Without this valve, you cannot effectively bleed the brakes. The valve typically has a hex head for a wrench and a rubber dust cap for protection.
How to bleed brakes with bleeder valve?
First, attach a clear hose to the valve nipple. Place the other end in a catch bottle with some brake fluid. Then, have an assistant pump the brake pedal several times and hold it down. Open the valve with a wrench to let fluid and air escape. Close the valve before the assistant releases the pedal. Repeat until no bubbles appear. Then move to the next wheel in the correct sequence. Always keep the master cylinder reservoir full.
Is a brake bleeder necessary?
Yes, it is absolutely necessary. Air in the brake lines reduces hydraulic pressure, causing a spongy pedal and poor stopping power. The bleeder valve provides a controlled exit for that air. Without it, you cannot remove air from the system. Therefore, a functioning bleeder valve is essential for safe brake maintenance.
Can bleeder valves be replaced?
Yes, they can be replaced easily. Most bleeder valves are threaded into the caliper or wheel cylinder. You can unscrew the old one and screw in a new one. Just make sure the thread size, pitch, and length match your vehicle. Apply a small amount of anti-seize compound to the threads to prevent future seizing. Replace them if they are rusted, damaged, or leaking.
Final Thoughts
Choosing the right brake bleeder valve ensures a smooth and safe bleeding process. Remember to always consider brake bleeder valve replacement when the old one shows wear. Learn how to use a brake bleeder valve properly to avoid common mistakes. Pay attention to brake bleeder valve sizes and types so you get a perfect fit. Invest in quality brake bleeder valve tools and kits to make the job efficient. Ultimately, a reliable brake bleeder valve for automotive maintenance is a small part that delivers big safety benefits.
Whether you are a weekend mechanic or a professional, taking the time to select the correct valve pays off. Your brakes will respond better, and you will drive with confidence. So, do not overlook this simple component. Check it regularly, replace it when needed, and always follow proper bleeding procedures. Your safety on the road depends on it.
Leave a Reply