Introduction
The 1960 Mini Cooper is more than just a car. It represents a revolution in automotive design. For vintage enthusiasts, restoring this model is a rewarding challenge. Before you start, you need solid knowledge. This article provides practical 1960 mini cooper restoration tips. We cover everything from the history of the 1960 mini cooper model to the price of a 1960 mini cooper for sale. We also include detailed 1960 mini cooper specifications and features and 1960 mini cooper performance reviews. These insights help you plan your project with confidence.
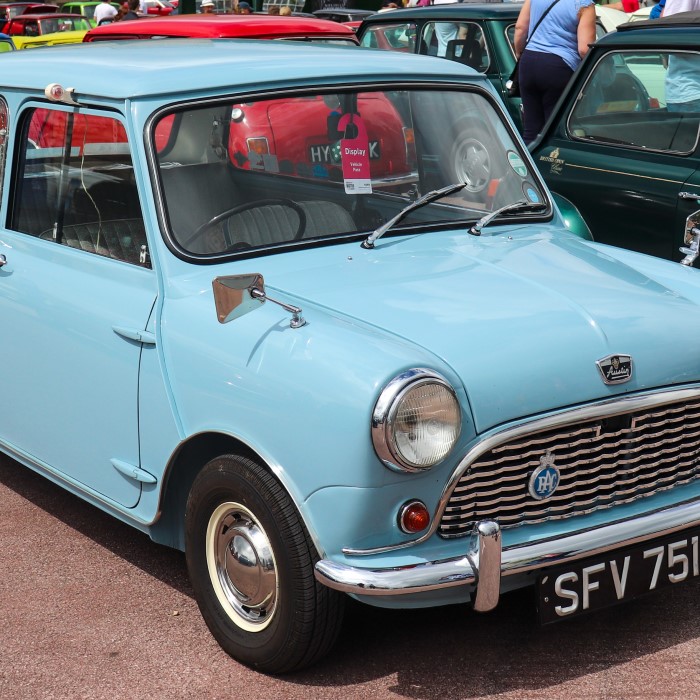
First, understand why this car matters. The original Mini Cooper debuted in 1961, but the 1960 model year is special. It marked the transition from the Austin Se7en to the iconic Cooper name. The car’s compact size and nimble handling won races. Many enthusiasts today seek to replicate that magic. However, restoration is not simple. Parts are rare. Knowledge is scattered. That is why we compiled this guide.
In the following sections, you will learn about chassis, engine, and interior work. We also discuss budgeting and sourcing parts. Each tip is based on real experience from seasoned restorers. Use this information to avoid common pitfalls. Remember, restoring a 1960 Mini Cooper takes patience. But the result is a timeless piece of motoring history.
Understanding the Unique Chassis of the 1960 Mini Cooper
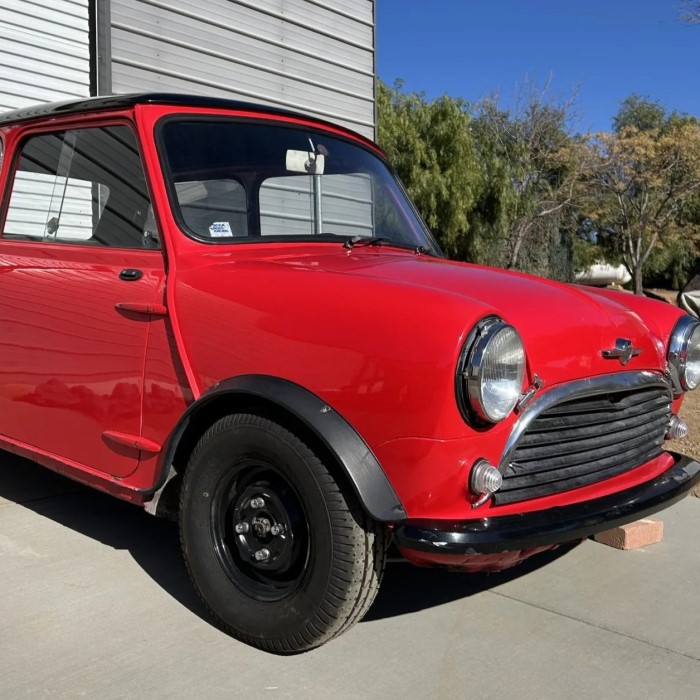
The 1960 Mini Cooper uses a monocoque chassis. This design means the body is the structure. There is no separate frame. Consequently, rust is the biggest enemy. Most surviving cars have rust in the floor pans, sills, and boot area. You must inspect these areas first.
For a successful restoration, start with the substructure. Remove all interior trim and carpets. Look for bubbling paint or holes. Use a magnet to check for filler. If you find extensive rust, do not panic. You can buy replacement panels. However, they are not always perfect. Many reproduction panels need adjustment. Expect to do metalwork.
Next, consider the subframes. The front and rear subframes bolt to the body. They often corrode around the mounting points. Replace them if they are weak. Aftermarket subframes are available. They also offer improved geometry. But they cost more.
Another critical area is the A‑panels and B‑panels. These connect the roof to the floor. Rust here compromises safety. Weld in new sections carefully. Use a spot welder if possible. Otherwise, plug welds work.
Finally, seal all joints after repairs. Use seam sealer to prevent moisture ingress. Paint the underside with a quality underbody coating. This step prolongs the chassis life. Remember, a solid shell is the foundation. Without it, everything else fails.
Engine and Powertrain Restoration
The engine in the 1960 Mini Cooper is the famous 997cc A-series. It produces around 55 horsepower. That may sound low today, but the car weighs only about 600 kilograms. Performance is lively. According to 1960 mini cooper performance reviews, the car handles corners beautifully.
When restoring the engine, decide how original you want to be. Some owners keep the stock setup for authenticity. Others upgrade for reliability. Common upgrades include a bigger carburetor, electronic ignition, and a better cooling system. These changes improve driveability without hurting value too much.
Start by stripping the engine completely. Check the bore wear. The A-series block is sturdy, but cylinders can be oval. Rebore if necessary. Then fit new pistons and rings. Replace the camshaft with a standard or mild performance grind. For the cylinder head, regrind the valves and replace guides.
The gearbox is equally important. The 1960 Mini Cooper uses a four-speed manual. Synchromesh on all gears is weak by modern standards. Rebuild the gearbox with new bearings, synchro rings, and gaskets. Some people swap in a rod-change gearbox from later models. That improves shift feel.
Don’t forget the cooling system. The engine is small, but it runs hot in traffic. Replace the radiator with a modern core. Add an electric fan. Also upgrade the thermostat housing to avoid leaks. Finally, use a quality oil with high zinc content. The flat tappets need protection.
Sourcing Parts for Your 1960 Mini Cooper Restoration
Finding parts for a 1960 Mini Cooper can be tricky. Many items are no longer in production. However, a dedicated community exists. You can find new old stock (NOS) parts from specialist dealers. Also, online forums and Facebook groups are valuable. Members often sell used parts in good condition.
Important parts to source early include body panels, weatherstripping, and interior trim. The boot lid and bonnet are common rust areas. Replacements are available from heritage suppliers. But check fitment before painting. Some panels need adjustment.
For mechanical parts, many items interchange with later Minis. For example, brake drums, wheel cylinders, and master cylinders are shared. You can buy them new. Suspension components like rubber cones are still made. Only genuine or high-quality aftermarket brands last.
Pay attention to unique parts. The 1960 Mini Cooper has specific dashboard, steering wheel, and badging. These are rare and expensive. Consider reproduction items. Some are accurate copies. However, original parts hold more value for concours restoration.
Finally, budget for shipping. Many suppliers are in the United Kingdom. International shipping adds cost and time. Plan ahead. Join the Mini community. Ask for recommendations. Trusted vendors include Minispares, Somerford Mini, and Mini Sport. They ship worldwide.
Bodywork and Paint: Achieving a Factory‐Fresh Finish
The body of the 1960 Mini Cooper is simple but requires skill to repair. Start by removing all paint and filler. Use a chemical stripper or media blasting. Sandblasting can warp thin panels. Instead, use soda blasting or dry ice blasting. These methods are gentler.
After stripping, assess the metal. Replace any panel with rust perforation. Weld new sections in with a MIG welder. Use a panel gap gauge to ensure consistent gaps. The original Mini body has many seams. Grind welds smooth. Then apply a thin layer of filler only where needed.
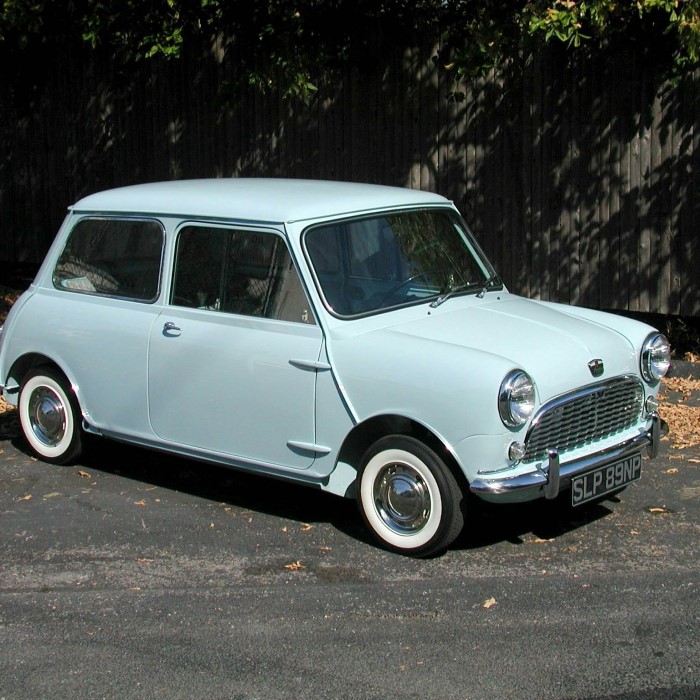
For the paint, choose the correct original color. The 1960 Mini Cooper came in colors like Old English White, Tartan Red, and Smoke Grey. Use a modern two‑pack paint for durability. But apply it over a high‑quality primer. Paint the engine bay and inside the boot as well. A complete respray looks best.
Don’t forget trim and brightwork. The chrome bumpers, grille, and window surrounds can be re‑plated. Alternatively, buy new ones from specialist suppliers. Install new rubber seals for windows and doors. This prevents rattles and water leaks.
Finally, apply a clear coat or wax to protect the paint. Park the car indoors. A well‑painted body lasts decades. Regular washing and waxing maintain the finish. Your restored 1960 Mini Cooper will turn heads wherever it goes.
Interior Restoration: Preserving the Vintage Charm
The interior of the 1960 Mini Cooper is minimal but iconic. It features a single large speedometer, a three‑spoke steering wheel, and bucket seats. Restoring the interior requires attention to detail. Start with the seats. Original seats have a fixed back. They are uncomfortable for long drives. Many owners re‑upholster them with authentic materials. Use vinyl or cloth that matches the original pattern.
The dashboard is simple. The speedometer and switches are easy to replace. However, finding a working original speedometer is hard. Send yours to a specialist for recalibration. Also, install a modern fuse box hidden behind the dash. This improves safety and reliability.
Carpets are another area. Original carpets were rubber or felt. Reproduction sets are available. They fit well. Choose colors that complement the body. Black or gray are common.
Door panels are often missing or damaged. Rebuild them using hardboard and foam. Cover with matching vinyl. Add new door pulls and window cranks. The 1960 Mini Cooper uses simple mechanisms. They are easy to fix.
Don’t forget the headliner. The original is hardboard with cloth. Replace it with a similar material. Use spray adhesive to secure it. Sunroof models have additional trim. Be patient. A neat interior greatly enhances the driving experience.
Performance Upgrades That Preserve Authenticity
Many enthusiasts want better performance from their 1960 Mini Cooper. But they also want to keep the car original. Fortunately, you can upgrade without ruining the character. Start with the suspension. Replace rubber cones with new ones. They sag over time. Also, fit adjustable dampers. This improves ride and handling.
For the brakes, upgrade to a larger master cylinder. Use disc brakes on the front. This is a common modification. It dramatically improves stopping power. The rear drums can remain stock. But use good quality shoes.
The engine can be breathed upon. Fit a twin SU carburetor setup. Or use a single 1.25‑inch SU. Port the cylinder head. The A‑series responds well to these changes. Keep the compression ratio reasonable. 9.5:1 is fine with premium fuel.
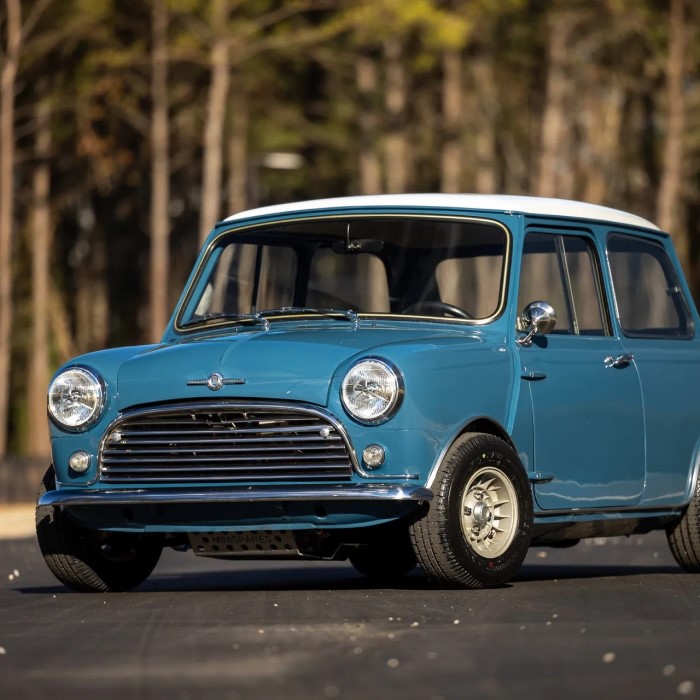
Wheels and tires are another area. Original wheels are 10‑inch. They look correct. But modern tires are better. Buy radial tires with a period‑correct tread pattern. They provide grip without looking out of place.
Finally, consider an alternator conversion. The original dynamo is weak. An alternator provides more power for lights and accessories. Install it discreetly. With these upgrades, your 1960 Mini Cooper drives like a modern car but looks timeless.
Budgeting and Timeline for a 1960 Mini Cooper Restoration
Restoring a 1960 Mini Cooper costs money. You need a realistic budget. The price of a 1960 mini cooper for sale varies. A running project car may cost 8,000to15,000. A fully restored example can exceed $30,000. Your restoration budget depends on the car’s condition.
Break down costs: bodywork and paint 5,000–10,000. Engine and transmission 3,000–6,000. Interior 2,000–4,000. Suspension and brakes 1,500–3,000. Parts and labour add up. If you do all the work yourself, you save labor. But you need tools and skills.
Time is another factor. A full restoration takes one to three years. That includes sourcing parts, waiting for specialists, and dealing with setbacks. Do not rush. Plan each phase. Set milestones.
Consider paying for a professional assessment. Some restorers offer a quote. They can evaluate structural rust. They also know hidden costs.
Finally, keep a contingency fund. Add 20% to your estimate. Unexpected issues arise. For example, you may find a cracked bulkhead. Or need to rewire the entire car. Being prepared prevents stress.
Conclusion
After months of hard work, your 1960 Mini Cooper is finished. Now it is time to drive and enjoy. Attend car shows, join rallies, and connect with other enthusiasts. The sense of accomplishment is immense.
Before hitting the road, do a final inspection. Check all fluid levels. Test the brakes. Ensure lights work. Drive gently for the first few hundred miles. Then change the oil.
Remember, this car is a piece of history. Regular maintenance keeps it reliable. Follow the 1960 mini cooper restoration tips you learned. Use the 1960 mini cooper specifications and features to reference. Keep an eye on the price of a 1960 mini cooper for sale to understand market trends. Study the history of the 1960 mini cooper model to appreciate its legacy. Read 1960 mini cooper performance reviews to see how your restoration compares.
Your 1960 Mini Cooper is more than a vehicle. It is a tribute to British engineering. Enjoy every mile. And share your journey with others. Happy restoring!
Leave a Reply