The Importance of a Secure Rearview Mirror
Your rearview mirror is a critical safety device. It gives you a clear view behind you. You use it constantly. A loose mirror is dangerous. This is a serious problem. Fortunately, you can fix it. The solution involves using the right glue for rearview mirror attachments. This is not a simple task. You must follow specific steps. Many people make mistakes. They use the wrong adhesive. They skip surface preparation. This leads to failure. The mirror falls off again. This wastes time and money. Therefore, you need proper knowledge. You need to understand the best glue for rearview mirror attachment. You also need to know how to use glue for rearview mirror repair correctly.
There are several secure rearview mirror with glue methods. Each method has its own steps. Some work better than others. You also need to know glue for rearview mirror replacement techniques. This applies when you install a new mirror. It differs from a simple reattachment. Finally, you must anticipate common issues with glue for rearview mirrors. Temperature, humidity, and contamination all affect the bond. By learning these best practices, you ensure a permanent fix. Your mirror stays in place. You drive safely. You avoid future problems. This guide covers everything. It starts with choosing the right product. It ends with long-term care. Use this information. It will save you frustration. It will also keep your car safe. A properly attached glue for rearview mirror is a small investment. It has big benefits.
Understanding Different Types of Glue for Rearview Mirror
Not all glue works for this job. You need a specialized adhesive. Standard household glue will fail. The heat inside a car is extreme. The glass surface is smooth. The vibration is constant. Only certain products handle these conditions. The best glue for rearview mirror attachment is usually a two-part epoxy. This epoxy consists of a resin and a hardener. You mix them together. This creates a very strong bond. It fills small gaps. It resists heat and cold. Another excellent option is a cyanoacrylate adhesive.
This is a specialized super glue. However, it must be “high-temp” or “automotive” grade. Regular super glue becomes brittle. It breaks under heat. You should avoid it. A third option is a urethane adhesive. This is very strong. But the bond is very durable. Many professional auto shops use urethane. For a glue for rearview mirror replacement techniques, you need a product with gap-filling properties.
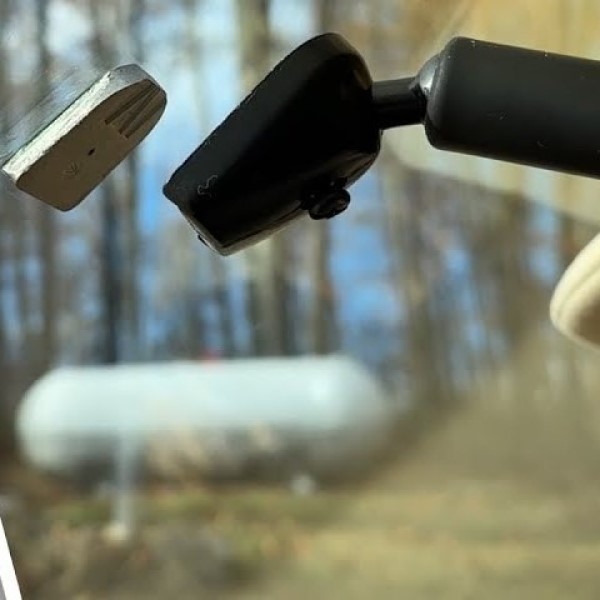
The mirror tab may not sit perfectly flush. The adhesive fills these gaps. This creates full contact. Some products come in a tube. Others come in a small vial with a brush. The brush type is common for primer. You apply the primer to the glass. Then you apply the glue. This is a standard secure rearview mirror with glue methods. Always read the product label. It should say “for automotive glass” or “for rearview mirrors.” Do not use construction adhesive.
Do not use silicone. These are not strong enough. They will fail. The price of the correct glue is low. A failed attempt costs more. You may break the mirror. You may damage the windshield coating. So, choose wisely. Use the best glue for rearview mirror attachment from a trusted brand. This ensures success.
Surface Preparation: The Most Critical Step
Many people skip this step. This is a big mistake. The bond is only as strong as the surface. Glass is very smooth. It can have a coating. Most modern windshields have a low-E coating. This coating is slick. The glue cannot stick to it well. Therefore, you must remove this coating. You use a razor blade. Scrape the windshield where the tab sits. Be gentle. Do not scratch the glass. Remove all visible coating. You will see a difference. The glass will become clearer. Next, you must clean the area.
Use isopropyl alcohol. Use a clean cloth. Do not use Windex. Windex leaves a residue. Alcohol evaporates completely. It leaves no film. Clean the glass. Clean the mirror tab. The tab is the metal piece on the mirror. It also needs preparation. Sand the tab lightly. Use fine-grit sandpaper. This roughs up the surface. It gives the glue something to grip. This is a key part of how to use glue for rearview mirror repair.
After sanding, clean it with alcohol. Do not touch the surfaces with your fingers. Your skin has oils. Oils prevent adhesion. Wear gloves if possible. If you touch it, clean it again. This attention to detail matters. It separates a successful fix from a failed one. Many common issues with glue for rearview mirrors come from poor surface prep. The glue appears to bond. But within days, it fails. The bond never truly formed. The coating or oil acted as a barrier. Take your time with this step.
It takes only 5 minutes. It saves you from redoing the job. For glue for rearview mirror replacement techniques, this step is identical. You always prep the new tab and the glass. The process does not change. Surface preparation is a universal requirement. Never skip it.
Application Techniques for a Strong Bond
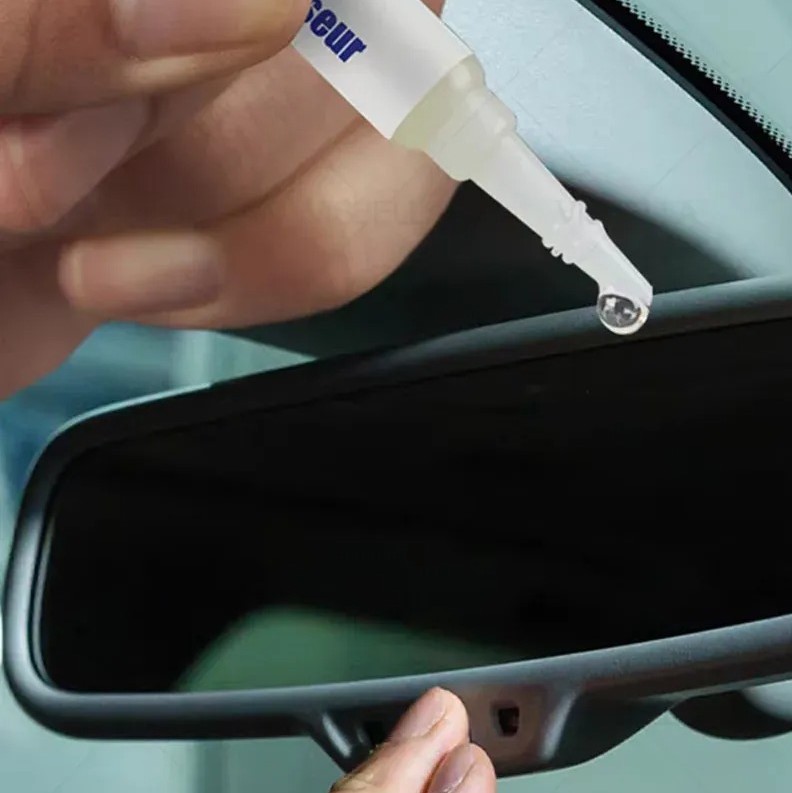
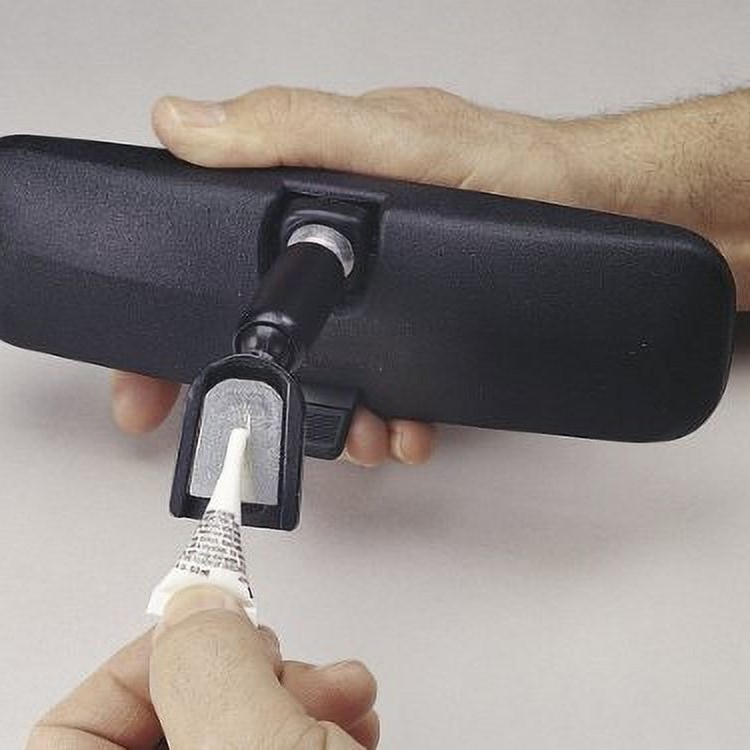
You have the right best glue for rearview mirror attachment. You have prepared the surfaces. Now you apply the glue. Follow the product instructions exactly. For two-part epoxy, mix the components thoroughly. You must mix for the recommended time. Usually, this is 30 to 60 seconds. The mixture should be uniform. Apply a small amount to the tab. Do not use too much. Excess glue will squeeze out. It can run down the windshield. This looks messy. It is hard to clean.
A pea-sized amount is usually enough. Press the tab onto the glass. Apply firm pressure. Hold it in place. You must hold it for a specific time. This can be 30 seconds to 2 minutes. The exact time is on the package. Do not let go early. The bond is not yet strong. You can use tape to hold it. Tape the mirror to the windshield. This keeps constant pressure. Leave the tape for the full cure time. Cure time can be 24 hours.
Some products cure faster. Do not drive the car during this time. Sudden bumps can break the bond. This is a crucial part of secure rearview mirror with glue methods. For cyanoacrylate glue, you apply it differently. You usually apply a primer first.
Then you apply the glue to one surface. Then you press it together. This glue sets very fast. You have only seconds to position it. Be ready. Position the tab perfectly the first time. You cannot move it. If you move it, the bond weakens. For how to use glue for rearview mirror repair, this is the most delicate step. If you use a urethane adhesive, you need to support the mirror.
Common Mistakes and How to Avoid Them
Even with good intentions, mistakes happen. One common mistake is using too much glue. Excess glue squeezes out. It can get on your hands. It can drip on the dashboard. More importantly, it takes longer to dry. The core of the glue may not cure properly. So, use a small amount.
Another mistake is moving the mirror during curing. You need to hold it still. Even a slight shift can break the bond. Use tape to secure it. Do not check it constantly. Let it cure. A third mistake is ignoring temperature. Glue needs the right temperature to cure. Cold weather slows curing. Hot weather can make it runny. Work in a moderate environment. Ideally, between 60°F and 80°F. This is a key factor in common issues with glue for rearview mirrors. Many weekend mechanics try this in winter. The glue never hardens. The mirror falls off. A fourth mistake is not removing the old glue.
The old adhesive must be cleaned off the glass. You cannot glue on top of old glue. It will not hold. Use a razor blade. Scrape it all off. Then clean the area. Finally, a fifth mistake is reattaching a broken tab. Some mirror tabs are metal. Some are plastic. Plastic tabs can break. The tab is the part glued to the mirror. If the tab itself is cracked, new glue will not fix it. You need a new mirror. Or you need a repair kit with a new tab. Do not waste time gluing a broken tab. These common issues with glue for rearview mirrors are easy to avoid. Just follow the steps. Use the best glue for rearview mirror attachment. Prep the surface. Apply correctly. Let it cure. Your mirror will stay in place for years.
Curing Time and Safety Considerations
Patience is essential. You cannot rush the curing process. Most adhesives need at least 24 hours to reach full strength. Some high-performance glues cure in 1 hour. But waiting longer is safer. The rule is simple: the longer you wait, the stronger the bond. During this time, do not drive the car. Avoid slamming doors. The vibrations can break the bond. If you must move the car, do it very slowly. Take smooth turns. After 24 hours, test the mirror gently. Give it a light tug. It should be solid. If it moves, wait another 12 hours. If it still moves, you did something wrong. You may need to remove it and start over. This is frustrating, but it is better than a mirror falling off at highway speed.
Safety is another factor. Some adhesives produce fumes. Work in a well-ventilated area. Wear gloves. Cyanoacrylate glue can bond skin instantly. Be very careful. If you glue your fingers, use acetone to remove it. Keep glue away from car paint. It can damage the finish. For secure rearview mirror with glue methods, safety is part of the process. Using the correct best glue for rearview mirror attachment improves safety. The mirror stays put. You do not get distracted. Do not use generic super glue. It can fail catastrophically. A falling mirror is a hazard. It can shatter. It can cause an accident. Always prioritize safety. Follow all instructions. The few dollars you save on cheap glue are not worth the risk. Invest in the right product. Invest the time. This ensures a safe repair.
FAQ Section: Common Questions About Rearview Mirror Glue
What is the best glue for a rear view mirror?
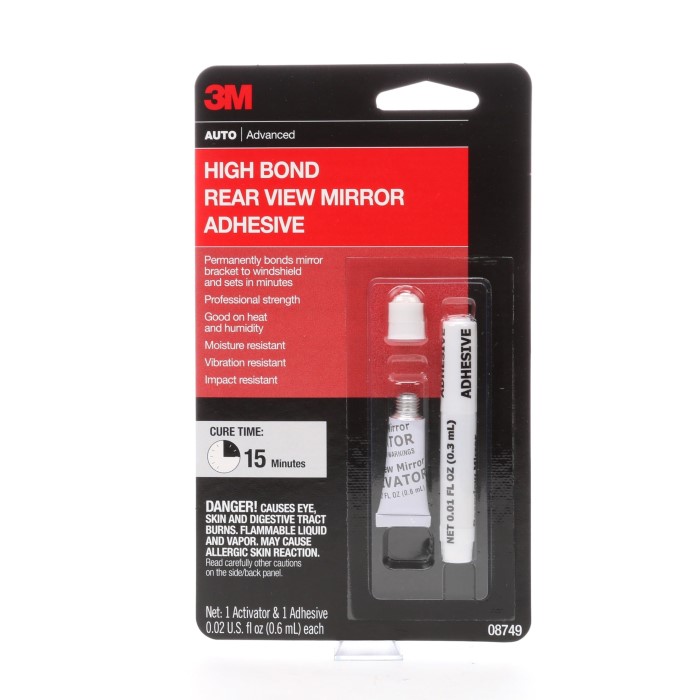
The best glue is a two-part epoxy designed for automotive glass. Brands like Permatex and Loctite make specific products. Another good option is a specialized high-temperature cyanoacrylate. The best glue for rearview mirror attachment comes from a reputable auto parts brand.
How do you glue a rearview mirror?
First, clean the windshield surface. Remove any old adhesive. Apply a primer if required. Then apply a small amount of glue to the mirror tab. Press the tab firmly onto the glass. Hold it in place. Secure it with tape. Allow it to cure for 24 hours. This is the standard how to use glue for rearview mirror repair process.
What is the best glue to stick a car mirror back on?
Again, a two-part automotive epoxy is the best. It provides the strongest bond. It is formulated for the high heat inside a car. Avoid standard silicones or construction adhesives. They will fail. Use a product specifically labeled for mirror attachment.
Can I Super Glue my rearview mirror back on?
You can, but it is not recommended. Standard super glue becomes brittle. It cannot handle the heat and vibration. It will likely fail within weeks. You should use an automotive-grade cyanoacrylate if you choose this type. This is different from common super glue. It is more flexible and heat-resistant.
Final Thoughts: A Lasting Repair for Clear Vision
A functional rearview mirror is essential. You need it for safe lane changes. You need it for backing up. Therefore, a repair should be permanent. Do not take shortcuts. Use the best glue for rearview mirror attachment. It ensures a durable bond. Learn how to use glue for rearview mirror repair. The steps are straightforward. Master the secure rearview mirror with glue methods. They guarantee your mirror stays in place. Study glue for rearview mirror replacement techniques. This helps if you install a new mirror. Finally, be aware of common issues with glue for rearview mirrors. Avoid them by preparing the surface properly.
Control the temperature. Use the correct amount. Do not rush the cure time. By following these best practices, you guarantee a strong bond. Your rearview mirror will stay firmly attached. You will have a clear view behind you. You will drive with confidence. Your passengers will feel safe. You will save money by not repeating the repair. The tools and materials are affordable. The time investment is small. The result is a major improvement in your car’s safety. So, take action. Fix your mirror correctly. Use this guide as your reference. It contains everything you need. Enjoy a secure, vibration-free mirror for many miles. Your car and your safety deserve it.
Leave a Reply