Understanding the Alternator Diode Function
The alternator diode is a small but vital part. It converts AC power to DC power for your car. Without it, the battery cannot charge. Many drivers ignore this component. They focus on the battery or alternator itself. But the diode pack often fails first. This guide covers alternator diode maintenance tips for longevity and efficiency. You will learn how to test alternator diode correctly. You will also understand symptoms of a bad alternator diode early. This saves you from breakdowns. Also, check an alternator diode wiring diagram to see connections. The best alternator diode for cars depends on your model. But all diodes do the same job. They allow current to flow one way. They block it the other way. When a diode fails, it can leak current.
This drains the battery overnight. Or it can stop charging completely. So, you need to maintain it. First, keep the alternator clean. Dirt and oil cause heat. Heat kills diodes. Second, check the belt tension. A loose belt makes the alternator work harder. This increases heat. Third, avoid overloading the electrical system. Too many accessories stress the diodes. For instance, adding extra lights or amplifiers can cause failure. Also, monitor the battery voltage. A healthy system shows 13.8 to 14.5 volts. Lower voltage means a bad diode. Higher voltage means a regulator problem. In summary, the alternator diode is crucial. Care for it well. Then you avoid many electrical problems.
Common Symptoms
Recognizing symptoms of a bad alternator diode early is important. One clear sign is a dimming headlight. The light flickers when you accelerate. This happens because the diode fails to smooth the current. Another symptom is a dead battery in the morning. A bad diode can cause a parasitic drain. It draws power even when the car is off. You may also hear a whining noise from the alternator. This noise comes from the diode failing. The electrical system becomes noisy. Another sign is the battery light on the dashboard. This light warns of charging issues. But it does not tell you which part fails. You must test further. Also, check the voltage at the battery. Use a multimeter. Set it to DC volts. Start the engine.
Read the voltage. If it is above 15 volts, the regulator may be bad. If it is below 13 volts, the diode may be bad. A quick test involves the AC voltage setting. Place the probes on the battery terminals. With the engine running, check AC voltage. A good alternator shows less than 0.1 volts AC. Higher AC voltage indicates a bad alternator diode. This is a common diagnostic step. Additionally, look for physical signs. The alternator may be hot to the touch. Diodes generate heat when they fail. Another symptom is a battery that needs charging often.
The diode does not charge the battery fully. So, you need a jump start frequently. In some cases, the engine runs rough. The electrical interference affects the ignition system. So, treat these symptoms seriously. They point to diode failure. Early detection saves the alternator. It also saves the battery. So, act when you see these signs.
How to Test an Alternator Diode
You can test the alternator diode yourself. It is not complicated. You need a digital multimeter. First, set the meter to measure AC voltage. Connect the red probe to the positive battery terminal. Connect the black probe to the negative terminal. Start the engine. Let it idle. Read the AC voltage. A good alternator shows less than 0.1 volts AC. If you see 0.3 volts or more, the diode is bad. This test works for most cars. Another method is the ripple test. It uses a scope, but a multimeter works. Also, you can test the diode directly.
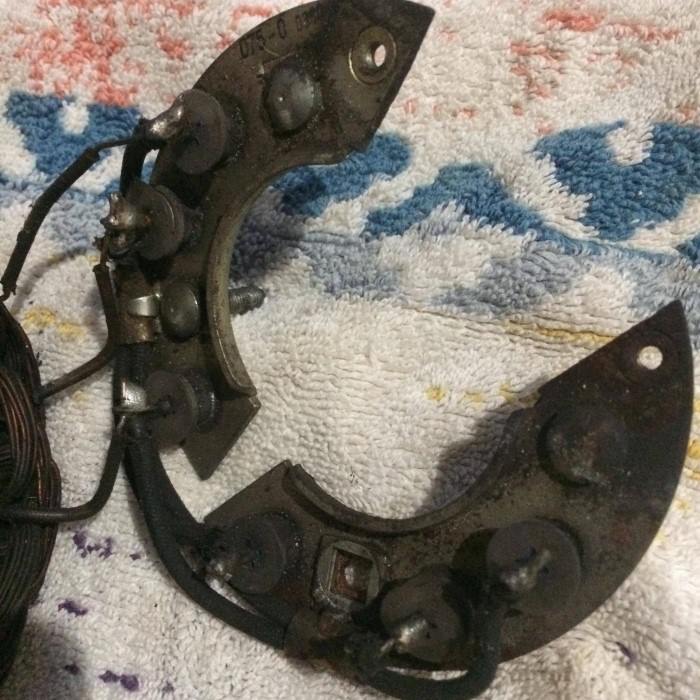
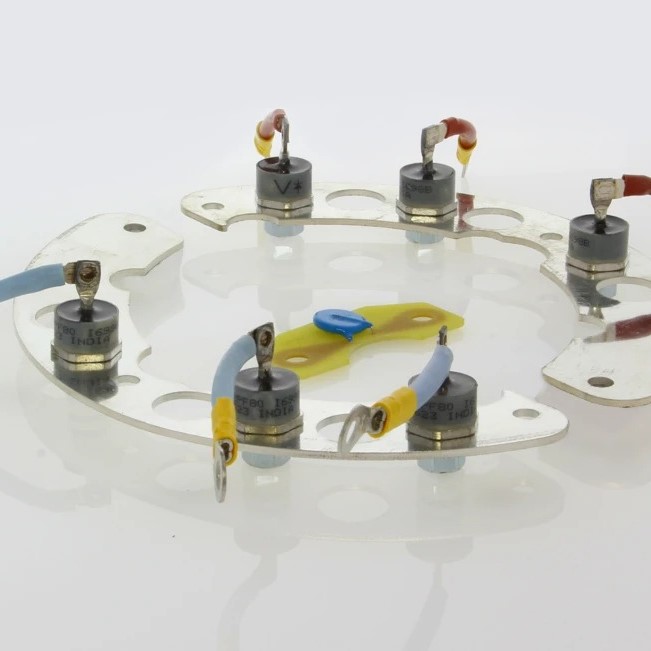
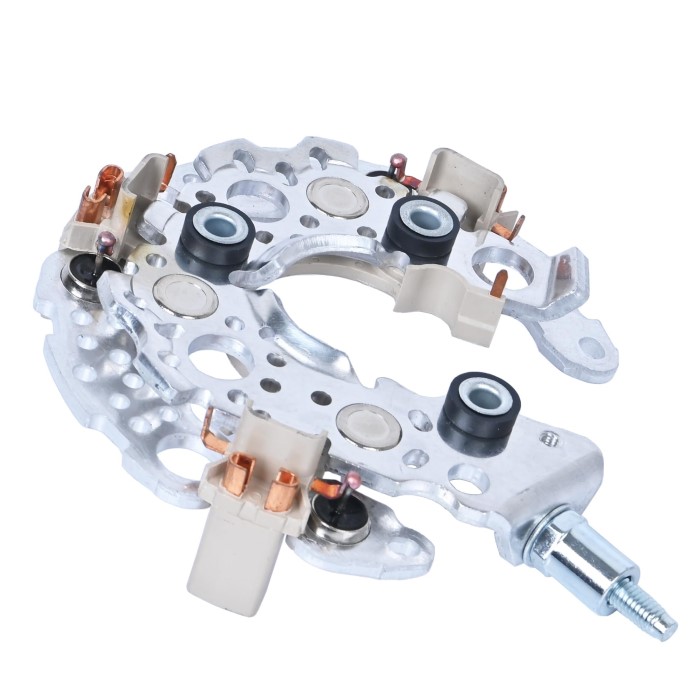
First, disconnect the alternator. Remove the rear cover. You will see a diode pack. It has three or six diodes. Use the diode test mode on your meter. Place the red probe on the diode input. Place the black probe on the output. The meter should show a voltage drop (0.5 to 0.7 volts). Then reverse the probes. It should show “OL” or infinite. If it shows a short in both directions, the diode is bad.
Repeat for each diode. This direct test is accurate. However, it takes more time. For a quick check, the AC voltage test is good. Many mechanics prefer it. Additionally, you can use a load tester. It stresses the alternator. Then measure output. A bad diode will cause voltage drop under load. Remember, safety first. The alternator connects to the battery. Never short the terminals. Wear gloves. Also, ensure the engine is off when you touch the internal parts. After testing, you know the condition. If the diode fails, plan for alternator diode replacement cost. It varies. But testing first saves unnecessary spending. In summary, testing is easy. Do it annually. It prevents unexpected failures.
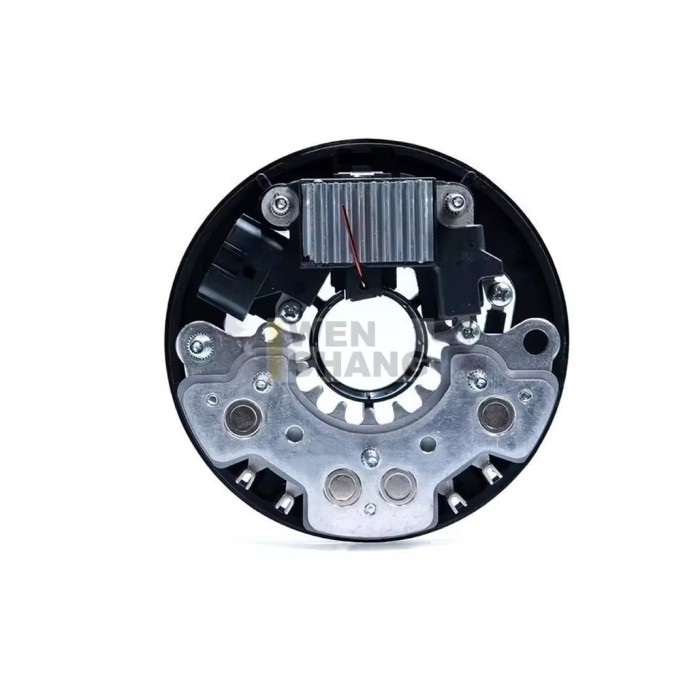
Understanding the Alternator Diode Wiring Diagram
An alternator diode wiring diagram shows the internal circuit. It helps you understand the flow. The alternator has three main parts: stator, rotor, and diode pack. The stator generates three-phase AC electricity. The diodes convert it to DC. The diagram typically shows three diodes. They are connected in a bridge configuration. One set of diodes allows positive current through. Another set allows negative current through. The output goes to the battery terminal. The diagram also shows the voltage regulator. It senses the battery voltage.
It adjusts the rotor field current. This controls the output voltage. Some diagrams include an “L” terminal. This goes to the warning light. Another terminal is “S”. It senses the battery voltage. If you see a six-diode diagram, it is for a full-wave rectifier. This is common in modern cars. It provides smoother DC. The wiring diagram also shows the ground path. The alternator case is the ground.
The negative diodes connect to the case. The positive diodes connect to the output post. When you troubleshoot, refer to the diagram. It shows which wire goes where. For example, a wire from the diode output goes to the battery. A wire from the regulator goes to the ignition switch. Study the diagram before you start. It prevents mistakes. You can find the diagram in the service manual. Many are available online. Use the specific year and model. If you are unsure, ask a mechanic.
Maintenance Tips
Proper maintenance extends the life of your alternator diode. First, keep the alternator cool. Heat is the enemy of diodes. Ensure the alternator has good airflow. Remove any dirt or debris from the cooling fins. Second, check the drive belt. A tight belt reduces strain. A loose belt causes slipping. This creates heat. Replace the belt every 60,000 miles. Third, avoid electrical overloads. Adding big audio systems or extra lights stresses the diodes. If you must add them, upgrade the alternator. A high-output alternator has stronger diodes. Fourth, clean the battery terminals. Corroded terminals cause voltage spikes. Spikes can damage diodes. Use a wire brush. Apply dielectric grease. Fifth, keep the battery healthy.
A weak battery causes the alternator to work harder. This increases heat. Test the battery every year. Replace it if needed. Sixth, use a battery maintainer if the car sits for long periods. A fully discharged battery forces the alternator to charge hard. This can kill the diodes. Seventh, listen for unusual sounds. A squealing belt or a whining alternator indicates a problem. Fix it quickly. Eighth, check the voltage regulator function. It works with the diodes. If the regulator fails, it can send high voltage to the diodes.
This overheats them. So, test the system regularly. Ninth, use quality parts. The best alternator diode for cars is made by brands like Bosch, Denso, or AC Delco. Do not buy cheap knock-offs. They fail sooner. Tenth, consider a diode guard. Some aftermarket devices protect diodes from reverse current. They are inexpensive. They add a layer of security. By following these tips, your alternator diode will last longer. You will avoid sudden failures. Your car will start reliably. Remember, a little maintenance goes a long way.
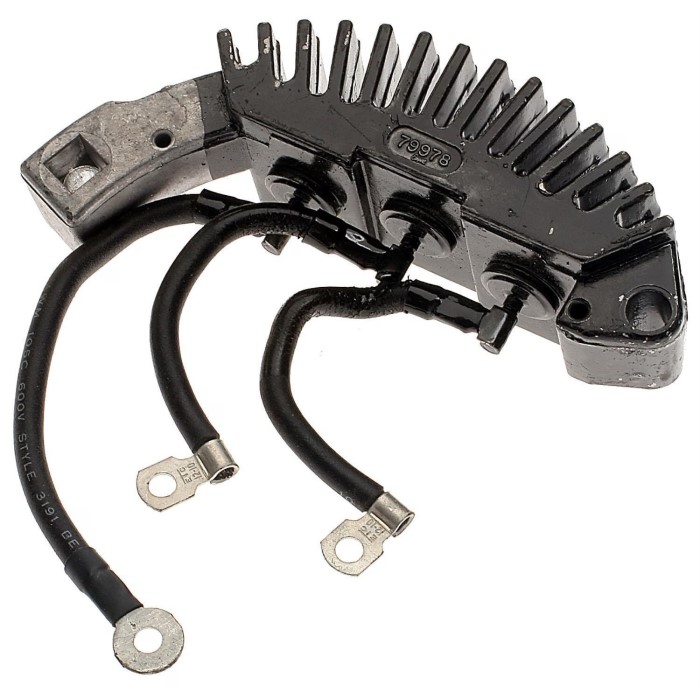
Replacement Process and Cost for a Bad Alternator Diode
When a diode fails, you must replace it. The alternator diode replacement cost varies. A new diode pack costs 20 60. However, labor can cost 100 200. Many mechanics charge for the whole alternator. They replace the unit because it is faster. A new alternator costs 150 400. This is more expensive than just replacing the diode. But it is easier. If you are handy, you can replace the diode yourself. First, remove the alternator from the car. Disconnect the battery first.
Then, unplug the wiring connector. Remove the mounting bolts. Take out the alternator. Place it on a clean workbench. Remove the rear cover. You will see the diode pack. It is usually held by screws. Remove the screws. Desolder the old diodes if they are soldered. Some are pressed in. Use a small punch to remove them. Clean the surface. Install the new diodes. Use solder or press them in. Reassemble the alternator. Install it back in the car.
Reconnect the battery. Test the system. Check the voltage. It should read 13.8 to 14.5 volts. Also, check the AC ripple. It should be low. This process takes about 2 hours. It saves money. But you need soldering skills. If not, let a professional do it. Before buying a new diode, learn how to test alternator diode to confirm the failure. Do not guess. Also, check the alternator diode wiring diagram for correct polarity. Installing a diode backward will blow a fuse. So, be careful. Many auto parts stores sell generic diode packs.
They work with many models. But using the best alternator diode for cars ensures compatibility. Always match the amperage rating. A 100-amp alternator needs a 100-amp diode. Using a smaller rating causes failure. In summary, replacement is possible.
Frequently Asked Questions
What are the symptoms of a bad alternator diode?
Symptoms include a dim headlight that flickers. The battery dies overnight. You hear a whining noise from the alternator. The battery warning light comes on. Also, the engine may run rough due to electrical interference. The voltage at the battery may be low or high. A quick test shows high AC voltage at the battery. So, look for these signs. They point to a failing diode.
How do I test my alternator diode?
You can test it with a multimeter. Set it to AC volts. Start the engine. Measure voltage at the battery. Good is below 0.1 volts AC. Higher means a bad diode. You can also test directly. Remove the alternator. Use the diode test mode. Put probes on each diode. A good diode shows voltage one way. It shows no voltage the other way. If it shows voltage both ways, it is bad. This test is accurate. It tells you which diode is faulty.
How many diodes does an alternator have?
Most alternators have six diodes. They form a three-phase bridge. Three are positive. Three are negative. Some small alternators have only three. They use a single-phase circuit. But modern cars use six for smoother output. Each cylinder or phase has two diodes. They handle the AC current. So, when you buy a diode pack, get one with six diodes. Check your car’s specifications. It matters for correct fit.
Final Thoughts
Your alternator diode is a small component. But it has a big job. This guide covered alternator maintenance tips. You learned how to test alternator diode with a multimeter. You now know symptoms of a bad alternator diode like flickering lights and battery drain. The alternator diode replacement cost is reasonable if you do it yourself. Even so, a professional repair is worth it for many. Studying an alternator diode wiring diagram helps you understand the circuit.
Always choose the best alternator diode for cars from a reputable brand. Regular checks prevent sudden failure. Keep the alternator cool and clean. Monitor battery voltage at least once a month. If you see signs, test immediately. A little time spent now saves you from being stranded. Your car depends on a stable electrical system. The diode is the key. Take care of it. Drive with confidence. Your alternator will last longer, and you will save money.
Leave a Reply