Understanding the Ignition Control Module and Its Role
The ignition control module is a crucial part of your vehicle’s ignition system. It manages spark timing and ensures the engine fires at the right moment. Without it, your car would struggle to start or run properly. Many drivers overlook this small unit until problems arise.
First, let’s define its function. The ignition control module receives signals from the crankshaft position sensor and the ECU. Then it triggers the ignition coil to produce a spark. This process happens thousands of times per minute. A faulty module can cause misfires, stalling, or even a no-start condition.
When you search for ignition control module replacement, you need to understand the symptoms first. Common ignition control module symptoms include engine hesitation, rough idling, and intermittent power loss. You may also notice the check engine light. Therefore, learning how to test ignition control module is valuable. Simple multimeter tests can reveal if the module is dead. Additionally, ignition control module troubleshooting involves checking wiring, voltage, and ground connections.
Finally, many people look for ignition control module for sale online. Yet buying the wrong part wastes time and money. That is why this article provides expert tips. We will cover everything from diagnosis to installation.
Common Symptoms
Recognizing ignition control module symptoms early saves you from roadside breakdowns. The module may fail gradually or suddenly. Here are the most frequent signs.
Engine Misfires and Hesitation
When the module fails to send the correct spark signal, the engine misfires. You feel a jerking motion during acceleration. The car may also hesitate when you press the gas. This happens because the spark timing becomes erratic.
Stalling and No-Start Conditions
Another classic sign is stalling while driving. The engine dies without warning. Then it may restart after cooling down. A completely dead module prevents the engine from starting at all. This is often mistaken for a bad ignition coil or fuel pump.
Check Engine Light Illuminates
Modern cars store diagnostic trouble codes (DTCs) when the module misbehaves. Codes like P0351 (ignition coil primary/secondary circuit) often point to the module. However, other faults can trigger similar codes. So scanning the ECU is essential.
Reduced Fuel Efficiency
A weak spark from a failing module leads to incomplete combustion. The engine burns more fuel to compensate. You may notice a drop in gas mileage. This symptom develops slowly, so track your fuel consumption over time.
Difficulty Starting in Wet or Hot Conditions
Temperature changes affect electronic components. A failing module may work fine when cold but fail when hot. Similarly, moisture can short circuit the module. If your car starts poorly in rain or after a heat soak, suspect the module.
Intermittent Power Loss
You might experience sudden loss of power while driving. The engine recovers after a few seconds. This is dangerous on highways. The module can interrupt the spark intermittently.
In all these cases, you need ignition control module troubleshooting. Start by checking the module’s wiring and connectors. Then perform a resistance test. Many auto parts stores offer free testing.
How to Test the Ignition Control Module Properly
Learning how to test ignition control module saves time and money. You do not need advanced skills. A multimeter and a wiring diagram are usually enough.
Step 1: Safety First
Disconnect the battery negative terminal. The ignition system carries high voltage. Wear insulated gloves. Work in a well-ventilated area.
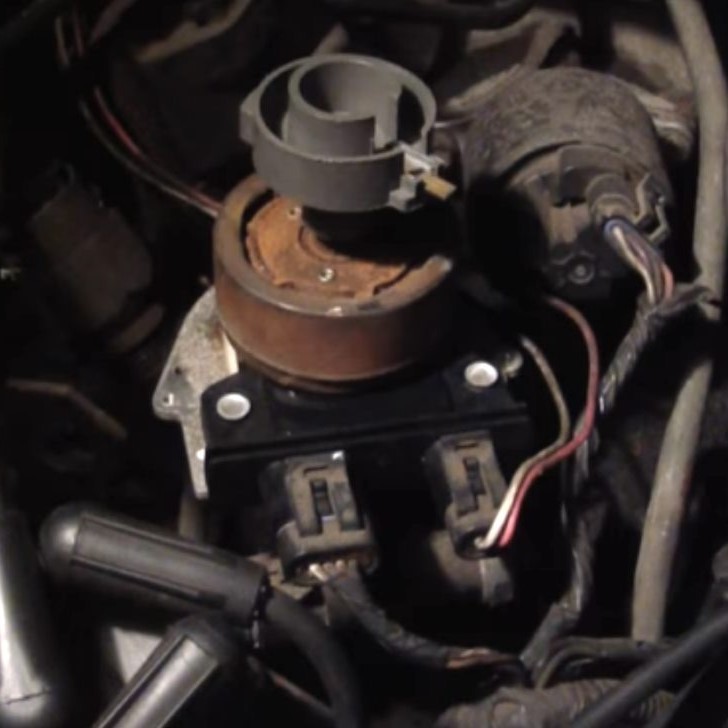
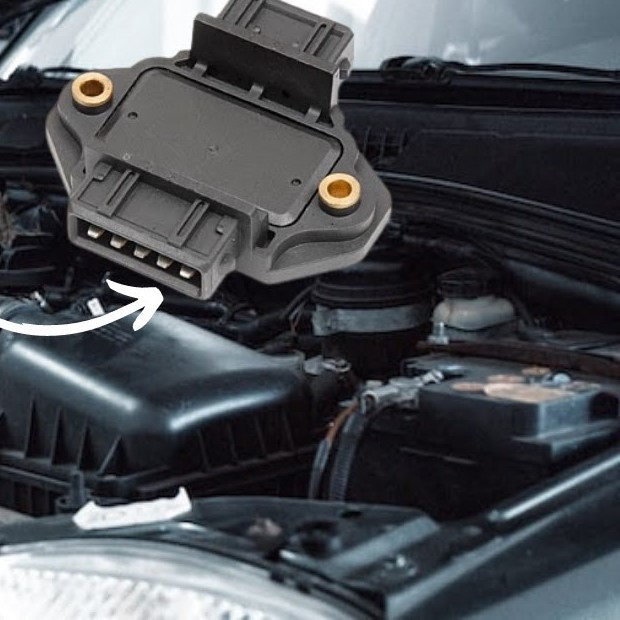
Step 2: Locate the Module
The ignition control module is often mounted on the distributor, on the firewall, or near the ignition coil. Consult your vehicle’s repair manual. Some modern cars integrate the module inside the coil pack.
Step 3: Visual Inspection
Look for burnt marks, cracks, or corrosion. Check the wiring harness for frayed wires. Loose connectors cause many issues. Repair or replace damaged wires first.
Step 4: Resistance Testing
Use a digital multimeter set to ohms. Measure the resistance between the module’s terminals according to the manufacturer’s specifications. Typical readings range from 0.5 to 2 ohms for primary circuits, and 5k to 15k ohms for secondary circuits. If readings differ significantly, the module is faulty.

Step 5: Power and Ground Check
Turn the ignition key to the “on” position (engine off). Probe the power wire of the module. You should see battery voltage (around 12V). Next, check the ground wire for continuity to the chassis or engine block. No voltage means a blown fuse or broken wire.
Step 6: Signal Input Test
Some modules receive a pulse signal from the crankshaft sensor. Use an oscilloscope or a test light to verify the signal. A steady pulse indicates good input. No pulse points to a sensor problem.
Step 7: Swap Test
If possible, borrow a known working module from a friend’s identical car. Install it and see if the problem disappears. This is the quickest diagnostic method.
Step 8: Professional Diagnosis
Many repair shops have advanced scan tools that can command the module. A mechanic can read live data and confirm failure.
After testing, you might decide on ignition control module replacement. The procedure is straightforward for most vehicles.
Troubleshooting: Step-by-Step Guide
Ignition control module troubleshooting is systematic. Do not replace parts blindly. Follow this logical sequence.
Step 1: Rule Out Simple Causes
Before blaming the module, check the battery voltage, ignition switch, and fuses. A weak battery mimics module failure. Also inspect spark plugs and wires. A worn plug can cause misfires that look like module issues.
Step 2: Check for Loose Connections
The module relies on clean, tight connections. Unplug the connector and look for bent pins or corrosion. Use electrical contact cleaner. Reconnect firmly. Sometimes the problem disappears after a simple cleaning.
Step 3: Test the Input Sensors
The crankshaft position sensor and camshaft sensor provide timing signals. If these sensors fail, the module receives no data. Use an oscilloscope to check sensor output. Replace any faulty sensor.
Step 4: Measure Module Output
With the engine cranking, test the output wire that goes to the ignition coil. A multimeter may show a pulsing voltage. Better yet, use an inductive timing light. If the light does not flash, the module is likely bad.
Step 5: Overheating Analysis
Some modules fail due to heat. Feel the module after the engine runs for a while. If it is extremely hot, there may be an internal short. Compare with a normal operating temperature (usually warm, not scalding hot).
Step 6: Check for Ground Loops
Poor grounding can cause erratic behavior. Measure resistance between the module’s ground terminal and the battery negative. It should be less than 0.5 ohms. Add a dedicated ground wire if necessary.
Step 7: Use a Known Good Module
As mentioned earlier, swapping modules confirms the diagnosis. It is the most reliable method.
Step 8: Inspect the Wiring Harness
Track the wiring from the module to the ECU. Look for chafing, breaks, or shorts. A simple repair may cost nothing.
Once troubleshooting confirms the module is defective, you need ignition control module replacement. Always buy a high-quality unit. Cheap knockoffs often fail quickly.
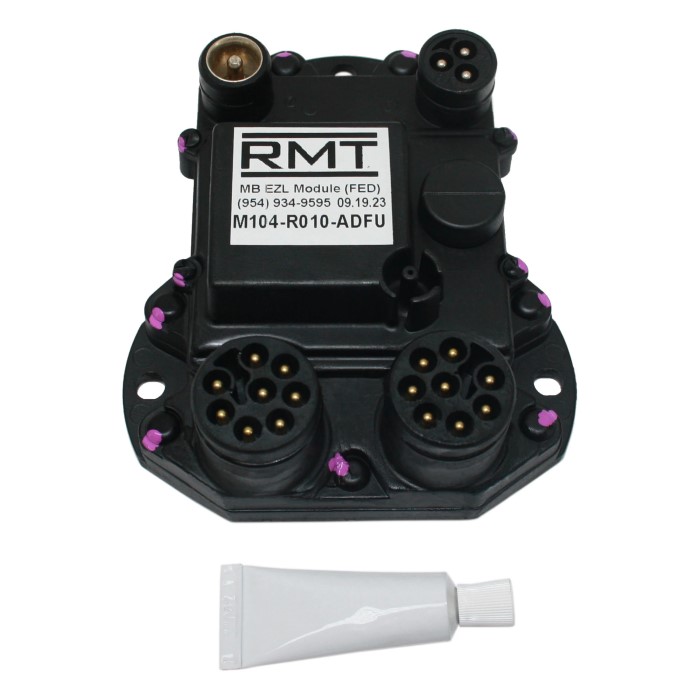
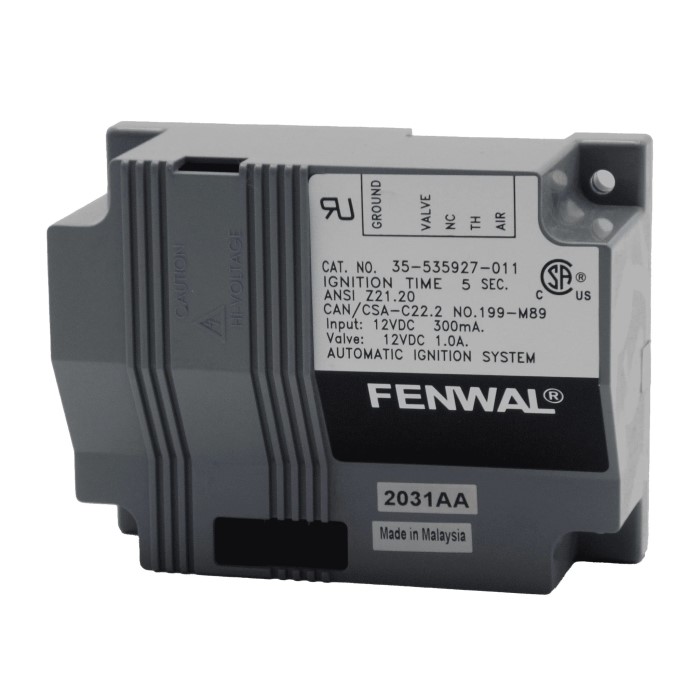
Tips for Choosing the Right Ignition Control Module for Sale
When you search for ignition control module for sale, you see many options. Not all are suitable. Here are expert tips to make the right choice.
1. Match OEM Specifications
Original Equipment Manufacturer (OEM) parts guarantee fitment and performance. Aftermarket modules may work but must meet the same electrical specs. Check the part number on your old module. Use online catalogs or call the dealer.
2. Consider Brand Reputation
Trusted brands like Delphi, Bosch, Denso, and ACDelco are reliable. Avoid generic no-name modules. Reading customer reviews helps. Look for complaints about early failure.
3. Check Warranty
A good module comes with at least a one-year warranty. Some offer a lifetime warranty. This protects your investment.
4. Verify Compatibility with Your Vehicle
Year, make, model, and engine size matter. Enter these details on auto parts websites. Double-check with the seller. Even a slight variation can cause issues.
5. Look for Quality Construction
Inspect photos of the module. It should have a sealed casing, quality connectors, and proper heat dissipation. Flimsy plastic housings break easily.
6. Compare Prices
Prices vary widely. OEM modules are pricey but reliable. Aftermarket units can save money. However, extremely low prices signal poor quality. Set a reasonable budget.
7. Read Return Policy
Sometimes the wrong module is shipped. Ensure the seller accepts returns. Keep the packaging until you confirm fitment.
8. Buy from Reputable Sellers
Prefer established websites like RockAuto, Amazon, or your local auto parts store. Avoid shady third-party sellers on marketplaces.
After you buy, proceed with ignition control module replacement. Follow the correct removal and installation steps.
How to Replace the Ignition Control Module Yourself
Ignition control module replacement is a DIY-friendly job for many cars. However, some modules are inside the distributor, which requires removing the distributor cap and rotor. For others, the module is bolted to the engine block.
Tools You Need
- Socket set (metric and SAE)
- Torx or hex bits (if required)
- Multimeter
- Dielectric grease
- New module
- Safety gloves and glasses
Step-by-Step Replacement
Step 1: Disconnect the Battery
Always start with the negative terminal. This prevents accidental shorts.
Step 2: Locate and Remove the Old Module
On older GM cars, the module sits under the distributor cap. Remove the cap and rotor. Unbolt the module. Carefully disconnect the wiring harness.
On Ford and some imports, the module is on the inner fender or near the coil. Unplug the connector and remove mounting screws.
Step 3: Clean the Mounting Surface
Old thermal grease may be crusty. Scrape it off. Apply a thin layer of new thermal paste or dielectric grease on the module’s back. This helps heat transfer.
Step 4: Install the New Module
Place the new module in position. Tighten screws to the recommended torque (usually around 20 in-lbs). Do not overtighten.
Step 5: Reconnect Wiring
Plug the connector securely. Make sure the lock tab clicks.
Step 6: Reassemble Distributor (if applicable)
Install the rotor and distributor cap. Ensure correct rotor alignment.
Step 7: Reconnect Battery and Test
Attach the negative terminal. Start the engine. Check for smooth idle and no warning lights.
Step 8: Verify Timing
Some cars require ignition timing adjustment after module replacement. Refer to the service manual.
Replacing the module yourself saves labor costs. The job usually takes 30 to 60 minutes.
Frequently Asked Questions
Now we address common questions. These answers provide deeper insight.
What happens when the ignition control module goes bad?
When the module fails, the engine may misfire, stall, or refuse to start. You may lose spark intermittently. Power loss can occur while driving. In severe cases, the engine dies completely. The check engine light often illuminates. Diagnosis requires testing with a multimeter or scan tool.
What does the ignition control module do?
The module controls when the ignition coil fires. It receives signals from sensors and triggers the coil at the correct moment. This optimizes spark timing for combustion. Without it, the spark occurs at random or not at all. The engine cannot run properly.
Can a car run without an ignition control module?
No, a car cannot run without a functioning module. The module is essential for spark generation. Some modern cars integrate the module into the ECU, but the function remains. If the module fails, the engine stops. Some older cars with points-style ignition do not need a module, but most vehicles rely on it.
How to check a bad ignition control module?
You can check it using a multimeter. Measure resistance across specific terminals. Verify power and ground. Perform an oscilloscope test to see the output signal. The most reliable method is swapping with a known good module. Many auto parts stores offer free bench testing.
Final Thoughts: Making an Informed Purchase
To summarize, choosing the right ignition control module requires understanding symptoms, testing, and troubleshooting. Start by identifying ignition control module symptoms such as misfires or stalling. Then learn how to test ignition control module with simple tools. Systematic ignition control module troubleshooting rules out other faults. When replacement is necessary, search for ignition control module for sale from reputable brands.
Remember, buying a high-quality module ensures long-term reliability. Follow the installation steps carefully. If you lack confidence, consult a professional mechanic. But with the tips in this article, you can save money and avoid guesswork.
We hope this guide helps you make a smart decision. Always prioritize safety and accuracy. Your car deserves a properly working ignition system.
Leave a Reply